Earth Day is April 22nd, so let's honor the day with a vintage or shabby chic project that includes an item that would normally land in the recycle or trash bin. You can use an old jar, glass bottle, packaging material or other bits and bobs to create your upcycled masterpiece. Be sure to tell us in your post what your recycled item is and how you used it, as it may not be apparent in the photo.
As always, the Design Team will choose their top four picks, and the winner will be invited to join us in a Guest DT spot at Frilly and Funkie. The next three will receive Top 3 badges to display on their blogs. Everyone who enters and follows the rules will be entered into the draw to have the chance to win a $25 spending spree at The Funkie Junkie Boutique.
I remember, as a child, on Earth Day my brothers and sisters would spend the day collecting trash along the road that ran from our farm down to the New York state line. Even though the filled bags were thrown in the trash when we got to New York, I think this ingrained in me habits of keeping my eyes peeled for trash that I might be able to use again. In fact, about 2 months ago, on a rainy walk, I found two soggy, crumpled dollar bills-- a $50 and a $10. I sure can use that again! It certainly pays to keep your patch of the road clean!
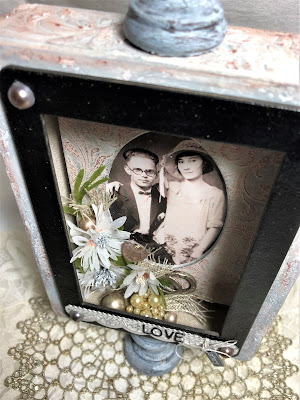
Kathy's theme is right up my alley! Can you spot the 'trash' in this vignette I made for my husband's and my next wedding anniversary? It's not 'til September, but it's always good to be prepared.
I gave the box frame a coat or two of gesso inside and out and smeared Wendy Vecchi Crackle Texture Paste over the (now) front edges. The finials were painted with Distress paints; Ground Espresso undercoat, followed by DecoArt crackle medium, then Weathered Wood. In the end, I smeared with Picket Fence Distress Crayon.
I trimmed and adhered the embossed panels for each outer edge of the box using Distress Collage Medium Matte and then smeared on Crazing medium. After it dried, I painted these edges and back with a wash of Weathered Wood paint, dried and then scribbled and blended the box with Antiqued Bronze Distress Crayon to highlight all the texture.
I trimmed the Mini Scallop 3D embossed die cut to fit the box and swiped it with Prima Brushed Iron Metallique Wax to highlight the amazing detail.
I cut panels of Idea-ology Halloween Collage Paper and Textile surfaces to line the box, and adhered them with collage medium. I swiped on Vintage Collage Medium just around the edges of the collage paper, where it would be seen behind the Baseboard Frame. Not much of this will be seen when the box is photographed, but these details are important to me.
Now that the box is prepared, it's time to work on the details. I altered two of Tim Holtz old Idea-ology Baseboard Frames, one with Seth Apter Eclipse (and Versamark ink pad) and the other with Desert Baked Velvet embossing powders. I love the leather-like finish of the melted black powder!
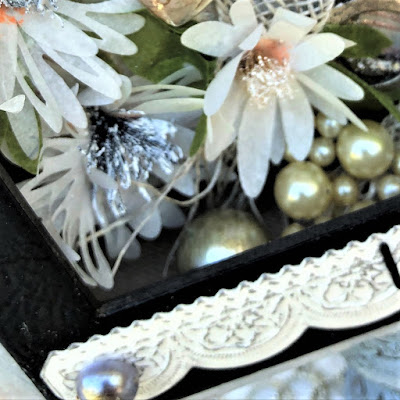
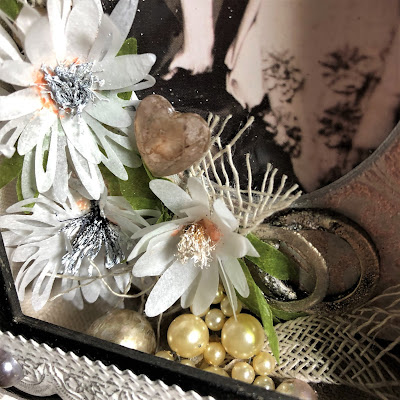
The Large Funky Floral and Funky Floral #3 Thinlet flowers are cut from scraps of Parchment paper I save after cutting circles to fit in my cake pans. Another good re-cycling substitute for white flowers would be coffee filters, but I think these are better used for filtering coffee.
I cut the Large Funky Floral greenery from green wax paper that came in a fruit gift box we received as a Christmas gift from my nephew and his wife.
I colored the centers with Dried Marigold crayon and made stamen for them out of old cheepo paint brushes. I swiped the brushes with Ranger Emboss It and dipped them in White Cloud Baked Velvet powder. After heating them, I pushed them onto my craft mat to splay the hairs.
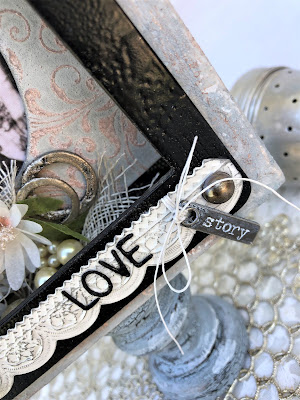
I cut the word Love from black card using the newly released Alphanumeric Label Thinlit set and heat embossed with Eclipse powder. I tied on a Picket Fence-paint-smudged Idea-ology Story Stick to complete my sentiment and added some altered 1/2 pearls to the corners of the frame (Brushed Pewter paint and Mushroom alcohol ink). I could have dropped them in with the Baubles, but I did these early on before I discovered how easy it was to use Smolder for a one and done alteration.
Challenge shares:
Scrapy Land Challenge #112 Anything Goes
Simon Says Stamp Monday Beautiful Blooms
Simon Says Stamp Wednesday No Designer Paper
Country View Challenges April 2019 - Easter and/or Spring
Southern Girls Frame It
Creative Moments Challenge 166 Anything Goes Optional Spring/Easter
Allsorts Week 515/516 - Blossoms, Butterflies, Bugs
Mix It Up MIUCB #24 - Anything Goes + Black & White Plus One Color
Artistic Stamper April Creative Challenge -New Growth I used Lattice and Flourish stamp set to emboss my frame.
The following products used are available at The Funkie Junkie Boutique:Scrapy Land Challenge #112 Anything Goes
Simon Says Stamp Monday Beautiful Blooms
Simon Says Stamp Wednesday No Designer Paper
Country View Challenges April 2019 - Easter and/or Spring
Southern Girls Frame It
Creative Moments Challenge 166 Anything Goes Optional Spring/Easter
Allsorts Week 515/516 - Blossoms, Butterflies, Bugs
Mix It Up MIUCB #24 - Anything Goes + Black & White Plus One Color
Artistic Stamper April Creative Challenge -New Growth I used Lattice and Flourish stamp set to emboss my frame.
Sizzix Chapter 2 Tim Holtz Thinlits Alphanumeric Label
Tim Holtz Sizzix Thinlits Funky Floral Large
Ranger Tim Holtz Alcohol Pearls - Smolder
Tim Holtz Tim Holtz Idea-ology Found Relatives
Seth Apter Baked Velvet Neutral Kit


What a lovely way to enjoy my cuppa this morning, Sara! This is magnificent. From the very first glance at this nostalgic vignette, I knew I was in for a special treat this morning. First, let me just say, no one uses Distress Crayon as well as you do. I should just send you mine, as I've never developed your knack for incorporating them seamlessly into a project. But everytime you use them, I'm impressed. Next, the process you've used on the embossed panels is so gorgeous. This whole piece looks like aged wood and I'm having a hard time wrap convincing my brain to accept that this is a sweet and low box. What????? Now your flowers and stamens, Incredible! They look gorgeous done in your scraps of parchment paper! And the stamens are spectacular! I spotted the copper "ring" right off the bat, but love the story behind your drawers and the process you used there. If I believed in former lives, I would think you had been an alchemist once. This is pure magic, and I love every gorgeous detail. I could go on and on, but you get my drift. Gobsmacked. Utterly. You repurposed, reused, recycled the daylights out of this challenge. Standing O here! xo
ReplyDeleteAbsolutely stunning!! All of the details are amazing!! I love the textures and how you've recycled products to make this gorgeous project!! So, so spectacular, Sara Emily!! And thank you so much for playing along at Scrapy Land, too!! Have a great day my friend!! Big hugs :)
ReplyDeleteLisa
A Mermaid's Crafts
Very cool and thanks for sharing all the fabulous techniques used. The finished creation is gorgeous!
ReplyDeleteYou are my hero, Sara Emily! It is incredible the amount of detailed work you put into this project and into all your projects. Fantastic!
ReplyDeleteI love the title first of all of your post! Secondly so many clever up-cycles with beautiful texture and design. Old paint brushes for the middle of the flowers?! BRILLIANT! Beautiful gift for your hubby on your anniversary!
ReplyDeleteA beautifully decorated frame, thanks so much for joining in with our Spring theme at Allsorts challenge.
ReplyDeleteB x
Gorgeous design and beautiful frame.
ReplyDeleteThank you for sharing at Allsorts;-))m
Gorgeous project as always, Sara! Thanks for joining us at Mix It Up!
ReplyDeleteOh my goodness Sara this is complete vintage perfection! Every single element, surface, detail and addition has been carefully considered, altered so beautifully and placed to create such harmony. Those crackled embossed surfaces look so perfectly aged, the delicate paper flowers are so effective with the inked baubles and altered rings, and I love how you've taken such care with the frames and back of the box so that every surface has texture and colour combined. A true masterpiece xx
ReplyDeleteI am in total awe of this piece of art Sara! I loved reading the story behind it and seeing how you brought the whole piece together - and wow - that box!!! Like I said on FB I don't think I have EVER seen 'trash' used so beautifully!! Bravo my hugely talented friend! Hugs, Anne xx
ReplyDeleteThank you so much for entering our challenge at Allsorts this week with your creation.
ReplyDeleteWow wow wow,this is a trashy piece? Everything is so beautiful and refined, at start I thought every single piece came from a craft shop instead was the opposite. A stunning transformation, love the ring details, the black lace on the back, the luscious texture. Brilliant and love it to bits!
ReplyDeleteI appreciate every single moments you spend writing a comment on my blog, thank you. And have a Happy Easter, too :-)
Your trash items have turned into such a gorgeous treasure with your magical hand. I love all the texture and sweet embellishments.
ReplyDeleteHugs!
Cec
Sara Emily, you are an inspiration!!! All the fabulous details in your projects are, each one, perfect!!! The parchment paper and green wax paper for the flowers looks wonderful!!!! Love this!!!!
ReplyDeleteA lovely piece and a terrific theme to play off of. I believe recycling was actually invented by artists--hah! I have a shoebox of found objects that were lying in the road that I have saved for "I don't know what" but you never know--right? My latest find--two playing cards: a two of Clubs and a seven of Hearts. I'd join in on the challenge but I can't seem to get the linky to work :(
ReplyDeleteHappy Easter Sara!
What an alteration with that pink box...great Earth Day project...a favorite day of mine, and so shabby delicious!!!! Fab photo too.htoo. Happy Easter to you!!!
ReplyDeleteWhat a fabulous project and an equally stellar post! When I saw the title, I smiled and waited to see what sort of scandalous "trashy" situation we had here! So way to suck me in with a clever post title! And then when I realized you had utilized trash for this piece, I was even more impressed! Thank you so much for creating something so inspiring and for reminding us of how ordinary things can be repurposed into something extraordinary. I always enjoy seeing your entries here at the Simon Says Stamp Monday Challenge Blog!
ReplyDeleteWhat a gorgeous shadow box display! As usual, the details are amazing! Love your work!
ReplyDeleteSuch a beautiful piece of art that you created what’s so much detail. Thanks so much for joining us for the Simon Says Stamp Wednesday Challenge. I hope you’ll join us again soon.
ReplyDeleteMisty
DELIGHTFUL decor piece!
ReplyDeleteWOW - LOVE IT ALL and thoroughly enjoyed your FABULOUS tutorial too!
Thank You for joining our Frame It with Team Lou challenge at the Southern Girls Challenge :)
So adorable! Thank you for playing along at Creative Moments.
ReplyDeleteCrafty hugs
This is AMAZING!!! I just love how you turn junk (like cardboard boxes) into something beautiful!! You definitely inspire me!!
ReplyDeleteSo beautiful! The embellishing is fantastic.
ReplyDeleteThank you so much for joining in with our challenge at Country View Challenges last month!
Evelyn xx
This is so beautiful Sara - not trashy at all lol. I can be the first to wish you a happy anniversary, even if I am 4 months early. Thank you so much for joining in with our challenge at Country View Crafts, and have a very happy month, Sue x
ReplyDelete