
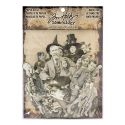
It's time to get your freak on and go all out for Halloween. We want to see your ghouls and ghosts and things that go bump in the night. It's going to be spooktacular!!!
I hope you'll stop over to the blog and see what my talented Frilly and Funkie teammates have cooked up to inspire you. Hopefully you'll be tempted to play along! As always, the Design Team will choose their top four favorites, with the winner being invited to join us in a Guest Designer spot at Frilly and Funkie, and the next three will receive Top 3 badges to display on their blogs. Everyone who enters and follows the rules will be entered into the draw to have the chance to win a $25 spending spree at The Funkie Junkie Boutique.


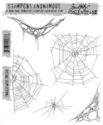
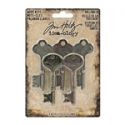
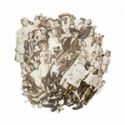
The copper toned Ideaology Halloween Word Key was colored with alcohol inks and tucked in with a shred of Mummy Cloth. I was really skeptical about these strips of creepy cloth, thinking I could achieve the same effect with cheesecloth, but this stuff is really so much stiffer and easier to work with. I think it provides a better look and dyes perfectly every time. Not to mention, there is a generous supply within the pack.


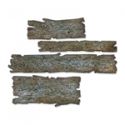
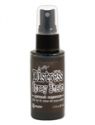
I crackled an amber bottle with clear and black crackle paint and highlighted with Antique Linen and Black Soot crayon. The broom is from my stash and colored with alcohol inks and Distress Spray stain in black. My broom doesn't have the detail that Tim's Ideaology brooms do, but I had to use these up.

Whew! You made it through to the end! I hope you enjoyed my fun and just a bit creepy Halloween frame, and that you are inspired to play along with Frilly and Funkie's Haunted Halloween challenge. The random winner of the Tim Holtz Halloween Remnant Rubs is Kate Yetter--congratulations! I will be in touch with you by e-mail to get your snail-mail info.
Happy Crafting!
Sara Emily
Challenge shares:
Country View Challenges October 2018 - Plant-tastic Sorry, but my plants are dead.
Simon Says Stamp Wednesday Anything But A Card
Country View Challenges October 2018 - Plant-tastic Sorry, but my plants are dead.
Simon Says Stamp Wednesday Anything But A Card
Artistic Stamper October's Creative Challenge - Inktober
Dies R Us Challenge #107 - Anything Fall I used Sizzix Tangled Twigs Thinlits die.
Love 2 Create Challenge #13, Anything Creative/Mixed Media Goes
Die Cut Divas Halloween or Autumn
Creative Artiste Challenge #43 "Anything Mixed Media Goes"
Let's Craft and Create Challenge #142 - ANYTHING GOES
Scrapy Land Challenge #100 Anything Goes I used 2 Sizzix dies.
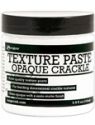
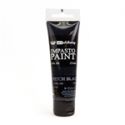
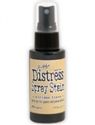
These products were used and can be purchased at The Funkie Junkie Boutique:
 |  |  |  |  |
 |  |  |  |  |
 |  |  |  |  |
 |  |  |  |  |
 |  |  |  |  |
 |  |  |  |  |
 |  |  |  |  |
 |

Wow! so many absolutely wonderful details Sara! It really is a stunning project x
ReplyDeleteYou have absolutely blown me away with this spooktacular creation. That roof is amazing, and every detail is mastered to create such an incredible spooky scene! Always love seeing your work, sorry I’ve missed a bunch of posts lately, life is...well, life! Definitely will be catching up on your blog. awesome post! xxxx
ReplyDeleteOh my goodness, Sara Emily! What a fabulously spooky project! You always have the most incredible details on what you make. I am in awe!
ReplyDeleteSara, this is a fabulous creation, spooky and deliciously creepy, I love everything about it (with the possible exception of the spider). The cobwebs look amazing. Love this! Hugs, Anne xx
ReplyDeleteOh my gosh, spectacular...I mean spooktacular!! Wow, Sara Emily, this is amazing!! Your details are so perfect!! I love the touch of adding the crackle to the roof shingles!! The cobwebs look fabulous!! I love, love this!! So perfect for Halloween!! Have a great day!! Big hugs :)
ReplyDeleteLisa
A Mermaid's Crafts
Great googly moogly! This is Spooktacular! That charred wood finish is amazing all on its own, but you just kept adding layer after layer of awesomeness as you developed this story! Wow, Sara Emily!
ReplyDeleteYikes! Creepy, spooky, icky! Yet beautiful, amazing and fabulous! How can that be? Only in Sara’s Closet can something like this be created. Really fantastic, Sara!
ReplyDeleteSo very creative, wicked and scary! Tell me, do you have children hidden in your attic!!!!!!!!
ReplyDeleteSandy xx
Oh, I hope not!
DeleteSo many fabulous details! Those webs add a nice lacy appearance and of course those paper dolls! Love this!!
ReplyDeleteKate
Oh my Sara, Sara, Sara Emily this is absolutely breathtaking!!! I am in total awe of this gorgeous artwork! So, so inspiring <3 <3 <3
ReplyDeleteWhat a spooky scene you created! ...and bone collector? Hmm yeah, scarry!!! Ilove this and all the techniques you used!
ReplyDeleteWOW! This is amazing and awesome! Thanks so much for playing in our ‘Anything FALL’ challenge at Dies R Us. Good Luck and please come back again soon!
ReplyDeleteDarlene (DRU Blog Leader)
DIES R US CHALLENGE BLOG
DAR’S CRAFTY CREATIONS Please stop by for a visit.
Very creative and super FUN!! Thank you for joining our challenge at Dies R Us!
ReplyDeleteDiane DRU DT {Nellies Nest}
Holy creepy cool Sara!This is definitely one of the coolest and creepiest I have seen yet this year! Bwaaaaaa haaahaaaa
ReplyDeleteWOW!! What a cool project! It is beyond spook-tacular!!! Your creations are always over the top! Great job on this...so inspiring!
ReplyDeleteHave a great day my friend~
Sherrie K
Also, thanks so much for joining us in the 100th challenge over at Scrapy Land!!
ReplyDeleteHugs,
Sherrie K
What a wonderful project. Thanks for all the pictures to show the details and for sharing it with us at Dies R Us Challenge Blog. We hope you join us in future challenges.
ReplyDeleteKathy
DRU
DT
This is fantastic! I love your house with all the fabulous details like that awesome roof! I am not visiting any time soon as the house and the members are spooky and perfect for Halloween!
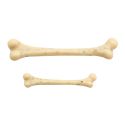
ReplyDeleteIncredible project! Such awesome texture and detail! I particularly like the bones in the hands..spookilicious!!
ReplyDeleteThank you for joining us this month at We Love 2 Create! Jane (DT) xxx
A super spooky project Sara, a great alternative haunted house. Fabulous textures, crackles and wood effects. The brilliant creepy details and your highly entertaining storytelling just add to the awesomeness of this amazing project.
ReplyDeleteThank you for joining in with our October challenge "Anything Mixed Media Goes" at Creative Artiste Mixed Media. Good luck x
Oh my goodness this is fabulous Sara Emily!!!!!! There is just SO much to LOVE including those clever cobwebs, the use of twigs all around, the gorgeous bespoke wallpaper and that incredible tiling on the roof!!! Absolutely in love with it all xx
ReplyDeleteIncredible project. So glad you joined us at Die Cut Divas.
ReplyDeleteTotally fabulous creation! Thank you for sharing with us over at Scrapy Land. Hope to see you again.
ReplyDelete~ DT Sherry x
Another fantastic Halloween creation! An awesome scene with so many details to watch, and we're caught in the story! Thanks for playing along with us at Creative Artiste Mixed Media challenge!
ReplyDeleteWow what a fab Halloween creation Sara, I love the textures and details. The eerie trees are brilliant. Thanks so much for joining in with our Plant'astic challenge over at Country View xx
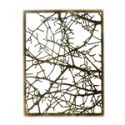
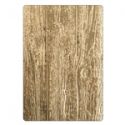
ReplyDeleteBravissimo! From the planked wood strips on the back to the cheesecloth webs and cobwebs in the attic, this is a work of wonder. I love the eerie tree branches clambering up the outside, and your strange family of characters so at home in their haunted shadowbox house. Another Halloween treat!
ReplyDeleteAlison x