Monday, July 30, 2018

Let the Merry Making Begin!


Hello, and Happy Monday! I hope you've had a relaxing weekend!  I have another simple Christmas card to share with you today. I was really inspired by the designers at Simon Says Stamp with their creative use of Tim Holtz Christmas products in their Christmas In July Blog Hop. Although the hop is closed now, it's well worth visiting for all the inspiration.


I'm infatuated with Tim Holtz' 3D embossing folder-- Lumber! I made this background pretty much like I did on this card; I just changed up the colors.  I just used Walnut Stain Distress crayon on this one, in place of the paint and several colors of crayons.


The beautiful plaid goes well with the wood--don't you think? It's from Tim's Christmas Paper Stash from last year.I used my new-to-me Stitched Ovals die to create the frame. The backing is cut from black card with one of the larger dies, and I tore off the outer edge. I swiped it with Picket Fence Distress Crayon for a distressed look, but looks blueish here due to the poor lighting. I have to take my photos indoors due to the monsoon season here in eastern North Carolina.


I love the buck from Tim's Scribble Woodland set. This is probably my favorite Christmas stamp ever. It could also be used on those guy cards throughout the year. After stamping the image in Black Soot Archival ink on Distress Watercolor card stock, I blended entirely with Frayed Burlap ink.  I swiped on the teensiest bit of Distress MicroGlaze with my finger to resist the inks where I wanted the lightest shades. I finished coloring with Distress Oxides in brown tones with my Detail Waterbrush and fussy cut. The bow tie is cut with the Fold Up Bows die. I cut it from a scrap of really old embossed two color Coordinations sandable card.  The sentiment is an Ideaology Holiday Talk Metallic sticker.


I'm super excited to get out my Tim Holtz Christmas goodies from last year and combine them with his newer products! I can't wait to get my hands on Tim's new Christmas products! You can see a sneak peek of his Halloween/Christmas release here.

Hugs and Blessing!
Sara Emily
Products I've used can be found at The Funkie Junkie Boutique:


Sunday, July 29, 2018

Christmas Joy!

Sara Emily Barker http://sarascloset1.blogspot.com/ Retro Christmas Card Christmas Joy 1

Hello, friends! You've been very kind to visit my first two posts today, and as promised, this is my third and last. This is not what I planned to share with you, so stop back this coming week to see a couple more Christmas cards I've made using Tim Holtz 3D Texture Fades. I couldn't do them justice in indoor lighting and it's pouring cats and dogs here AGAIN!

Sara Emily Barker http://sarascloset1.blogspot.com/ Retro Christmas Card Christmas Joy 2

This is a very simple card and entirely flat for easy mailing. I started with Distress Heavy Stock and stamped it with Tim's Christmas Cling Foam stamps and Brushed Pewter Distress paint, creating a resist to the Distress Oxides. I used Cracked Pistachio and Evergreen Bough. I used a damp wipe to remove the ink from the stars.

Sara Emily Barker http://sarascloset1.blogspot.com/ Retro Christmas Card Christmas Joy 3

  I over-stamped in Cracked Pistachio with the Merry Christmas stamp from Tim's Sparkles and Christmas set. Christmas is cut from the card using the Retro Merry Christmas die. Joy is a Holiday Talk Metallic sticker.

Sara Emily Barker http://sarascloset1.blogspot.com/ Retro Christmas Card Christmas Joy 4

The bauble is a Movers and Shapers die -- Mini Retro Ornaments. I cut it from silver Metallic Kraft Stock, scuffed it with steel wool and colored the bow with alcohol ink--Meadow.   I attached a thread for the hanger and mounted the panel on black card edged with  Brushed Pewter.

Sara Emily Barker http://sarascloset1.blogspot.com/ Retro Christmas Card Christmas Joy 5

I'll be sharing with:

Thank you for your visit! 
Hugs and Blessings!
Sara Emily

Faux Barn Wood Tutorial With 3D Lumber Embossing


 Hi! Back again with my second post today!  I should have a third post coming later today. I've been busy trying to make up for lost time while I was on vacation. I have another Tim Holtz 3D embossing tutorial for you, this time using the wonderful Lumber Texture Fade. I actually completed a card this time. My daughter wanted to make some Christmas cards before she goes back to college, now that her internship is done, and she has some free time. She asked me to make up a few simple designs she could make quickly and easily.

Making these backgrounds is super simple and requires very few products. You can see my tutorial using the Botanical 3D Texture Fade here and how I used one of the panels here. I also give some tips for using the Lumber and Foundry folders here. There are plenty of ways to use these little gems, and a good place to find lots of inspiration for these and other Tim Holtz products is on Tim Holtz Addicts Facebook Group.

Onto the tutorial:

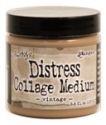
 First, I apply Vintage Collage Medium to kraft card stock with a brush. I like the lines, and I think it gives it more texture in the finished product.
 Next, apply a coat of Picket Fence Distress Paint with a paintbrush. Again, the lines add to the design and texture of the finished "wood". Let it dry or use a heat tool.
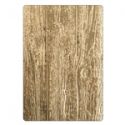
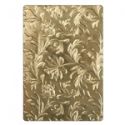
 Now it's time for the magic! Run the panel through your die cut machine in the Lumber 3D Texture Fade 3 passes, as Tim advises. No need to spray with water, because the collage medium keeps the paper from cracking.
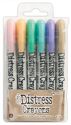
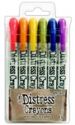
 For the final step, I just randomly scribble on Distress crayons in Walnut Stain, Black Soot, and Hickory Smoke  and blend with my finger. The crayon glides smoothly because of the collage medium I put down first. It helps to look at some wood to get an idea for how it weathers naturally when you're adding your colors.

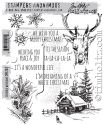
To complete my card I layered the wood panel over black card for contrast, then over a panel cut from Tim's Christmas paper stash from last year aged with Frayed Burlap Distress ink.


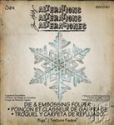
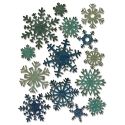
I embellished simply with a Layered Snowflake topped with a Mini Paper Snowflake so the wood remains the star of the show. Well almost; it's hard not to notice the snowflake! A Holiday Talk Metallic sticker stands in for my sentiment.


I cut the snowflakes from Metallic Kraft stock, painted them with Picket Fence paint, Bundled Sage Distress Oxide, and Cracked Pistachio and Walnut stain Distress crayons.

That's all for me! If you have any questions, please feel free to leave them in the comments section below and I will get back to you with an answer.

Hugs and Blessings!
Sara Emily


Everything Has Beauty

Sara Emily Barker http://sarascloset1.blogspot.com/ Everything Has Beauty card #timholtz #stampersanonymous #sizzix3dembossing #distressoxide 1

Hello and Happy Sunday! I had some fun with my new-to-me Flower Garden stamps by Tim Holtz on my vacation to our special place in the mountains of W. Va.-- Capon Springs. Short on space, I packed up all my Distress Oxides, water color card, Jet Black Distress archival ink and my stamp set into one neat box with thoughts of coloring to my heart's content! One problem! I forgot my water detail pen, so I spent the drive up to W. Va. looking for a craft store close to an exit. Right before we hit our destination, I found one! Yippee! When we got to our destination, I realized I didn't bring a stamp block for the cling stamps; duh! This would have been a good time to have a Travel Stamp Platform!

Sara Emily Barker http://sarascloset1.blogspot.com/ Everything Has Beauty card #timholtz #stampersanonymous #sizzix3dembossing #distressoxide 2

I made this card for my friend, Kathy, one of my Capon Family friends. She and a few other guests took an interest in my flower stamps and inks, and we had our first Capon mini art class.  Lots of fun to break up all that hiking!

 Although I didn't do the best job of stamping using just my hand to impress the image, I still had so much fun coloring the flowers and greenery with various shades of Distress Oxides! I can't wait to get my hands on Tim's new colors!

After I returned home, I fussy cut my flowers and layered them on Classic Kraft Stock I embossed with Tim's Botanical 3D Texture Fade. Details on how I made this background can be found here. Plain white card inked with Wild Honey Distress ink gives some definition to the panel and is layered over a Lumber 3D embossed panel.

Sara Emily Barker http://sarascloset1.blogspot.com/ Everything Has Beauty card #timholtz #stampersanonymous #sizzix3dembossing #distressoxide 3

The sweet bee and butterfly are from Tim's Botanical Layers collection, and I added some Distress crayon to make them fit my color scheme. A Small Talk sticker stands in for my sentiment.

I hope you like my simple card! Thank you for stopping by today, and for all your wonderful comments! Stop by again later today when I will have another tutorial on how to use Tim's Lumber 3D Texture Fade. I should have a third post later in the day! Making up for lost time while in the mountains!

Hugs and Blessings!