Showing posts with label Kaleidoscope 3D embossing. Show all posts

Sunday, April 7, 2019

My Peeps Will Call Yours-Another Easter Card

Sara Emily Barker https://sarascloset1.blogspot.com/2019/04/my-peeps-will-call-yours-another-easter.html  #timholtz #sizzix #geospringtime #kaleidescope3Dembossing #oxidespray (1)

Hello friends! I have just a few photos and a quick post of another Spring/Easter card. This one features the Geo Springtime bunny die cut and Kaleidoscope 3D Texture Fade.

Sara Emily Barker https://sarascloset1.blogspot.com/2019/04/my-peeps-will-call-yours-another-easter.html  #timholtz #sizzix #geospringtime #kaleidescope3Dembossing #oxidespray (2)

I cut two of the bunnies from a panel of white card stock, facing each other, leaving the apertures I would later reinsert the die cut bunnies into. I coated the card with Distress Collage Medium Matte.

I embossed the panel with the embossing folder and sprayed with Cracked Pistachio Oxide Spray and blended with a damp paper towel. I smoothed on Seedless Preserves and Cracked Pistachio Distress Crayons to highlight the texture even more. This panel was mounted on a white card stock panel. I matted it and the Small Talk Occasions stickers with Metallic Confections Kraft Stock.

Sara Emily Barker https://sarascloset1.blogspot.com/2019/04/my-peeps-will-call-yours-another-easter.html  #timholtz #sizzix #geospringtime #kaleidescope3Dembossing #oxidespray (3)

To get the bunny in the right facing position, I simply flipped the bunny over and heat embossed with white powder to get the rounded edges you get on the front side of a die cut.these die cuts were adhered into the apertures using collage medium. Easy card, made so simple with the Oxide sprays! Thanks for stopping by! Hugs! Sara Emily

Thursday, January 31, 2019

Mixed Media Vignette Mini Tutorial - Your Heart's Desire for A Vintage Journey


Hello! It's time for a new challenge at A Vintage Journey, and our hostess, Annie has chosen the theme Your Heart's Desire -- so appropriate for the upcoming Valentine's holiday. 

"Since February is the month of love, we would like you to include hearts as the 'main' focus of your project. Just be sure your design is in keeping with our vintage, shabby, mixed media, art journaling, industrial, timeworn or steampunk styles that we prefer."

These are the steps I took to alter my vignette tray using contractor's foil tape, Tim Holtz Kaleidoscope Texture Fade, Prima and DecoArt paints and powder. The hoarded tray was the perfect size and depth and was a gift from my fellow Creative Guide and wonderful friend, Autumn. Thank you!


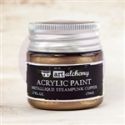
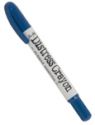
I cut a strip of foil tape for each side of the tray adding about 1/2 inch to each of the measurements. I applied Prima's Steampunk Copper paint to each foil strip using a cheap foam brush. This paint is really gooey, and I don't want to mess with washing out a brush when I'm done. I use a pouncing motion, rather than brushing it on, to get good coverage and to give some variation in color. Any texture will be flattened out by the dry embossing.


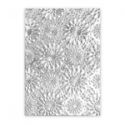
When the copper paint is completely dry, I emboss the strips using the Kaleidoscope embossing folder. Do not wet the foil as you would if you were using paper. I did pass it through my die cut machine the prescribed three times, but I doubt it needed more than one pass.

I apply DecoArt Green Patina Antiquing Cream over the surface with my finger and allow it to dry a bit. Then I wipe with a slightly dampened paper towel, leaving the color in the recesses. I don't particularly care for the shine from the foil, so I apply Prima Color Clay Artisan Powder with my finger over the entire surface and wipe off the excess with a dry paper towel.


It's very easy to adhere the tape over the edges of the frame, since the foil is adhesive backed. **I make all my cuts before removing the protective backing. ** I mark the width of the inside of the frame opening on the back of the long edge of the foil strip.  I add 1/4 inch to the depth of the frame (1/2 inch) and mark a line horizontally on the back of the strip at 3/4 inches from the long edge. I make vertical cuts to that line from the previous markings. I score this flap at 1/4 inch and again at 3/4 inch.


I fold the strip at 1/4 score line and this surface goes on the 'floor' of the frame. The score at 3/4 inch  will be at the inside lip of the frame. Use scissors to cut in at an angle to miter the corners. Now I remove the protective backing and starting at the floor of the tray, adhere to each surface. Once the scored and folded part of the strip is adhered, I simply fold and form the remaining portion over the remaining edges.


I got lucky and the design aligned at one of the corners! Now here are some more  photos of the finished project.


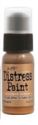
I used another foil strip to create the Retro Repeat panel in the background and paired it with a panel colored with Distress paints. Behind the Retro Repeat is a scrap of paper I used to ink up some die cuts on awhile back--I didn't want to waste the ink. LOL


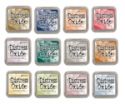
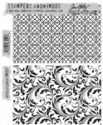
The Faceted Heart is cut from Distress Metallic Kraft Stock, heat embossed in clear with Lattice and Flourish stamp set. It's colored with Distress Crayon, antiquing cream and Artisan powder. I used a couple of Big Chat stickers for my sentiment.


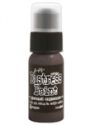
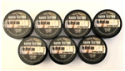
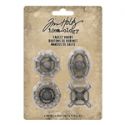
The wooden cogs were also a gift from Autumn, and I heat embossed them with a mix of Baked Texture powders. I altered and added Faucet Knob, an old Ideaology word token and some chain from my stash. I threaded rusty wire through the token hole and twisted it up. Black Soot paint splatters finish it off.


I can write a personal message on the back, which is finished off with a stamped Oxide panel from my stash.


I hope you'll hop on over to A Vintage Journey to see how my talented fellow Creative Guides have interpreted this theme. Then I hope you'll play along! I can't wait to see YOUR Heart's Desire!

As always, your visit and your sweet comments brighten my day! Sara Emily

Challenge shares:
Mixed Media Place January Challenge Inspired by the bottom right photo and by the cinnamon sticks matte brown color.

Links to products used stocked by The Funkie Junkie Boutique:


Saturday, January 5, 2019

Easy Mixed Media Techniques With Tim Holtz Ice Flake Bigz Die and Embossing Powders

Hello and welcome to a new year at Sarascloset! I'm starting the New Year off with a step by step post at Frilly and Funkie, where I'm sharing some easy mixed media techniques featuring Tim Holtz Bigz Ice Flake die and embossing powders. Here's some photos, but I hope you have some time to visit Frilly and Funkie for the tutorial.

Sara Emily Barker Easy Mixed Media Techniques https://sarascloset1.blogspot.com/2019/01/easy-mixed-media-techniques-with-tim.html #timholtz #sizzixalterations #iceflake #kaleidoscope3D 1

Sara Emily Barker Easy Mixed Media Techniques https://sarascloset1.blogspot.com/2019/01/easy-mixed-media-techniques-with-tim.html #timholtz #sizzixalterations #iceflake #kaleidoscope3D 2

Sara Emily Barker Easy Mixed Media Techniques https://sarascloset1.blogspot.com/2019/01/easy-mixed-media-techniques-with-tim.html #timholtz #sizzixalterations #iceflake #kaleidoscope3D 3

Sara Emily Barker Easy Mixed Media Techniques https://sarascloset1.blogspot.com/2019/01/easy-mixed-media-techniques-with-tim.html #timholtz #sizzixalterations #iceflake #kaleidoscope3D 4

Thank you for your visit!
Hugs and Blessings!
Sara Emily

Challenge shares:
Simon Says Stamp Monday Party Time! Celebrating the New Year when I crafted these!
Simon Says Stamp Wednesday Something New New embossing powders, new foil tape, new embossing folder.
Scrapy Land Challenge #105 Anything Goes I used two Sizzix dies.
Craft Rocket Challenge #55 - January 2019 - Winter
Bleeding Art December Challenge - Shiny and Sparkly
Card Mania CMC#112 Baby It's Cold Outside
Dies R Us Challenge #112 - Anything Goes using dies by companies carried at the DRU Store I used Sizzix Alterations Ice Flake and Holiday Words, Thin.
Sandee and Amelie SASPC New Year's (January) Challenge Anything Goes - Steampunk/Industrial It's been so LONG since I've made anything industrial--so happy to play! My NEW  crafty stash includes the Kaleidoscope embossing folder, new embossing powders, and new foil tape. I'm a happy camper!
Mixed Media Place December Challenge I was inspired by the colors, the subject of snow and middle photo for first make, upper left photo for second make, bottom right photo for third make.

Crafts Dreamy December Challenge 2018 I was inspired by the snowflakes and icy blues.