Welcome friends and visitors! Today the Funkie half of the team at Frilly and Funkie get to unveil their inspiration for our current challenge,
'Tis Near Halloween, chosen by me
. It's going to be a photo heavy post, so get comfortable and let's get started!
Here's my challenge:
It's no secret. I.Love.Halloween. With Halloween just a few weeks away, I challenge you to create a vintage or shabby chic project with a Halloween theme. If Halloween isn't your thing, that's OK--just be sure to include orange, black and purple in your vintage or shabby chic project (These colors are not required if your theme is Halloween.) It would be a grave mistake to miss this challenge!

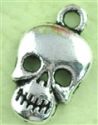
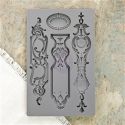
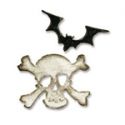
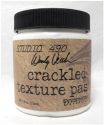
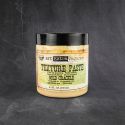
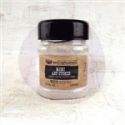
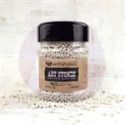
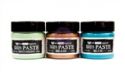
I started with this wooden decor piece I picked up for 25 cents at a yard sale this summer and instantly knew it would house a tiny graveyard at Halloween. I gave it a coat of gesso and patted on sand texture paste. I glued on the IOD molded paper clay piece, having shaped it to fit the curved roof before allowing it to dry. I also glued the skull charm using my go-to adhesive, Ranger Multi Medium Matte. This stuff adheres just about anything. I added some Concrete Stone Effect and crackle paste to the molded piece for texture. The skull was painted with Snow Cap Mixative, and I added Stickles in the eye sockets, just as I did with the owl below.


I slathered on crackle paste randomly on the base and roof edges, even on the ceiling. (Yes, that's the ceiling pictured below.) The structure was colored with Lamp Black Color Burst, except for the columns which I colored with Burnt Umber Color Burst. I only used two Color Bursts, but there is so many colors within the powders. It's quite unpredictable what you will end up with, but I'm never disappointed. Linda sells these in the
shop; I encourage you to see which colors she has in stock.
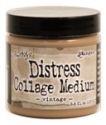
The surfaces were sealed with Distress collage medium, since the crackle had started chipping. Now you can pick this up and turn it to your heart's content without fear of getting your hands blackened or the crackle coming off.
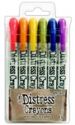
I cut my headstones from grey fun foam, cutting five matching pairs. I glued the pairs together to make the headstones more dimensional. I coated them with Prima Concrete Stone Effect paste and let that dry. Next I gave them color with Lamp Black Color Burst and some moss with Peeled Paint Distress Effect powder. I found a pile of skulls in my Halloween decorations and altered it to match the headstones. I took some photos of the graveyard before I added the fence so you could get a better view.
And then as I'm working out the fence.
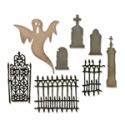
Fences and gates were cut from Kraft Metallic using Tim's Village Graveyard Thinlits and given texture and color with Distress Grit paste and Prima paints and pastes. I chose the Kraft metallic because of the way it holds it's shape when you bend it. I can even swing the gate open and closed.
Ghosts from the same set were cut from vellum. I left them unattached so they could move around as ghosts apparently do. For the record, while I.Love.Halloween, it's not about the gore and ghosts that tickles me, but the grunginess and decay and beautiful colors of everything at this time of year. Skeletons and bones are pretty cool, too, but that goes to my background in anatomy.
To decorate the base, I adhered two more IOD molded pieces, shaping them while the paper clay was still wet, and adhered them over the crackled background. They were finished the same way as the skull plaque above.
The Stars Adornments were inspired by Kathy's
Halloween Night Tag. I love the way she glittered her stars, and I pretty much did what she did except I used Gold crackle paste in place of her silver. I centered a star between each two columns.
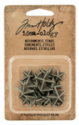
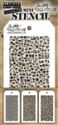
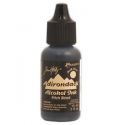
In addition to the skull charm above, I used this beautiful owl charm and creepy spider charm Linda sells in her
shop. These were colored with Teakwood and Pitch Black alcohol ink respectively. All of the Filigree Metals and Charms in the shop are an ADDITIONAL 15% off until October 26, so now is a good time to stock up!
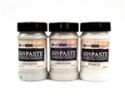
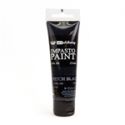
The two Movers and Shapers bats get their texture from Impasto Pitch Black paint, laid on thick and then blasted with the heat gun to make it bubble and wrinkle. I highlighted the texture with some wax paste.
Oh, how I wish I were 4 inches tall, so I could peer over those rusted fences or take a stroll over that cobbled path. During the daylight, maybe...
...but not at dusk!
I hope you are inspired to get out your Halloween goodies or your orange, black and purple colors and get crafty! Before you do, I hope you will stop by
Frilly and Funkie to see what the rest of my Frilly and Funkie teammates made to inspire you.
Then it's over to YOU! Create a vintage or shabby chic project following the challenge guidelines and link up at Frilly and Funkie before midnight on Tuesday, October 24th.
The Frilly and Funkie team will choose our top four picks with the winner being invited to join us in a Guest DT spot at Frilly and Funkie. The next three will receive badges to display on their blogs. Everyone who enters and follows the rules will be entered into the draw to have the chance to win a $25 spending spree at The Funkie Junkie Boutique.
I can’t wait to see what YOU make!
I'm sharing with these fine challenges:
Inspired by colors, Halloween theme, spider, ghostie and building.
Thank you for stopping by today!
Hugs and Blessings!
Sara Emily