Thursday, April 26, 2018

Rusty Masculine Card with Tim Holtz and Seth Apter


Welcome friends and visitors! I have a 'Creative Cardmaking' tutorial at A Vintage Journey today. I hope you'll stop by the blog to see all the details and learn how I put this masculine card together in less than an hour from idea to the completed photo session.

The new Creative Card monthly feature at A Vintage Journey is where one of the Creative Guides shares some ideas for putting together a card focusing on our preferred genres - vintage; shabby; mixed-media; art journaling; industrial, timeworn or steampunk style.

I'm sharing with these challenges:
Country View ChallengesApril 2018 - Pimp it up! (reuse or alter something) I hope this qualifies--I altered the die cut gears, the papers and Paper Doll. 
Scrapy Land Challenge #88 Anything Goes I used a gears die by Sizzix.
heARTful Stamping Challenge Anything Goes + a stamp April 22 – 29 I used a stamp for the piece behind the man.

Thank you for stopping by and for all your wonderful comments! They really brighten my day!
Hugs and Blessings!
Sara Emily

The following products were used on this card and can be purchased at The Funkie Junkie Boutique:

Wednesday, April 18, 2018

Mysterious Garden Wall with Tim Holtz Thinlits and Prima IOD Moulds for Frilly and Funkie


Hello friends! Thank you for joining me today! It's time for the Funkie side of the Frilly and Funkie team to share some inspiration for our current challenge 'Elegant Jewels' chosen by our lovely and talented Cec.

Here's what Cec has to say about her theme: "Let's make a vintage or shabby chic project in jewel tone colours such as deep purple, emerald green, jade green, burgundy, bright turquoise to name a few AND to make your project extra special, add some sort of jewel or gem, which can be anything from a dollar store find to a piece of broken jewelry."

I visualized some jewel toned flowers growing out of an antique zinc planter, but it didn't turn out like that. Instead I have flowers climbing over a 'carved slate wall'. I'll be sharing a tutorial on how to create this faux background on May 5th here at Frilly and Funkie, so be sure to pay us a visit then.


I began making my flowers by coloring a piece of Heavy Stock with Merlot and Indigo Color Bursts. I love how this paper can stand up to a lot of liquid mediums. I wet the paper first, then sprinkled some of these glorious powders onto the wet paper. I spritzed with water and moved the color around by tilting the paper and directing the colored water with my heat tool. I can make the color as pale and transparent as I want or make the color deep and rich, just by how much water I apply. I cut two of the Wildflowers from the paler portions of the paper and two of the Tiny Tattered Florals from the deeper colored paper. It's so easy to twist up these little flowers with the quilling tool included with the dies. Someone like myself who is handmade flower challenged can whip these up in minutes using this die set, which also includes three sizes of roses and three sizes of the daisy-like third flower (on the right) I had left over from THIS  project.


 It was originally sprayed with Peacock Feathers Distress Spray Stain, but I gave it a quick makeover with a spritz of Wilted Violet Distress Spray Stain. I love how that gave me just the right shade to go with my two Color Burst flowers. I had a few tiny flowers from a LONG time ago that I believe I made with an old Tim Holtz strip die. I just dipped them in a puddle of Merlot. I purchased a BOX of silk flowers at a friend's yard sale this weekend with the intention of using the purple and deep pink flowers on this project, but I ended up just tearing one of the flowers off the garland, pulling it apart and re-working into this rose bud.


 I cut ivy using the Garden Greens die.  These were colored with several green Twinkling H2O's to get that rich raw jade green. I wrapped the bottom of my rose bud with one of the largest ivy leaves.


I layered my flowers over a broken earring from my quite large stash of old costume jewelry. This was colored with Cranberry and Purple Twilight alcohol inks and adhered to the Object Labels Prima IOD molded piece. These molds make the most beautifully detailed pieces. You can use them with hot glue, clays and resins, even chocolate,  but I  prefer paper clay. I also colored five crystal clear gems from my stash with the same colors and all the jewels were given just the teensiest swipe of  Old Silver Prima Metallique Wax. Additional molded pieces from Baroque 6 set were added at the top and bottom. Everything was adhered using my favorite glue, Multi Medium Matte.


That's all for me today! I hope you've gotten a little inspiration to create your own vintage or shabby chic project in rich jewel tones.  There's plenty more wonderful inspiration from my teammates at Frilly and Funkie, so I hope you'll pop over and then play along with our Elegant Jewels challenge. The team will choose 4 of their favorites and everyone who enters and follows the rules will go into the draw for the chance to win a $25 spending spree at The Funkie Junkie Boutique. I can't wait to see what YOU will create!

I'm sharing with these challenges:
Tuesday Throwdown #388 - Glimmer and Shine My glimmer is on the ivy leaves and the shine is on the jewel and gems.
Country View Challenges April 2018 - Pimp it up! I pimped my panel, but details won't be out until May 5. I also altered some flowers and an old earring.
Die Cut Divas Altenew for April I used flower dies.

Thank you for stopping by and for your lovely comments!
Hugs and Blessings!
Sara Emily

The following products were used and can be purchased at The Funkie Junkie Boutique:


Wednesday, April 4, 2018

Tim Holtz Bloomin' Marvelous Vintage Garden for Frilly and Funkie


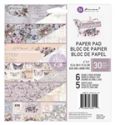
Hello friends! Thank you for all your wonderful comments on my last post. They really made my day! It's time for the Funkie side of the Frilly and Funkie team to unveil their inspiration for our current challenge Bloomin' Marvellous chosen by our Funkie and fabulous Zoe.

Here's what Zoe has to say about her challenge: "As spring pokes it's head through the frozen ground, let's celebrate the season and create a vintage or shabby chic project with flowers as the focus and in vintage muted pastel tones, (no brights)."


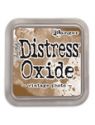
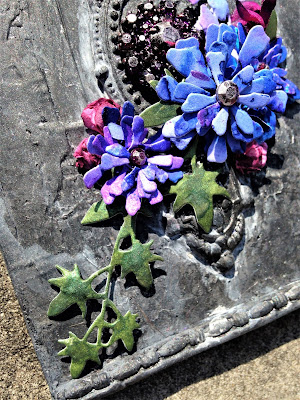
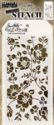
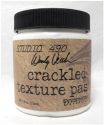
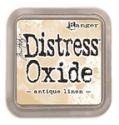
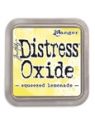
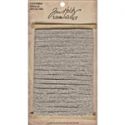
The background is made with Tim Holtz Distress Mixed Media Heavystock, Floral stencil, transparent texture paste, Antique Linen and Squeezed Lemonade Distress Oxides, and Tumbled Glass and Evergreen Bough Distress inks.  I mounted it on a panel coated with crackle paste. I inked with Shabby Shutters and smudged with Hickory Smoke and Peeled Paint Distress Crayons to highlight the cracks and to give it some variation in color. I finished both panels with a coat of Vintage Distress Collage Medium. Sorry for the photo quality--I snapped this at my desk.


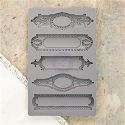
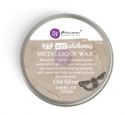
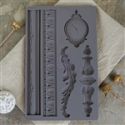
I die cut two of the Ornate Frames and oval inserts from kraft paper colored with Squeezed Lemonade  oxide and my cat food box panels. I adhered the two layers with Distress Collage Medium and gave each of them a random coat of crackle paste. I smudged with Hickory Smoke and Walnut Stain crayons. I swiped Prima White Gold Paste Wax around the edges of the frame and crackled backing panel ever so lightly for some much needed shimmer.


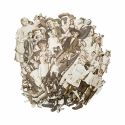
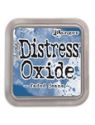
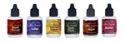
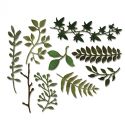
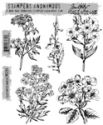
I colored watercolor paper with Tattered Rose and Squeezed Lemonade oxides and stamped several images from Tim's Illustrated Garden with sepia archival ink. I added some more color with a paintbrush, the two aforementioned oxides and Bundled Sage, Peeled Paint, and Spiced Marmalade oxides. All were fussy cut and edged in Ground Espresso ink. I shaped a few to add dimension.


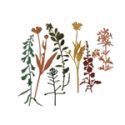
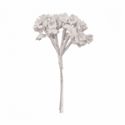
I colored some Ideaology Bouquet Findings with Squeezed Lemonade, Spiced Marmalade, and Tattered Rose oxides, and tucked them in along with a flower from my stash. I was amazed the oxides matched the colors of my stash flower to a tee.

Tip: Color Prima Mini Art Stones with the white gold wax, so they coordinate with your project. Do this by applying some wax to your finger and dip into your jar of stones. The stones will stick to your finger and then you can roll them briefly on your craft mat to transfer the color. Pick up some collage medium with another finger or a paint brush and dip into your colored beads to apply to your artwork. Linda sells so many colors of these beautiful waxes at The Funkie Junkie Boutique, so you are not limited to just gold for your project.


The fussy cut butterfly is from Prima's Lavender 6 x 6 paper stack. I simply added Tattered Rose oxide and edged with Ground Espresso ink to match my flowers.


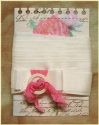
Finally, I made a bow with Tim's old Linen Ribbon tied with a snippet of dyed seam binding ribbon. It was from one of those fun bags of goodies, Linda sends along as a thank you gift when you place your order at The Funkie Junkie Boutique. It was a little brighter pink than I needed, so I just rinsed out some of the color for the perfect shade. I had some of the Prima Wax on my fingers, so it has just a bit of the gold shimmer, too. I purposefully left a sentiment off my card, since I don't know what I will use this card for. I can easily adhere a Chit Chat sticker at a future date.

That's all for me today. I hope you found some little thing to inspire you. The rest of my Funkie teammates have even more to inspire you on the blog, so be sure to pop over, and then get your craft on and join in our Bloomin' Marvellous challenge for a chance to win a generous shopping spree at The Funkie Junkie Boutique or to be chosen as one of our 4 winners! I'm looking forward to seeing what YOU will create!

I would like to share with these challenges:

Thank you for stopping by my blog today and for your sweet comments!
Hugs and Blessings!
Sara Emily

The following products were used on this card and are available for purchase at The Funkie Junkie Boutique: