Showing posts with label 3D Texture Fade Foundry. Show all posts

Wednesday, May 13, 2020

Slightly Distracted and Corroded

Sara Emily Barker https://sarascloset1.blogspot.com/2020/05/slightly-distracted-and-corroded.html Tim Holtz Masculine Mixed Media Card 1

Hello, friends! It's time for anew challenge at The Funkie Junkie Boutique Blog, and this time around Jenny is hosting. She calls her challenge theme 'Oh Man!', and this is how she describes it:

"Fathers Day may be a way off yet but there are always other occasions and reasons for making something for the men in our lives. For this challenge create something which you feel has a more masculine look."


 As always, the winner will earn a chance to be a Guest Designer at a future date at The Funkie Junkie Boutique blog, and everyone who enters and follows the rules will go into the draw for the chance to win a $25 spending spree at The Funkie Junkie Boutique. There are also Top 3 Badges for three additional outstanding entries, chosen by the Design Team. Please see the blog for details.

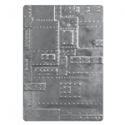
The 3D embossed (Tim Holtz Foundry) corroded/eroded metal background was the jumping off point for my snarky greeting card. But you'll have to wait until this coming Saturday to see how I made it when I'll have a step by step as part of our Saturday Showcase feature at The Funkie Junkie Boutique blog.

Sara Emily Barker https://sarascloset1.blogspot.com/2020/05/slightly-distracted-and-corroded.html Tim Holtz Masculine Mixed Media Card 2

 I did some background stamping using the Glitch 1 set and Black Soot archival ink. Of course, I couldn't resist using one of my Paper Dolls as the subject. His jacket and slacks are embossed in Cracked Pistachio and Peeled Paint Embossing Glazes and stamped with the grid from the same Glitch one set, also in archival ink.

Sara Emily Barker https://sarascloset1.blogspot.com/2020/05/slightly-distracted-and-corroded.html Tim Holtz Masculine Mixed Media Card 3

I pulled out my Steampunk Parts Bigz die and some cat food box panels to make some rusty parts. (These come between the layers of canned Fancy Feast in a big box, so untouched by the cat food. Sadly, Roger's still on a diet and has to eat low fat, expensive food that doesn't come in a case, so I'm using up my stash.) I'll be sharing my 'rust' recipe on Saturday, too, although there are some slight changes here. Here, I added a few dribbles of Rust alcohol ink and sprinkled them with Rust Embossing Glaze and allowed it to dry without heating. I did the same thing to the Idea-ology Hardware Heads, too.

Sara Emily Barker https://sarascloset1.blogspot.com/2020/05/slightly-distracted-and-corroded.html Tim Holtz Masculine Mixed Media Card 4

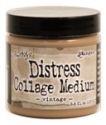
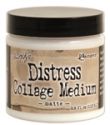
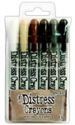
The snarky quote is from Snarky Cats stamp set. While I love the cats, I bought this set for the quotes. The layer under the Foundry layer is white card with Typeset Collage paper adhered with Collage Medium Matte. I colored just the edges with Distress Crayons: Black Soot and Vintage Photo and Prima Patina Green Matte Wax. Thank you to Wendy Baysa (Dabble DoDay) for gifting me with the Typeset Collage Paper, among many other crafty goodies!

6Sara Emily Barker https://sarascloset1.blogspot.com/2020/05/slightly-distracted-and-corroded.html Tim Holtz Masculine Mixed Media Card 5

I tucked in a Type Chip and and ephemera from Ideaology Urban Layers colored to coordinate with Antique Linen and Antiqued Bronze crayon and Matte Wax. A portion of another Urban Layer is stamped with another of the Glitch 1 images and altered with Vintage Photo and Black Soot crayons, Rust and Cracked Pistachio Embossing Glazes and Matte Wax.

Sara Emily Barker https://sarascloset1.blogspot.com/2020/05/slightly-distracted-and-corroded.html Tim Holtz Masculine Mixed Media Card 6

I hope you liked my slightly distracted manly card. If you get time, be sure to pop over to The Funkie Junkie Boutique Blog this Saturday for our Saturday Showcase feature to see how I made this corroded/eroded metal background and rusty metal as well as a few other things. In the meantime, please drop the blog to see to see what my talented teammates have put together to inspire you for our  Oh Man! challenge. Then it's over to you; I can't wait to see what you will create for this challenge! Take care of yourselves. Big hugs! 

Happy crafting!
Sara Emily
These products were used and can be purchased at The Funkie Junkie Boutique:
Stampers Anonymous Tim Holtz Stamp Set - Glitch 1
Stampers Anonymous Tim Holtz Stamp Set - Snarky Cat
Sizzix Chapter 2 Tim Holtz Steampunk Parts Bigz Die
Tim Holtz Idea-ology Urban Layers
Tim Holtz Idea-ology Type Chips
Tim Holtz Idea-ology Collage Paper, Typeset
Ranger Tim Holtz Distress Crayons - Black Soot, Walnut Stain, Vintage Photo Antique Linen Antiqued Bronze
Ranger Tim Holtz Distress Oxide Spray -  Rusty Hinge
Tim Holtz Distress Embossing Dabber
Tim Holtz Distress Embossing Pen 2pk
Tim Holtz Ranger Distress Paint - Antiqued Bronze
Ranger Tim Holtz Distress Archival Mini Ink Pad - Black Soot
Tim Holtz Distress Embossing Glaze - Rusty Hinge, Cracked Pistachio, Peeled Paint
Tim Holtz Ranger Distress Grit Paste
Ranger Tim Holtz Distress Collage Medium Matte
Prima Finnabair Art Alchemy Wax Paste - Patina Green
Ranger Tim Holtz Alcohol Ink - Rust
Dina Wakley Media Acrylic Gesso - black

Wednesday, July 17, 2019

It's Heating Up at The Funkie Junkie Boutique Challenge Blog

Sara Emily Barker https://sarascloset1.blogspot.com/2019/07/its-heating-up-at-funkie-junkie.html Masculine Mixed Media Card  1

Welcome friends! It' s time for a new challenge at The Funkie Junkie Boutique blog and our lovely and talented hostess, Suzz has chosen the theme 'It's Heating Up'. Here's what Suzz says about this challenge:

July is when the weather here in the Midwest really starts to turn warm and muggy. This is the inspiration for our challenge to interpret the heat with using one or more of the following colors: Yellow, Red or Orange. Your challenge is to create a vintage or shabby chic project where the main color is yellow, orange or red. I can't wait to see how you turn up the heat in your art!

As always, the Design Team will choose their top four picks, and the winner will be invited to join us in a Guest DT spot at The Funkie Junkie Boutique Blog. The next three will receive Top 3 badges to display on their blogs. Everyone who enters and follows the rules will be entered into the draw to have the chance to win a $25 spending spree at The Funkie Junkie Boutique.

While I do use yellow, orange and red quite frequently in my projects, it's not often the main color, so this indeed was a challenge for me.

My background is a panel of Classic Kraft Stock embossed with Tim Holtz Foundry 3-D Texture Fade. I sanded it and added color with Evergreen Bough Distress Oxide ink and Ground Espresso ink. I layered it on two old Tim Holtz papers and finally to a kraft card blank.

Sara Emily Barker https://sarascloset1.blogspot.com/2019/07/its-heating-up-at-funkie-junkie.html Masculine Mixed Media Card 2

I stamped The Professor by Tim Holtz with Ground Espresso and Faded Jeans  Distress Archival inks on a card scrap, fussy cut and colored his frames with Spiced Marmalade marker.

Sara Emily Barker https://sarascloset1.blogspot.com/2019/07/its-heating-up-at-funkie-junkie.html Masculine Mixed Media Card 3

 I stamped the dial from the same set on Distress Heavystock with Rusty Hinge and Ground Espresso inks and a bit of Cracked Pistachio oxide ink. Using my stamp platform allows me to use multiple colors to create depth and interest.

I fussy cut the dial and colored it with Wild Honey and Rusty Hinge oxides. I gave the dial a coat of Distress Crazing and after drying, smudged with Distress crayon-Chipped Sapphire. Both stamped pieces were edged with Ground Espresso ink. With foam adhesive, both pieces were layered over some scraps I had on my worktop.

Sara Emily Barker https://sarascloset1.blogspot.com/2019/07/its-heating-up-at-funkie-junkie.html Masculine Mixed Media Card 4

I finished my card with a Rusty Bottle Cap, Idea-Ology Metal Ruler Measurements (one of the many prizes I won in a challenge on Tim Holtz Addicts Facebook page), Mirrored and Adornments Stars and an Occasions Small Talk sticker. I patted the ruler with Chipped Sapphire Distress paint. Linda sells the bottle caps in the shop already rusted, and I just dabbed it with Chipped Sapphire paint to give contrast to the Mirrored Star. I colored the star with Splendor Alcohol Pearls (front) and Chipped Sapphire paint (back). The copper painted Adornment Star was already painted, leftover from a previous project, and I colored the other two with Chipped Sapphire paint and Carved Pumpkin oxide. Everything was adhered with Distress Collage Medium Matte.

Sara Emily Barker https://sarascloset1.blogspot.com/2019/07/its-heating-up-at-funkie-junkie.html Masculine Mixed Media Card 5

Sara Emily Barker https://sarascloset1.blogspot.com/2019/07/its-heating-up-at-funkie-junkie.html Masculine Mixed Media Card 6

As a final touch, I splashed the card with diluted Faded Jeans oxide.

Sara Emily Barker https://sarascloset1.blogspot.com/2019/07/its-heating-up-at-funkie-junkie.html Masculine Mixed Media Card 7

Sara Emily Barker https://sarascloset1.blogspot.com/2019/07/its-heating-up-at-funkie-junkie.html Masculine Mixed Media Card 8

That's all for me today, but there's plenty more wonderful 'hot' creativity over on the blog, where my Frilly and Funkie teammates will wow you with their projects. Then it's over to you! I can't wait to see what you will make! Hugs and Blessings! Sara Emily

I'll be sharing with these favorite challenges and a few more when I return to civilization:

Crafty Cardmakers #238 Here Comes Summer It's a stretch, but my kiddo's birthdays are in the summer, and this card is for my son's birthday.
Simon Says Stamp Wednesday Make Your Own Background

The following products were used and can be purchased at The Funkie Junkie Boutique:

Tim Holtz Cling Stamps - The Professor
Sizzix 3-D Texture Fades Embossing Folder - Foundry
Tim Holtz Idea-ology 8 x 8 Classic Kraft Stock
Tim Holtz Distress Mixed Media Heavystock
Tim Holtz Idea-ology - Mirrored Stars
Tim Holtz Idea-ology Adornments, Star
Rusted Metal Embellishments - Bottle cap
Tim Holtz Stamp Platform
Ranger Tim Holtz Distress Crayons - 6PC Set #2
Ranger Tim Holtz Distress Paints - Chipped Sapphire, Ground Espresso, Rusty Hinge
Ranger Tim Holtz Distress Inks - Frayed Burlap, Ground Espresso, Rusty Hinge
Ranger Tim Holtz Distress Oxides - Carved Pumpkin, Cracked Pistachio, Evergreen Bough, Faded Jeans, Rusty Hinge, Wild Honey
Ranger Tim Holtz Distress Archival Mini Ink Pad Kit #2
Ranger Tim Holtz Distress Archival Mini Ink Pad Kit #3
Ranger Tim Holtz Distress Collage Medium Crazing
Ranger Tim Holtz Distress Collage Medium Matte 1 oz Bottle
Ranger Tim Holtz Alcohol Pearls - Splendor


Wednesday, September 5, 2018

Foundry Altered Mannequin for Haberdashery Challenge at Frilly and Funkie

Sara Emily Barker http://sarascloset1.blogspot.com/ Foundry Altered Mannequin #timholtz #foundry #3Dembossing #distresspaints 1

Hello! It's time for the Funkie side of Frilly and Funkie Design Team to unveil their inspiration for the current challenge 'Haberdashery' at Frilly and Funkie. I'm sharing my altered mannequin featuring Tim Holtz Foundry 3D Texture Fade. I'll have some process photos and details as well as some close ups following, but first let's see what our talented hostess, Zoe, has to say about her chosen theme.

A haberdasher is a person who sells small articles for sewing, such as buttons, ribbons and zippers.  For this challenge create a vintage or shabby chic project including items found at a Haberdashery.

In America, the word also refers to a men's clothing store. Having visited these upscale stores with my husband, I know they often tailor off the rack clothing for their clients as part of their services. So I mingled these two concepts to come up with my project.

The Design Team will choose their top four favorites, with the winner being invited to join us in a Guest Designer spot at Frilly and Funkie, and the next three will receive Top 3 badges to display on their blogs. Everyone who enters and follows the rules will be entered into the draw to have the chance to win a $25 spending spree at The Funkie Junkie Boutique.

 Inspired by Jenny's Funky Floral Mannequin back in April, I picked one of my own up at a yard sale not long after. When Zoe announced her theme, I was reminded of my flea market find. Having gone back here to pick up Jenny's link today, I see that we had similar thought processes in using a tape measure and lace at the bottom.  Perhaps, in the back of my mind, I remembered seeing she had done this, but my conscious mind was trying to hide some not-so-perfect seams.

Sara Emily Barker http://sarascloset1.blogspot.com/ Foundry Altered Mannequin #timholtz #foundry #3Dembossing #distresspaints 2

Here's what it looked like before I started on the body but after I had crackled the painted black base and top with DecoArt crackle medium and paints. 
Sara Emily Barker http://sarascloset1.blogspot.com/ Foundry Altered Mannequin #timholtz #foundry #3Dembossing #distresspaints 3

The legs required some repair work, so I used some of the drying Wendy Vecchi Crackle texture paste that forms under the rim and on the sides of the jar (waste not, want not) to fill the cracked joints. Even though it was so dry, it crackled up nicely, so I decided to swipe the entire base and top with crackle paste.

Sara Emily Barker http://sarascloset1.blogspot.com/ Foundry Altered Mannequin #timholtz #foundry #3Dembossing #distresspaints 4

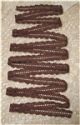
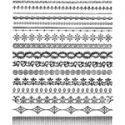
 I've hoarded this vintage tape measure  for years and wanted to use it before it was nothing but a pile of dust. So perfect for this challenge. It was pretty far gone, so I thought I could preserve it with Prima Sculpture Medium. It worked quite well to stop it from disintegrating further, but some of the printing was removed. I added some stamping back in using Ornate Trims and Watering Can Archival ink. The tape is a typical tape measure on one side, but on the reverse side it asks 'How do YOU measure up?' and provides guidelines for how large your various body parts 'should be'. LOL!
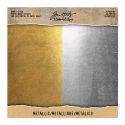
After crackling the top and base, it was time to move on to the body. I had some strips of Metallic Kraft Stock left from previous projects that were the perfect length to run a continuous strip from top to bottom of the dress form.
Sara Emily Barker http://sarascloset1.blogspot.com/ Foundry Altered Mannequin #timholtz #foundry #3Dembossing #distresspaints 5

To emboss them as one continuous strip, I embossed one end and then flipped the panel around and placed the un-embossed end into the embossing folder. I carefully lined it up with the previous embossing and ran it through my Big Kick just up to that initial embossing. Maybe the photo will better explain.
Sara Emily Barker http://sarascloset1.blogspot.com/ Foundry Altered Mannequin #timholtz #foundry #3Dembossing #distresspaints 6

 The strips were lightly scuffed with steel wool and painted with Distress paints.

Sara Emily Barker http://sarascloset1.blogspot.com/ Foundry Altered Mannequin #timholtz #foundry #3Dembossing #distresspaints 7

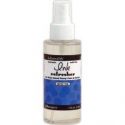
 Each of the strips were rubbed on the reverse side with Ranger Perfect Ink Refresher which makes the card pliable, allowing it to form on the curves.

Sara Emily Barker http://sarascloset1.blogspot.com/ Foundry Altered Mannequin #timholtz #foundry #3Dembossing #distresspaints 8

 I repeated the embossing and paint on some sticky back metal sheets I purchased at an estate sale several years ago. I cut the various embossed panels from this. These will serve not only as more detail, but as 'patches' and 'bandaids' after the kraft stock is adhered. The Funkie Junkie Boutique offers several types of adhesive foil sheets that could serve this same purpose.

Sara Emily Barker http://sarascloset1.blogspot.com/ Foundry Altered Mannequin #timholtz #foundry #3Dembossing #distresspaints 9

  Using every square inch of the metal panel, I cut the un-embossed portions into pieces that I then re-inserted and taped onto the folder to add embossing to these as well. I just ran this back through my Big Kick for more 'patches to use.

Sara Emily Barker http://sarascloset1.blogspot.com/ Foundry Altered Mannequin #timholtz #foundry #3Dembossing #distresspaints 10

In the photo above, you can see the darts I had to cut to form the card to the mannequin. There are also areas where there is little or no texture because rubbing in the ink refresher removes some of the embossed texture.  Also some seams popped up,. These are all areas that I used the cut up metal pieces. After everything was in place, I gave it a coat of Distress Collage Medium Matte, and when dry, rubbed with Walnut Stain Distress crayon. I got a little carried away with the patches at times!

Sara Emily Barker http://sarascloset1.blogspot.com/ Foundry Altered Mannequin #timholtz #foundry #3Dembossing #distresspaints 11

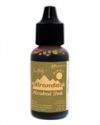
I had this lone zipper pull and some pearl and gold toned pins in my stash. I colored them with Caramel alcohol ink.

Sara Emily Barker http://sarascloset1.blogspot.com/ Foundry Altered Mannequin #timholtz #foundry #3Dembossing #distresspaints 12

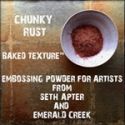
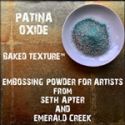
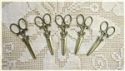
I cut a length of the tape that says 'chest' and 'bust' along with boxes to record your monthly progress in these areas to make a lanyard to hold those tools important to a seamstress. I hand sewed a hook of a hook and eye on one end and a 'loop' on the other. A loop pin holds a thimble charm and a old rusted bobbin from my stash. The hook holds this sweet scissors charm that Linda sells at The Funkie Junkie Boutique. The thimble, loop pin, and scissors were altered with Mushroom alcohol ink and Chunky Rust and Patina Baked Textures powders.

Sara Emily Barker http://sarascloset1.blogspot.com/ Foundry Altered Mannequin #timholtz #foundry #3Dembossing #distresspaints13

Sara Emily Barker http://sarascloset1.blogspot.com/ Foundry Altered Mannequin #timholtz #foundry #3Dembossing #distresspaints 14

 I used an old Tim Holtz embossing folder set called Pattern and Stitches for the 'stitched' patches on the upper back and on the waist.

Sara Emily Barker http://sarascloset1.blogspot.com/ Foundry Altered Mannequin #timholtz #foundry #3Dembossing #distresspaints 15

 This old unadorned shank button and safety pin are from my stash. I was happy that at least 'tape' was still clear on the old tape measure. The crochet lace here and at the neck is also from Linda's shop.

Sara Emily Barker http://sarascloset1.blogspot.com/ Foundry Altered Mannequin #timholtz #foundry #3Dembossing #distresspaints 16

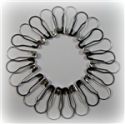
 I used some old silver toned snaps from my stash and gave them this color with Caramel and Mushroom alcohol inks. I sewed on one of the hook and eye sets, and realized I could get the same effect by just adhering the others. Ranger Multi Medium Matte works terrifically to permanently adhere these and other hard to hold embellishments.

Sara Emily Barker http://sarascloset1.blogspot.com/ Foundry Altered Mannequin #timholtz #foundry #3Dembossing #distresspaints 17

I gave the base and neck crackled portions a coat of Vintage Collage Medium. I stamped some plain tissue with text from Tim HoltzInventor 3 set and adhered it.  I had these cute wooden spools in my stash. I stained them with Vintage Photo Distress stain and wound some thread around them. 

Sara Emily Barker http://sarascloset1.blogspot.com/ Foundry Altered Mannequin #timholtz #foundry #3Dembossing #distresspaints 18

Sara Emily Barker http://sarascloset1.blogspot.com/ Foundry Altered Mannequin #timholtz #foundry #3Dembossing #distresspaints 19

Sara Emily Barker http://sarascloset1.blogspot.com/ Foundry Altered Mannequin #timholtz #foundry #3Dembossing #distresspaints 20

That's all for me today! Please hop on over for even more amazing inspiration by my talented teammates here. Be sure to link up your own shabby chic or vintage Haberdashery projects to be in  for a chance to win one of the fabulous prizes.

As always, thank you for stopping in and for all your lovely comments!
Hugs and Blessings!
Sara Emily

Artistic Stamper September's Creative Challenge - Going Round & Round My lace and tape goes around the bottom and lace around the neck. I used a round button and other round elements. I used stamping on base and on the tape measure.
SumMore Fun Mood Board Challenge #36 I was inspired by the Foundry at the bottom.
Simon Says Stamp Monday Stamp It On I know you really have to look, but I used 2 stamp sets.

These products were used and can be purchased at The Funkie Junkie Boutique: