Showing posts with label Crazing. Show all posts

Sunday, August 12, 2018

Free to Fly With 3D Embossing


Sara Emily Barker http://sarascloset1.blogspot.com/ Free to Fly With 3D Embossing 1

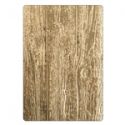
Hi! I've had a little more time to play with my Tim Holtz Lumber 3D Texture Fade yesterday. And I experimented with my Laurel 3D Impresslits embossing folder for the first time. How I love these 3 dimensional miracles, and they couldn't be more on trend! 

Sara Emily Barker http://sarascloset1.blogspot.com/ Free to Fly With 3D Embossing 2

I used Distress Crazing Collage Medium, Distress paint, Oxide, and crayons along with the Lumber Folder to make my 'bark' background. If you missed my post on how to create faux barn wood using this embossing folder and similar supplies, you can check out my tutorial here.

Sara Emily Barker http://sarascloset1.blogspot.com/ Free to Fly With 3D Embossing 3

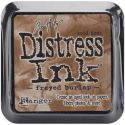
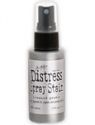
I cut and embossed black card with the Lauren Impresslit and used one embossed side up and the other de-bossed side up. I colored them with Brushed Pewter Distress Spray stain, then applied a thin layer of Crazing, followed by Picket Fence crayon. I layered them over another pair of Laurels cut/embossed from white card blended with Frayed Burlap Distress ink.

Sara Emily Barker http://sarascloset1.blogspot.com/ Free to Fly With 3D Embossing 4

 The butterfly is from the Botanical Layers pack, and I colored it with a splatter of gesso, a spritz of Brushed Pewter stain, followed by Antique Linen Distress Oxide. I edged with Frayed Burlap crayon.

Sara Emily Barker http://sarascloset1.blogspot.com/ Free to Fly With 3D Embossing 5

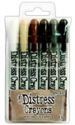
I made a frame using Stitched Ovals Thinlits dies. I smudged on Picket Fence crayon and spritzed with Brushed Pewter. Again, I applied a thin layer of Crazing, and when dry, smudged with Black Soot crayon. I did the same thing to the black backing card.

Sara Emily Barker http://sarascloset1.blogspot.com/ Free to Fly With 3D Embossing 6

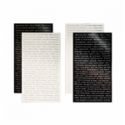
I finished off with a Quotations Metallic Sticker blended with Frayed Burlap ink. I hope you enjoyed my mix of 'metal and wood'. Thank you for stopping by!

Hugs and Blessings!
Sara Emily

The products I used can be found at The Funkie Junkie Boutique:

Tuesday, July 10, 2018

You Already Know Too Much Wall Hanging

Sara Emily Barker http://sarascloset1.blogspot.com/ You Already Know Too Much Wall Hanging #timholtz #ideaology #baseboardframes #stampersanonymous 1

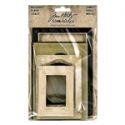
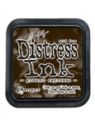
Hello, friends! I've had some more fun playing around with Tim Holtz Baseboard Frames and Worn Wallpaper. This time, I've created a wall hanging for my BFF, because she really already does know too much. Ha! Ha! For even more ideas on how to create with these wonderful frames, please see my tutorial at Frilly and Funkie.

How do you like my new hankie? I picked it up at a yard sale in a bag FULL of doilies for just 50 cents this weekend, and I haven't had time to iron it. It's REAL silk! Squeal!

Sara Emily Barker http://sarascloset1.blogspot.com/ You Already Know Too Much Wall Hanging #timholtz #ideaology #baseboardframes #stampersanonymous 2

Sara Emily Barker http://sarascloset1.blogspot.com/ You Already Know Too Much Wall Hanging #timholtz #ideaology #baseboardframes #stampersanonymous 3

Sara Emily Barker http://sarascloset1.blogspot.com/ You Already Know Too Much Wall Hanging #timholtz #ideaology #baseboardframes #stampersanonymous 4

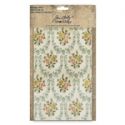
I sprayed my Worn Wallpaper with Distress Resist Spray in my box reserved just for this, so it doesn't get all over everything. Once it's on, it's on for good! When dry, I blended with  Frayed Burlap Distress ink and adhered it to a Vignette Frame backing panel using Distress Collage Medium Matte. I used the actual frame on this wall hanging, so I had this panel left in my stash.  The edges were wrapped to give it a finished look and then blended with Ground Espresso ink. I love the additional vintage appearance the spray gives the wallpaper, and the texture feels wonderful, too.

Sara Emily Barker http://sarascloset1.blogspot.com/ You Already Know Too Much Wall Hanging #timholtz #ideaology #baseboardframes #stampersanonymous 5

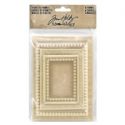
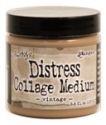
The shabby crackle on the Baseboard frame resulted from some experiments I was doing with Distress Collage Medium Crazing, crayons, and collage medium. First, I applied crazing in random thicknesses on the frame. After I came back to it a few days later, I scribbled it with Picket Fence Distress Crayon and rubbed it around with my dampened finger. This worked on my previous experiment, but this time some of the crazing started to flake off. I think I put it on too thickly. The white was too white, so I toned it down and sealed the crazing with Vintage collage medium. I like how it turned out!

Sara Emily Barker http://sarascloset1.blogspot.com/ You Already Know Too Much Wall Hanging #timholtz #ideaology #baseboardframes #stampersanonymous 6

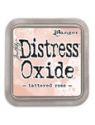
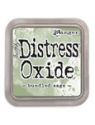
To back the frame, I used my favorite mini stencil -- Floral and texture paste and colored with Antique Linen, Tattered Rose, and Bundled Sage Distress Oxides. My chosen Paper Doll girlfriends, a ribbon from Adornments Ribbons and Bows smudged with Picket Fence crayon, some Elements Remnant Rubs and a Snarky Small Talk sticker finish it off.

Sara Emily Barker http://sarascloset1.blogspot.com/ You Already Know Too Much Wall Hanging #timholtz #ideaology #baseboardframes #stampersanonymous 7

I hope you enjoyed this post and that you found some tips you can use on your own project. 

Thank you for stopping by and for leaving your inspiring comments!
Hugs!
Sara Emily

These products were used and are available at The Funkie Junkie Boutique: