Thursday, February 26, 2015

A Vintage Birthday

Hello everyone!  I'm happy to be back from Frantic Crafter land...one project I had been working on for a few weeks did not make it to be entered into Frilly and Funkie's "Winter Blooms" as planned due to our relatively short 8 hour power outage, but I'm back in time to post my vintage birthday book/box I created for A Vintage Journey for my Guest Creative Guide spot.

 I am thrilled, but mostly honored to be chosen a second time to join the extremely talented Creative Guides this time on their vintage journey called "Special Numbers". Please stop over there to see all the wonderfully vintage makes by the hugely talented group of artists.  You will be so happy you did! Here is the box I altered to celebrate a friend's special milestone.


Let's get started!  I was so happy that Brenda chose the theme "Special Numbers".  Not long after I found out the theme, I received an invitation to an elderly friend's 90th birthday luncheon, and I knew those special numbers must include a 90!  Tim's got us covered when it comes to numbers, so I had no problem finding all the special numbers I needed for this book/box I made for Martha.  There are some other important dates and numbers in her long, fulfilling life that I wanted to include in some way on this project, as well.

I started with this box I picked up awhile ago at a yardsale.  Pretty, but kind of humdrum from the texture point of view in my opinion and some of  the elements were a little too cute for what I had in mind, so I gave it a good coat of gesso and started from scratch.


I did leave the inside pretty much alone, with the exception of toning down the greenish check with a little more gesso and painting the edges to match the cover.


Starting with the background, I've chosen a few techniques perfected by Tim including:
Paint Marbling

Spritz and Flick

A variation of Faded Layers

Effect Powders

Layering Stencil: Texture Paste

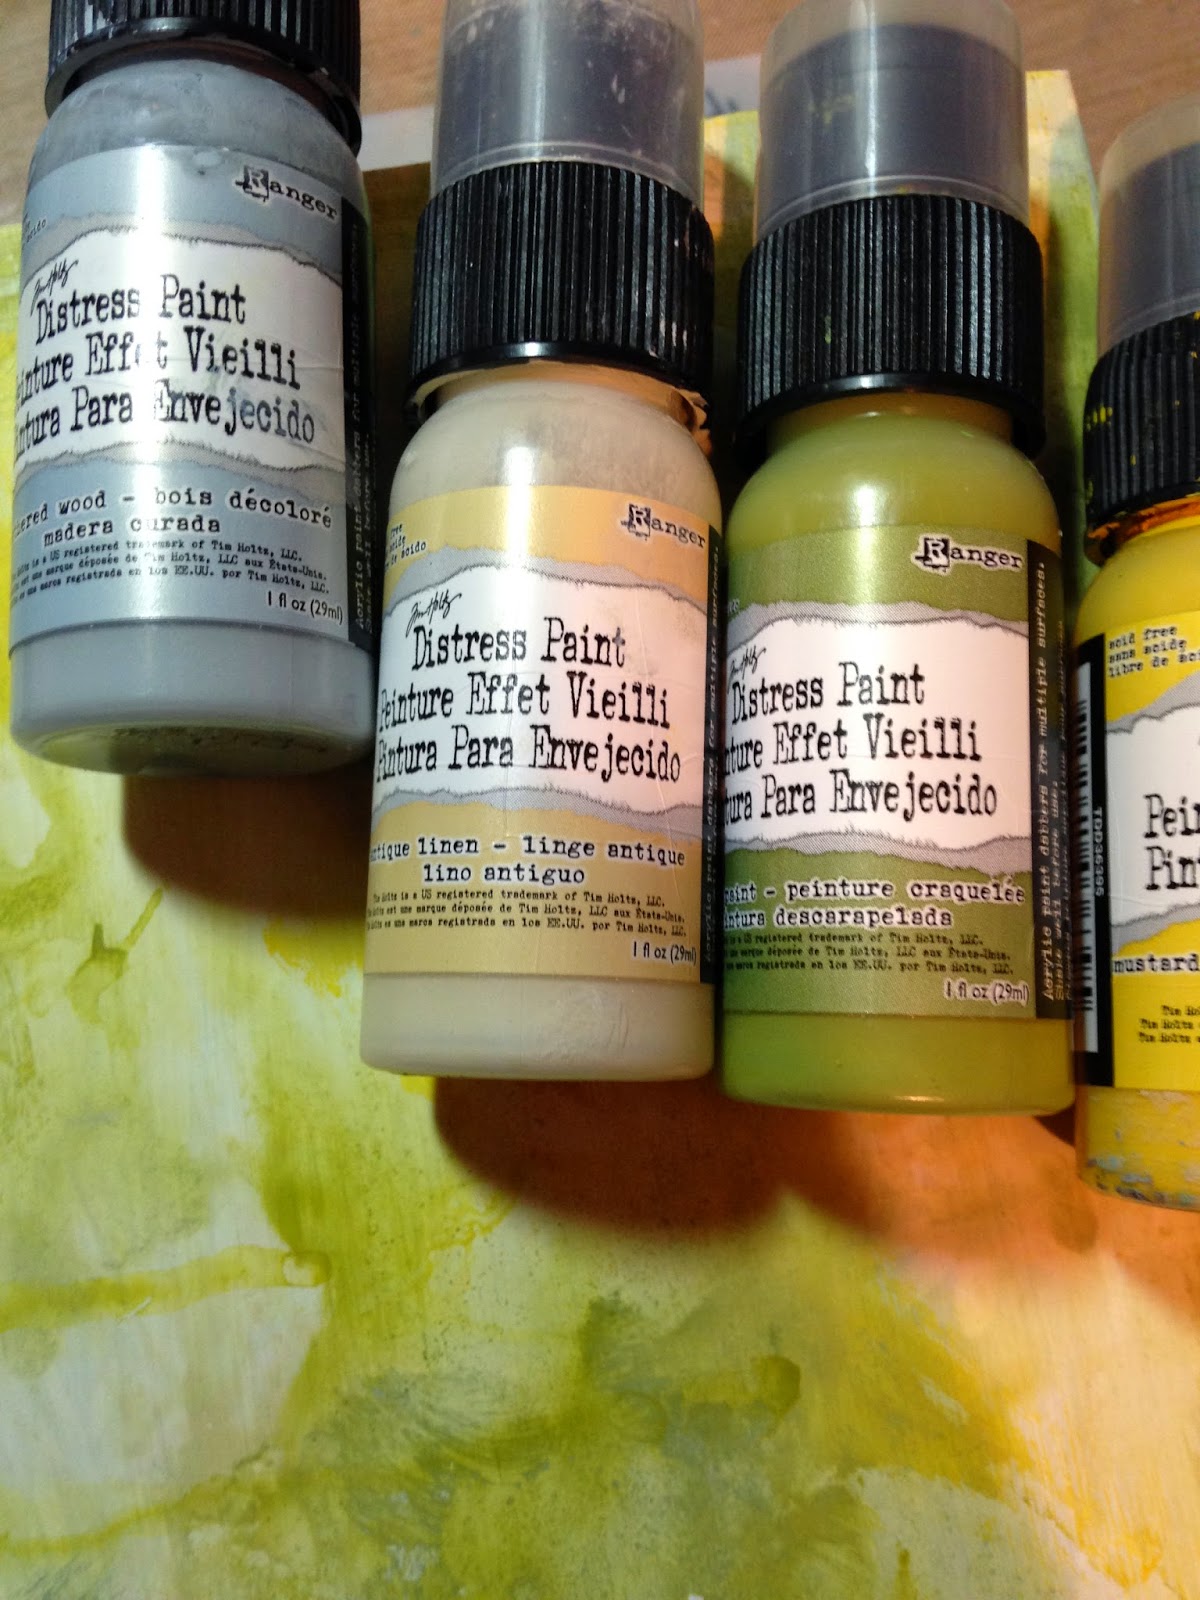
To cover the edges and make them look like pages, I used several Distress Paints and a dry brush.


I left the back cover fairly bare except for some painting, stenciling, and a little sentiment from Tim's Rub on collection.  My plan is to make a little bio with a photo of Martha for the back like you would find on a novel.  I think she may not approve of me publishing this, so you will not get to see it.  I also wanted this surface to be flat as the book is meant to sit on a table.


Next up, the spine.  I used Tim's Crocodile Layering stencil and then muted it with some more Distress paints and added my embellishments to represent the states Martha has lived in, a title (Simple Sayings), and of course, her commendable age. I used a string swiped through Distress paint as a makeshift stamp to make the lines on the spine to make it look like an old volume.


Now for the cover.  Of course, all the painting, swiping, texture pasting, etc. had already been done.  I hated to cover up that beautiful background, and other than the few photos above with the paint, I didn't get an in progress shot.  I added some paper from Tim's Wallflower stash and distressed it. I used a Distress marker with Tim's Marker Spritzer for random splatters.

I used my new Flourish Layering stencil I won on Tim's random draw and some crackle texture paste.

I added a few pieces of ephemera from Tim's Thrift Shop and Expedition packs.  This railroad ticket was a good way for me to get Martha's date of birth on here with the help of a game piece sticker. I was able to circle the month and date she was born.  Isn't Tim so clever to include this piece of ephemera in his pack?  It sold me! There's a Flash card with the number 3 with a bit of musical note Tissue Tape to give a nod to the singing trio Martha traveled with. "Good Times" is from my new for this project Framed Alpha Parts collection, and I've given it a variation of Tim's Altered Surfaces technique--no shine wanted on this one!

I

I've used a few of Tim's dies to make this little collection of framed flowers and foliage .  The Ornate Frame is cut from Grunge board and painted with Distress paints and Rock Candy Crackle Paint with some Vintage Photo ink rubbed in the cracks. The foliage is cut from Distress Color ore card stock and the Spring Greenery die. The butterfly (and the yellow one) are from the ephemera pack (Thrift Shop) and colored with Distress inks.


I made my flowers using the Tattered Florals Bigz die and used stains and inks to color them.  I added the micro beads to the roses just for fun, and the center of the blue flower is made from  a sunburst punch  and paper from my stash.  (The only 2 non-Tim things on this entire project except for the box are the beads and flower center.)

The 19 game piece sticker was scratched up a bit and made to look a little grungier with Distress paint.  I popped it up using several layers of grunge board.


I made my bow and closure ribbon from Tim's Crinkle ribbon colored with  Picket Fence paint (or was it stain?) and Squeezed Lemonade Distress ink on my mat, misted with water (I don't have any stain in SL). I love the crinkle ribbon, and although I've been known to use my huge cache of vintage seam binding for bows, this stuff is hands down the best for color absorption and shaping! 


Isn't that ribbon yummy?


That's all for today!  I hope you enjoyed seeing my process as much as I've enjoyed making this!  I have to say I love Tim's products, and they sure did a great job of covering up this somewhat ordinary box.  This will be presented to Martha at her luncheon hopefully filled with notes from her friends who may have had the misfortune of missing this special party.


Thank you for stopping by and persevering through this lengthy post.  Please be sure to stop by A Vintage Journey for all the other special numbers by the Creative Guides. I appreciate all your sweet comments, and read and reply to each and every one. Hugs and Blessings! 

Sara Emily

I would like to enter this into the following inspirational challenges:

The Mirror Cracked Challenge #6 "Album or Journal Cover" I would consider this an album of sorts, where my friend can put treasured memories of all kinds.

Artist Trading Post Exchange "Alphabet Soup" There is an option of numbers, and I've used numbers on my project.

Country View Challenges "Drips and Drops" I've got lot's of drips and drops on my background.


As You Like It "Favorite Anything but a Card"  Boxes are a favorite of mine, and I like to alter them for gifts and storage.

Simon Says Stamp Monday Challenge "No Rules" I love a little No Rules challenge!

Inspiration Journal "Love is in the Air"  I love a good altered box, and more than that, I love giving a gift I know will be loved by the recipient! And I love Tim Holtz products, old and new!

12 Tags of 2015--February

Finally, I've been able to finish my February tag for Tim's 2015 round of tags.


 I have had my fill of Valentine's cards and such, so I decided to make a little birthday tribute for a special birthday--mine!  I pretty much followed Tim's tag, but I fell short on a few of his products this time.  I changed around the ephemera; I used both Thrift Shop and Expedition and also used some things from his paper stashes. Destinations, Lost and Found and Crowded Attic are the ones I "shopped" from for my collage. I was looking for significant numbers, since this fortnight's theme at A Vintage Journey is "Special Numbers". My inspiration for this comes directly from the Master himself, and if you would like to know how it's done, may I suggest you visit Tim's blog for very clear instructions.


Instead of the felt heart cut with his die --I don't have either-- I cut two hearts free hand out of Tim's Eclectic Elements fabric, sewed them up and stuffed them. Then I did a little Frayed Fabric on it. Yes, I started this before Valentine's Day so I was pretty gung ho about using a heart!  But I do love butterflies, so I decided to use it anyway as a pincushion to hold my little butterfly from Crowded Attic. I also chose to use the large Industrious sticker frame due to the size of my heart.


I used an Idea-ology game piece with you guessed it...my age!  I altered it with a little Distress paint and alcohol inks.  Instead of the heart charm (don't have), I made a little Fragments charm using part of a word from one of Tim's sentiments inked in Archival cobalt on white card stock.  I aged it some with alcohol inks and Picket Fence Distress paint. In place of lace, I used some of Tim's trimmings with a zig zag stitch (Seamless Experience) stamped in black Archival. (My sewing machine was indisposed at this point.)


I love Tim's crinkle ribbon; it colors up so nicely using any of his Distress products.  This time I used stain (Stormy Sky) and paint (Picket Fence) to get this lovely mottled blue shade. My cat likes it, too!


Roger's reaching in to get a feel of the ribbon.


Well, that's it for this month's tag. I hope you all have a wonderful weekend, and I appreciate you stopping by .  I read and appreciate each one of your comments, and reply to all of them.  Hugs and blessings!

Sara Emily

I would like to enter this into the following inspirational challenges:

Tim Holtz 12 Tags of 2015--February

A Vintage Journey "Special Numbers"l

Artist Trading Post Exchange "Alphabet Soup" (Numbers are an option, and I have used many numbers on this, other than just the obvious one for my age.)

The Mixed Media Card Challenge #8 "Love"


Tuesday, February 24, 2015

Happy Anniversary, Kathy!

Hello everyone!  I will preface this post with an apology for any typo errors that you may see!  I'm changing my name to the Frantic Crafter today, because we are having an icy day with freezing rain, despite the fact that it is 28 degrees!  Ice here always means loss of power, and who knows when it will come back on!  So I'm trying to use my power while I have it!

I made this card for my friend, Kathy, who is coming up on her one year anniversary of opening her art store here in town.  It's been a rough, but exciting year for her, full of firsts and ups and downs.  I wanted to make her a wall hanging to celebrate getting through that first year.  I was inspired by a few of my favorite challenge blogs in making this-- the uber-talented Brenda over at A Vintage Journey  is hosting a "Special Numbers" challenge this fortnight, so in addition to the obvious "one" for the anniversary, I've tried to incorporate a few more of Tim's numeral products.  And he has quite an arsenal!  If you need to mark a special occasion, Tim has you covered!


The Alphabet Soup challenge over at Artist Trading Post is to use letters (or numbers as an option) when you create your mixed media masterpiece. I might not have gone to the degree that they are looking for, but it seems like a fun challenge anyway!


One of my favorite challenge blogs is Linda Ledbetter's  Compendium of Curiosities 3 Challenge where she guides us to page 62 of our Hymnals-- I mean,  Tim's book A Compendium of Curiosities Vol. 3.  There we find that Tim has produced yet another amazing tool--the Dimensional Cutting pad, and he gives us tips on how to use it!  My, I did not realized how versatile this cutting pad is!  I must have tried it with every one of my Tim dies that it looked like it would work with, and some that didn't!  My recycle pile is growing quite high!  If you want to join in the fun, make sure to visit each of the Crew's inspiring blogs and leave them some love, because they certainly deserve it!  And if you are into winning some goodies supplied by Tim and Mario, or would like to be a lucky winner of a very generous $25 shopping spree to the Funkie Junkie Boutique donated by the fabulous and really nice owner Linda Coughlin, be sure to link up your entry. You will be rewarded with an awesome assortment  of Tim's goodies  if you are picked as the Curiosity Crew's Choice or if you are the lucky draw, you will get to go shopping compliments of Linda! This is a win-win challenge any way you go, because even if you don't bring home the goodies, you will get to try something NEW and fun!  That's what it's really all about, anyway, right? You will need to have your own copy of  Tim's book to work from, and you can get it  here, signed by the craftmaster himself.

So let's get started, before we run out of time!  I used my favorite Tim Bigz die that comes with it's companion Texture Fade and the Dimension cutting pad, following Tim's instructions.  Lots of Distress inks, stains and paint to color the background, spritz and flick with water, my one and only Distress ink spray, some stamping with Tim's stamps (more numbers!), texture paste and stencils (TCW and Dylusions) and more stamping (see the dots with the tiny numbers?) ink and paint to tie it all together.


 I cut an extra butterfly, and finagled that in there, too. I used Tim's clockwork Texture Fade on that one, some ink and spritz and flick, and tucked it behind the top layer. I chose to use clocks to represent the time that, for me, has flown by since Kathy first hung her shingle.


I used some watercolor paper,  the numbers stamp from the new Perspective set, and more ink for what's under the wings. Notice the colors go from dark to light, signifying there are better days ahead for my friend's business, peeling away the dark layers to reveal  bright days ahead.


I used some glue dots to keep the wings lifted, and yes, I inked the back of the wings, too!


These numbers are repeated several times around the background, but I forgot to get a shot of them.

 My only embellishments are Tim's Framed Alpha Parts altered using his  Altered Surfaces technique from the same book.  The arrow makes a fine butterfly body and points up, because I want Kathy to know that things are looking up.  The "one" embellishment was tied on with vintage string.


That's it for now! Thank you for stopping by and leaving your wonderful comments.  They make me smile! I read and appreciate every single one of them, and eventually respond to every one. Hugs!

Sara Emily

I would like to enter this in the following inspirational challenges:

Linda Ledbetter's Studios L3 Compendium of Curiosities 3 Challenge #22 "Another Dimension--Dimensional Cutting Pad"

A Vintage Journey "Special Numbers" I'm inspired by Tim's techniques from his book and in all his different products used here.

Artist Trading Post Exchange "Alphabet Soup"

Inspiration Journal "Love is in the Air" I love my butterflies, and they are usually found in the air!

Simon Says Stamp Monday Challenge "No Rules!" I'm not going to pass up an opportunity to create without rules!

Craft Stamper Take It, Make It February Challenge "Stencilling" I've used 3 stencils on this with paste, then ink and stamping through the stencil.

Simon Says Stamp Wednesday Challenge "Add a Little Texture"

Open Minded Crafting Challenge #30 "Up In the Air"


Monday, February 23, 2015

Countdown to Spring

Hello, everybody!  It seems like it's been a while since I've posted, but rest assured, I have been working and playing in my Closet!  My projects have just been a little more time consuming. I have a wall hanging here for you today. When I saw that Frilly and Funkie was having a "Winter Blooms" challenge all sorts of ideas came to mind to make winter flowers--but that means camellias and pansies  to me, neither of which I know how to make--yet!


 My wall hanging was partially inspired by my friend, Kathy's store--it is her dream, and she is living her dream with passion.  There is a colorful sign out front; it is a chalkboard with a countdown of the number of days left until spring, and each day she updates it and it brings her that much closer to spring. So I thought why not make spring flowers in anticipation of this glorious season.

 Of course, my other inspiration comes from Tim Holtz' techniques and his versatile products.  I'm very excited to see the fresh, light- hearted new line of goodies he has turned out for us.  This butterfly is one of his new stamps from the Perspective set, and I''m seeing so many possibilities for it. I LOVE the butterfly!

If you REALLY  use your imagination you can see the sparkle from the Rock Candy Distress Glitter.  Need sunlight to pick that up with the camera, and we just weren't having any of that today!

A Vintage Journey  would like to see us include special numbers on our project this time. I stamped some random and subtle numbers with my new stamp (part of the Perspective set) to signify the countdown toward spring.  A few "figure" numbers to add some interest, and even some numbers stamped on one of my flowers! Not a lot; just enough to get my countdown point across.

Some subtle numbers in the corner.
                                               

Some subtle numerology can be seen under the leaves.

I started with water color paper, Distress stains and water. I still don't have the sprays yet, so I made my puddle and dragged and dipped my paper to get this gorgeous background. I held the paper just so to get some yummy drips, and spritz and flicked to get some drops. The drips were added special for Country View's challenge this month, but the drops were just for me! I watercolor stamped a few butterflies and then rolled on the accompanying numbers stamp randomly (remember the countdown to spring). When completely dry I gave a spritz with Perfect Pearls mist for some shimmer.  I used Tim's Rock Candy Distress Glitter technique with a few of the butterflies. The sentiment is from the same set, inked in Cobalt Archival. I added another Tim Holtz stamp from his Bird Feather set and a bee (Little Things--Tim Holtz) stamped on tissue in black archival.  I used gel medium to adhere and was able to get my bee to head in a different direction using this technique.  I colored him with Distress markers and blended him in with a tiny bit of Picket Fence Distress paint on a baby wipe. To finish the background, I used a Heidi Swapp stencil and Distress ink to make a trellis along the left edge, and used Picket Fence Distress Paint and the stencil to do the monoprint on the right edge, but neither is barely visible with all the flowers I've added!

 I celebrate the day they made Distress stains!  What beautiful backgrounds they make!

Some of the mono printing done with a stencil can be seen above the bee.

I mounted the water color background to a piece of white card stock adorned with ink and a Recollections trellis-like stencil and given the spritz and flick for those wonderful droplets. This was mounted to a piece of foam board.
Some of the droplet s can be seen along the left edge and some of the trellis stenciling on the card stock edge and on the water color background under the foliage.

Next came the flowers, all made with Tim's Tattered Florals Bigz die and Tatterered Floral Garland die. The yellow roses were colored with Dylusions spray and Distress ink, and after assembled and dried given a little swipe of Picket Fence Distress Paint.  The Daisy looking flower amongst the roses is made from the Bigz die and several punches from a sunburst punch for the center.  This paper was colored with Glimmer Mist. The two blue flowers on the right were made using the TF Garland die and Distress stain.  The smaller one was stamped with script from  Tim's Attic Treasures set.  I chose this image because it has numbers on it, but they are not obvious when you look at the flower--I know the numbers are there! I made the stamen out of thread and embossing powder. The greenery is cut from Tim's Springtime Greenery die and shaded using Distress stain.


More numbers on this flower, but upside down!


This was so much fun to make while I enjoyed a nice warm day indoors while we had a cold, wet day outdoors.  It really is a countdown to spring! I couldn't resist a few similar shots with different lighting! I felt like different light flattered different elements on this and found it hard to pick one favorite shot.


Thank you for stopping by and leaving your lovely comments.  I read, appreciate and comment on every one of them.  I'll be back at the end of the week with another breath of spring! Hugs and blessings!

Sara Emily

I would like to enter this into the following inspirational challenges:

Frilly and Funkie "Winter Blooms"

A Vintage Journey "Special Numbers" My numbers represent a countdown to spring.


Country View Challenges "Drips and Drops"

Artist Trading Post "Alphabet Soup" I used numbers (an option for this challenge) to represent a countdown to spring.

Artistic Stamper February's Creative Challenge "Love" I LOVE butterflies and I'm in love with my new Tim Holtz Perspective stamp set!

Inspiration Journal "Love is in the Air"  I'm in love with Tim's new Perspective stamps and I love butterflies!

Simon Says Stamp Monday Challenge "No Rules" Now I like anything without rules!

Craft Stamper February Challenge "Stencilling" I used 2 stencils with ink and paint, regular stencilling and monoprinting.

Simon Says Stamp Wednesday Challenge "Add a Little Texture" I love texture, both one dimensional "visual" texture and 3 dimensional "tactile' texture and I've included both.

Open Minded Crafting Challenge #30 "Up in the Air" How could I not enter in a challenge blog called "Open Minded"?!


.