Tuesday, August 28, 2018

Sweetly Creepy Halloween Party Favors

Sara Emily Barker http://sarascloset1.blogspot.com/ Sweetly Creepy Halloween Party Favors with Tim Holtz 3D Embossing Stampers Anonymous Entomology 1

H1! I had my first play with Tim Holtz Burst Impresslits 3D Embossing Folder a couple of weeks ago, and I was undecided on how I would use the bursts I created. Then my long wished-for Entomology stamps and Gift Card Bag dies arrived, and I was in the business of making some Halloween party favors.

Sara Emily Barker http://sarascloset1.blogspot.com/ Sweetly Creepy Halloween Party Favors with Tim Holtz 3D Embossing Stampers Anonymous Entomology 2

I die cut the gift card bags out of Distress Mixed Media Heavystock and blended them with Antique Linen Distress Oxide, Frayed Burlap, Hickory Smoke, and Ground Espresso Distress inks. I watered down and splattered on some of the inks left on my craft mat using my Splatter Brush. I later did the same with Black Soot Distress Crayon I had left on my mat.

Sara Emily Barker http://sarascloset1.blogspot.com/ Sweetly Creepy Halloween Party Favors with Tim Holtz 3D Embossing Stampers Anonymous Entomology 3

Sara Emily Barker http://sarascloset1.blogspot.com/ Sweetly Creepy Halloween Party Favors with Tim Holtz 3D Embossing Stampers Anonymous Entomology 4

I stamped the script and a few of the bugs from the Entomology set in Black Soot ink on both of what will be the front and the backs of the envelopes. The pockets were assembled and glued with Distress Collage Medium Matte. I love the detailing on the stamps, but these creepy insects look a little too realistic for my comfort. It's a little disconcerting to see those bugs squeezing their way out between the seams of the bag, isn't it?

Sara Emily Barker http://sarascloset1.blogspot.com/ Sweetly Creepy Halloween Party Favors with Tim Holtz 3D Embossing Stampers Anonymous Entomology 5

Each of the bursts are made a little differently from each other. I used the de-bossed side of one, just to see how it would turn out. Each was colored and textured with Antique Linen oxide, Black Soot crayon, and Distress Crazing; I just varied the order of application, so they look a bit different. I love to experiment with my products, but really need to keep better records. To top off the Bursts, I cut the ring portion off some cheapo dollar store spider rings.

Sara Emily Barker http://sarascloset1.blogspot.com/ Sweetly Creepy Halloween Party Favors with Tim Holtz 3D Embossing Stampers Anonymous Entomology 6

Cheesecloth is left over from a previous Halloween, but I distinctly recall spritzing it with Hickory Smoke and Wilted Violet Distress Spray Stains. My hands were stained for days!

Sara Emily Barker http://sarascloset1.blogspot.com/ Sweetly Creepy Halloween Party Favors with Tim Holtz 3D Embossing Stampers Anonymous Entomology 7

Sara Emily Barker http://sarascloset1.blogspot.com/ Sweetly Creepy Halloween Party Favors with Tim Holtz 3D Embossing Stampers Anonymous Entomology 8

I sprayed a length of twine in the same color to tie on the Halloween Typed Tokens.  The tokens were given their spooky look with Mushroom Alcohol ink and Black Soot crayon.  Everything was glued down with the collage medium--my go-to glue for adhering everything from paper to metal.

Sara Emily Barker http://sarascloset1.blogspot.com/ Sweetly Creepy Halloween Party Favors with Tim Holtz 3D Embossing Stampers Anonymous Entomology 9


And my favorite treat fits perfectly inside. I hope I've inspired you in some way! I can't wait to see what you're creating for Halloween! Thank you for your visit and kind comments!

Hugs and Blessings!
Sara Emily


Monday, August 27, 2018

Beauty in Simplicity

Sara Emily Barker http://sarascloset1.blogspot.com/ 3D Embossed Metallic card and tutorial Tim Holtz Sizzix Alterations Stampers Anonymous 1

Hello friends! I'm still having so much fun playing with my Tim Holtz Botanical 3D Texture Fade, and seeing just how versatile it is! This time, I've given my card a clean modern vibe using Tim Holtz Ideaology Metallic Kraft Stock as the base.

Sara Emily Barker http://sarascloset1.blogspot.com/ 3D Embossed Metallic card and tutorial Tim Holtz Sizzix Alterations Stampers Anonymous 2

To get one continuous pattern on this extra long card, I ran the 8 by 3.75 inch panel through my die cut machine with the Botanical folder, embossing the top portion of the card.  I removed the card from the folder and simply flipped it around to emboss the opposite end, using the same portion of the folder as I did the first pass.  I emboss it only to where the first pass finished. You'll notice there's a line there, but it will be covered up. And the flower is pointing upward as opposed to the downward facing ones on the top portion. This folder was so cleverly designed it works so nicely from either direction.

Sara Emily Barker http://sarascloset1.blogspot.com/ 3D Embossed Metallic card and tutorial Tim Holtz Sizzix Alterations Stampers Anonymous 3

I sanded the panel and colored it with some shades of green and blue inks which almost disappear on the metal.

Sara Emily Barker http://sarascloset1.blogspot.com/ 3D Embossed Metallic card and tutorial Tim Holtz Sizzix Alterations Stampers Anonymous 4

I applied clear crackle paste and allowed it to dry overnight. You can see how the paste really brings the color to life. To add some contrast, I swiped the embossed blossoms with metallic wax, using the lightest touch.  I think you could achieve similar results with Distress Crazing Medium and Distress Metallic Crayons, but the wax was out, and I'm fresh out of Crazing.

Sara Emily Barker http://sarascloset1.blogspot.com/ 3D Embossed Metallic card and tutorial Tim Holtz Sizzix Alterations Stampers Anonymous 5

I colored a Garden Greens die cut, a length of Crinkle Ribbon,  a trio of Bouquet Findings, and a flower from my stash using coordinating inks.

Sara Emily Barker http://sarascloset1.blogspot.com/ 3D Embossed Metallic card and tutorial Tim Holtz Sizzix Alterations Stampers Anonymous 6

The sentiment is from Tim's newly released Nature's Wonder set. I embossed it on a scrap of the metallic kraft stock with embossing ink and Ranger black embossing powder, using my Stamp Platform to make the impression. I cut it from the card using the label die from Stitched Slots. If you missed how I used those gorgeous leaves and another of those wonderful sentiments from Nature's Wonder you can view my post here.

Sara Emily Barker http://sarascloset1.blogspot.com/ 3D Embossed Metallic card and tutorial Tim Holtz Sizzix Alterations Stampers Anonymous 7

Sara Emily Barker http://sarascloset1.blogspot.com/ 3D Embossed Metallic card and tutorial Tim Holtz Sizzix Alterations Stampers Anonymous 8

Sara Emily Barker http://sarascloset1.blogspot.com/ 3D Embossed Metallic card and tutorial Tim Holtz Sizzix Alterations Stampers Anonymous 9

I sanded an old sandable card stock (also by Tim Holtz) from my stash to layer my card onto. I adhered it with Distress Collage Medium Matte and also used the collage medium to adhere my assembled elements. Although this card is so simply designed, I think it packs a lot of drama from the amazing 3D embossing and metallic card.

Sara Emily Barker http://sarascloset1.blogspot.com/ 3D Embossed Metallic card and tutorial Tim Holtz Sizzix Alterations Stampers Anonymous 10

That's all for me today! As always, I am so grateful for your time spent here and for your lovely comments!

Hugs and Blessings!
Sara Emily


Saturday, August 25, 2018

Go Where You Feel Most Alive -- Playing With Wendy Vecchi's Make Art Blendable Dye Inks


Hello friends and visitors! Today I'm sharing a tutorial at Frilly and Funkie for our weekly Saturday Showcase feature. I'll be shining the spotlight on Wendy Vecchi's Make Art Blendable Dye inks and sharing my techniques for making this gorgeous background and these life like leaves and bark. I hope you'll join me there!

As always, I'm thrilled you are here! Thank you for all your amazing comments! They make my day!

Hugs and Blessings!
Sara Emily

Challenge Shares
Country View Challenges August 2018 - Sun, Sea and Sand This is reminiscent of and inspired by my recent hiking 'holiday' to Capon Springs, WVa. In fact, the bracket fungus was harvested from a dead tree found on one of our hikes.
SumMore Fun Mood Board Challenge #35 I was inspired by the colors and the tiles.
Scrapy Land Challenge #96 Anything Goes  I used a Sizzix die set.


Wednesday, August 22, 2018

Field Notes -- An Expanding Mini Journal


Sara Emily Barker http://sarascloset1.blogspot.com/ Field Notes Mini Album 3D Texture Fade Lumber 1

Welcome! Today is the start of the second week of our two week challenge at Frilly and Funkie, and that means the Funkie side of the team gets to inspire you with their creations.  I am privileged to host the current challenge titled 'Back to Nature'. I hope you'll pop over to the blog to see all the amazing inspiration by both the Frilly and Funkie Design Team members.

Here's the brief:  Having just returned from our annual trek to the mountains of West Virginia where we observed so much natural beauty on our hikes, I couldn't help but make my challenge nature themed. You can make anything you like, from a card or tag to altered art, just be sure to include a natural element in your vintage or shabby chic project. Think real twigs, leaves, shells, pebbles. Or you could include a die cut or a stamped or stenciled image representing a natural object.

Sara Emily Barker http://sarascloset1.blogspot.com/ Field Notes Mini Album 3D Texture Fade Lumber 2

Sara Emily Barker http://sarascloset1.blogspot.com/ Field Notes Mini Album 3D Texture Fade Lumber 3

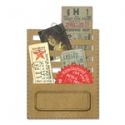
For my project, I decided to make an expanding pocket album, inspired by this tutorial by Sheila. Her samples are so neat and precise! She uses purchased coin envelopes but I made a template to cut mine. I also adjusted her measurements to fit my needs. Otherwise,  I just copied her album, putting my natural spin on it.

The Cover

Sara Emily Barker http://sarascloset1.blogspot.com/ Field Notes Mini Album 3D Texture Fade Lumber 4

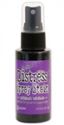
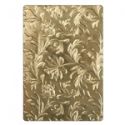
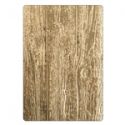
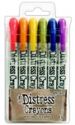
To make the cover, I cut a length of manila file folder to the length and width I needed and embossed with Lumber 3D Texture Fade. I had to do some strategic folding of the card to get one continuous strip of wood grain. I layered Distress crazing, paint, crayons, and oxides until I was satisfied with the texture and color.

Sara Emily Barker http://sarascloset1.blogspot.com/ Field Notes Mini Album 3D Texture Fade Lumber 5

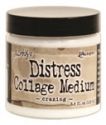
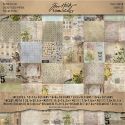
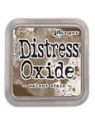
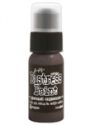
I colored the inside of the embossed piece with Ground Espresso and Weathered Wood paint. I cut my chipboard pieces to my desired size and covered them with paper from Wallflower paper stash. The panel's edges were blended with Ground Espresso ink. I adhered them to the prepared 'bark' strip using collage medium. I left about 1/8 inch between the individual panels so the box would fold properly. Lastly, I scored between each of the panels. I adhered magnets to the inside flap and front panel. These were not the best magnets to use; too thick to put under the paper, and they don't have the best grab. But they were the best I could get locally.

Sara Emily Barker http://sarascloset1.blogspot.com/ Field Notes Mini Album 3D Texture Fade Lumber 6

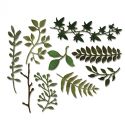
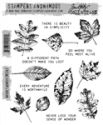
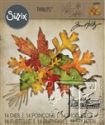
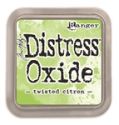
I used some die cut Fall Foliage leaves along with a twig tied with twine, mica chips and pebbles from my stash to decorate the flap. I cut the leaves from card I coated with DecoArt crackle paint and colored them with  Peeled Paint Distress Crayon and Twisted Citron oxide ink.

Sara Emily Barker http://sarascloset1.blogspot.com/ Field Notes Mini Album 3D Texture Fade Lumber 7

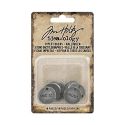
 The Quote chip serves as my title,  sanded and inked with Frayed Burlap and Ground Espresso.
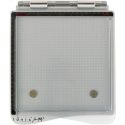
The Pockets

Sara Emily Barker http://sarascloset1.blogspot.com/ Field Notes Mini Album 3D Texture Fade Lumber 8


I made a coin envelope template using the one I made for my 
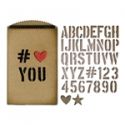
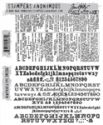
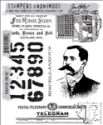
Vintage Mail Folio, just reducing it in size. I traced and cut 7 from cream card stock and cut the top flaps off. I colored them with oxides (colors in links below) and stamped with Newsprint from Newsprint and Type set by Tim Holtz in black archival ink. Each one is edged with Frayed Burlap ink. I wasn't concerned over getting a good impression, since most of the stamping will not be seen on the finished product. Each was assembled and glued.

Sara Emily Barker http://sarascloset1.blogspot.com/ Field Notes Mini Album 3D Texture Fade Lumber 9

I applied super sticky tape to the center of the envelopes and layered them up on top of each other. I adhered the first and last envelope to the front and back cover to form an accordion mechanism out of the pockets.

The Tags

Sara Emily Barker http://sarascloset1.blogspot.com/ Field Notes Mini Album 3D Texture Fade Lumber 10

Sara Emily Barker http://sarascloset1.blogspot.com/ Field Notes Mini Album 3D Texture Fade Lumber 11

(Apologies over the color variation. My indoor photo light died, and it's going to be a couple of weeks before a replacement is shipped. Some of my photos were taken before the bulb blew.The light was fading as I took these photos outdoors. Just pretend the colors are the same in the second photo above as the first, which reflects the actual colors.)

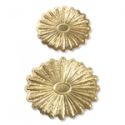
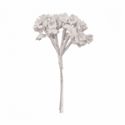
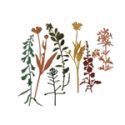
I cut more cream card to fit into the envelopes, to make removable note cards which can be taken with me to make observations when I'm hiking. I cut 9 in all to make up 7 cards. I made them just a bit longer than the pockets, so they could easily be removed. I die cut 4 different Wildflowers from the #2 set from kraft card (Autumn gave me a pile of this great card when we met and crafted at the lake last spring, and I've been hoarding it. Thank you, 
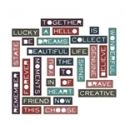
Autumn!) I die cut words into 2 of the note cards using the Mixed Media #6 and Thin Pondering Words dies.

Sara Emily Barker http://sarascloset1.blogspot.com/ Field Notes Mini Album 3D Texture Fade Lumber 12

I adhered a plain card to the back on the one reading 'Collect' and stamped 'Miscellaneous' (Purveyor) in Watering Can ink.

Sara Emily Barker http://sarascloset1.blogspot.com/ Field Notes Mini Album 3D Texture Fade Lumber 13

Sara Emily Barker http://sarascloset1.blogspot.com/ Field Notes Mini Album 3D Texture Fade Lumber 14

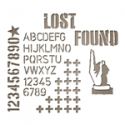
I blended Antique Linen and Walnut Stain DOX on one of the plain cards and later used that to back the 'Found' card, creating an ombre' background for the die cut letters.

Sara Emily Barker http://sarascloset1.blogspot.com/ Field Notes Mini Album 3D Texture Fade Lumber 15

Sara Emily Barker http://sarascloset1.blogspot.com/ Field Notes Mini Album 3D Texture Fade Lumber 16

I adhered a wildflower to each of the die cut cards and to two of the others.

Sara Emily Barker http://sarascloset1.blogspot.com/ Field Notes Mini Album 3D Texture Fade Lumber 17

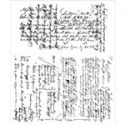
The tiniest leaves from the Fall Foliage set were cut and adhered to another card.  I dabbed a little watered down Peeled Paint Distress Crayon on them. Each card was dipped into puddles of DOX and dried until I achieved my desired effect.  This was done to each side (not photographed). I did some stamping on 5 of the panels in potting soil ink using the script from Ledger Script. I painted on a thin layer of collage medium over the front of each card to protect it and to give some additional stiffness to the card, but left the backs without any medium so I could write my field notes on them.

Sara Emily Barker http://sarascloset1.blogspot.com/ Field Notes Mini Album 3D Texture Fade Lumber 18

I hope you've picked up some 'Natural' ideas and will play along in Frilly and Funkie's current challenge, 'Back to Nature'.  As always, the Design Team will choose our four favorites from the entries, and one winner will earn the chance of a Guest Designer spot at Frilly and Funkie. If that's not enough to tempt you to play along, one lucky winner will score a generous $25 shopping spree at The Funkie Junkie Boutique. Please visit Frilly and Funkie for all the details. I hope to see you there!

Challenge shares:
Thank you for stopping by! If you have questions or comments, please leave them in the comments below.  I hope you'll join me at Frilly and Funkie this coming Saturday for our Saturday Showcase.

Hugs and Blessings!
Sara Emily

The following products were used and can be purchased at The Funkie Junkie Boutique: