Thursday, March 28, 2019

Good Stuff for Tag Friday at A Vintage Journey


Hello friends! It's that special time at A Vintage Journey when we get free crafty play to make a tag for our Tag Friday feature. 

I was inspired by how beautiful things are starting to look in our yard on these first days of spring, in spite of the hurricane damage from last September. The landscape has changed so much with many  trees missing, and the ones that remain twisted and broken. The fences that have been long overgrown with trees and shrubs are now exposed and are crumpled from the fallen trees. But new growth is emerging, and I see the beauty of God's grace and renewal.

“The steadfast love of the Lord never ceases, his mercies never come to an end; they are new every morning; great is your faithfulness.” Lam. 3:22-23


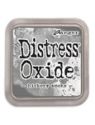
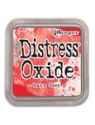
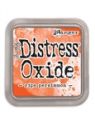
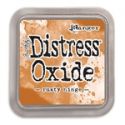
This was one of my first plays with my new Distress Oxide Sprays, and I really didn't take note of what I was doing. I used Picked Raspberry, and I'm pretty sure that's Cracked Pistachio, even though it appears blue. I like how it turned out, but I'm not a big fan of pink, so I thought of how I could make it more palatable to me with a rusty trellis and a few flicks of watery Rusty Hinge oxide ink.


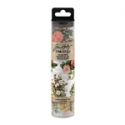
The Wildflowers Stems and Tattered Butterfly from Tim Holtz are colored with Cracked Pistachio oxide spray with a little Rusty Hinge oxide ink,  brushed straight from the ink pad or watered down and flicked on. The seam binding ribbon was a product of the leftover inks.


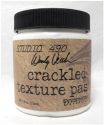
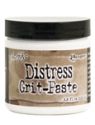
The trellis is a die cut I had in my bin that didn't quite cut right. I dabbed on some black metallic texture paste I recently picked up at Tuesday Morning, some Distress Grit Paste and a mix of embossing powders I've had sitting in the embossing powder drawer for a while. I heated all that until it bubbled, and then painted with watery DecoArt Fluid paints -- Q. Gold and Raw Umber, and a drop or two of Caramel alcohol ink. I tore the edges and painted them with Distress Black Soot paint. I brushed the trellis with Prima Sculpture medium, shaped it and allowed it to dry. No matter how I pointed my camera, I couldn't pick up on the dimension of this crumpled rusted 'fence'. I gave the same treatment to the hole reinforcer.


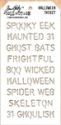
Tim Holtz' Small Talk stickers always have the perfect words.


That's it for me--just a little fun play with my new sprays and some paints. My talented fellow Creative Guides have some wonderful tag inspiration you won't want to miss on the blog. Hope to see you there! Hugs and Blessings! Sara Emily

Challenge shares:
Simon Says Stamp Monday Challenge Play With Paint The trellis and hole reinforcer were colored with paint.
Scrapy Land Challenge #110 Anything Goes I used two Sizzix dies and an old Cherry Lynn die.

Links to products used available at The Funkie Junkie Boutique:


Sunday, March 24, 2019

Tiny Easter Table Decor

Sara Emily Barker https://sarascloset1.blogspot.com/2019/03/tiny-easter-table-decor.html Easter Table Decor Tim Holtz Sizzix Wildflower Stems Springtime Side-Order 1

Hello! I've been having fun making these table decorations using Tim Holtz Wildflowers Stems Thinlits sets 1 and 2 and his Springtime Side-Order set. I started with some different pots I altered, but they seemed too dark for Easter decorations. Perhaps they'll make an appearance in the future.


I found these three cute pots in my potting shed, and I thought they would look perfect for Easter if I shabbied them up. I made them over with Ground Espresso Distress Paint and (sadly) discontinued Crackle Paint. After layering these two products on and allowing them to dry, I smeared and smudged with Distress Crayons in Frayed Burlap and Walnut Stain to highlight the cracks.

Sara Emily Barker https://sarascloset1.blogspot.com/2019/03/tiny-easter-table-decor.html Easter Table Decor Tim Holtz Sizzix Wildflower Stems Springtime Side-Order 2

I love how some of the crackle paint chipped away in places for a real shabby look. All of my springtime cuties were cut from scraps.

Sara Emily Barker https://sarascloset1.blogspot.com/2019/03/tiny-easter-table-decor.html Easter Table Decor Tim Holtz Sizzix Wildflower Stems Springtime Side-Order 3

The green/blue grass and flowers were cut from a background panel colored with Distress Oxide Sprays. All of the purple/lavender stems were water colored with Distress Markers and inks.

Sara Emily Barker https://sarascloset1.blogspot.com/2019/03/tiny-easter-table-decor.html Easter Table Decor Tim Holtz Sizzix Wildflower Stems Springtime Side-Order 4

 I added another tiny butterfly to the back so it would be pretty from any angle.

Sara Emily Barker https://sarascloset1.blogspot.com/2019/03/tiny-easter-table-decor.html Easter Table Decor Tim Holtz Sizzix Wildflower Stems Springtime Side-Order 5

Sara Emily Barker https://sarascloset1.blogspot.com/2019/03/tiny-easter-table-decor.html Easter Table Decor Tim Holtz Sizzix Wildflower Stems Springtime Side-Order 6

 The bunny is my favorite, but I guess that goes without saying since I LOVE bunnies! The grass is just the stem part of a few of the Wildflower Stems.

Sara Emily Barker https://sarascloset1.blogspot.com/2019/03/tiny-easter-table-decor.html Easter Table Decor Tim Holtz Sizzix Wildflower Stems Springtime Side-Order 7

Sara Emily Barker https://sarascloset1.blogspot.com/2019/03/tiny-easter-table-decor.html Easter Table Decor Tim Holtz Sizzix Wildflower Stems Springtime Side-Order 8

You can get an idea of how tiny these are when they are held in my hand. Excuse the nasty hands...I've been doing a lot of gardening in my real garden, too.

Sara Emily Barker https://sarascloset1.blogspot.com/2019/03/tiny-easter-table-decor.html Easter Table Decor Tim Holtz Sizzix Wildflower Stems Springtime Side-Order 9

I hope you enjoyed my little paper Easter parade as much as I enjoyed making it! I made these especially for the Miniature/Tiny Things Challenge at Simon Says Stamp Monday Challenge with my crayon smudged pots with the Tim Holtz Addicts Facebook March Challenge in mind. I hope you enjoy your Sunday! Hugs and Blessings! Sara Emily

I'm also sharing with these challenges (see two above):
Dies R Us Challenge #117 - One for the Ladies  Tim Holtz Wildflowers Stems Thinlits sets 1 and 2 and  Springtime Side-Order

Wednesday, March 20, 2019

Super Easy Tim Holtz Floral Collage Vintage Card Tutorial for Frilly and Funkie

Sara Emily Barker https://sarascloset1.blogspot.com/2019/03/super-easy-tim-holtz-floral-collage.html Vintage Card Tutorial #timholtz #idealogycollagepaper #floral #ranger #distress 1

Hello friends! It's time again for the Funkie side of the Frilly and Funkie Design Team to unveil our inspiration projects for the current challenge, Pass the Tissues, Please!, chosen by me.  I decided to make an easy card for my daughter.

Since we are still in 'cold season', I always make sure I'm stocked up on tissues in my home, in my purse and in the car. For this theme, I would like to see how you incorporate tissue paper into your vintage or shabby chic project. You can use regular tissues, tissue wrapping paper, sewing patterns or even collage paper, rice papers or tissue wrap designed especially for crafting.

I forgot to mention those tissues come in handy for pollen season, too, which has just started in our neck of the woods. Everything is yellow!

As always, the Design Team will choose their top four picks, and the winner will be invited to join us in a Guest DT spot at Frilly and Funkie. The next three will receive Top 3 badges to display on their blogs. Everyone who enters and follows the rules will be entered into the draw to have the chance to win a $25 spending spree at The Funkie Junkie Boutique.

I've prepared a mini tutorial on how I used Tim Holtz Collage paper, if you care to follow along, or you could skip down to the close up photos.


Although this is a different collage paper scrap than what I used on my project, I wanted to show how easy it is to tear just the part of the image you wish to use. I chose Tim Holtz Floral Collage Paper, because the images are so pretty and perfect for spring. I use a water pen and outline the area I want to tear out. Then pulling it gently apart with my two fingers, I use my water pen to wet just the specific area I'm pulling apart. Tearing it like this, as opposed to cutting it helps it to blend into the background. I flip the collage paper over and apply Distress Picket Fence paint to the flower images to make them stand out and prevent the background pattern from showing through.


 I used the tiniest of collage paper scraps to provide some interest to the card blank. I adhere the scrap to just the edge using Distress Collage Medium Matte and trim with scissors. Then I use my sanding block to give it a nice finished edge. Wipe any dust off, apply more collage medium over top. When the collage medium is dry, I scribble with Distress Crayon Antique Linen. I dampen my finger and spread the crayon smooth--the collage medium makes the crayon easy to spread evenly.

Sara Emily Barker https://sarascloset1.blogspot.com/2019/03/super-easy-tim-holtz-floral-collage.html Vintage Card Tutorial #timholtz #idealogycollagepaper #floral #ranger #distress 2

 In the photo above, you can see I've adhered my Collage Paper Scraps (again using collage medium under and over the tissue) to a monoprint background I had in my stash. This is left over from Halloween, and you can probably make out some spooky words from the Halloween Layering stencil. I think it just makes for an interesting pattern, and in the end you don't even notice it's letters and numbers, let alone BOO, WICKED, HALLOWEEN, FRIGHTFUL or 31! Ha! Ha!

Sara Emily Barker https://sarascloset1.blogspot.com/2019/03/super-easy-tim-holtz-floral-collage.html Vintage Card Tutorial #timholtz #idealogycollagepaper #floral #ranger #distress 3

I had this stitched heart die cut in my stash--a gift from my good friend, Autumn, and it was perfect to use as my focal point along with a watercolor paper scrap and some Prima Tissue Tape (Amber Moon).

Sara Emily Barker https://sarascloset1.blogspot.com/2019/03/super-easy-tim-holtz-floral-collage.html Vintage Card Tutorial #timholtz #idealogycollagepaper #floral #ranger #distress 4

Smudging with background with Distress Crayons adds some age/vintage-ness.

Sara Emily Barker https://sarascloset1.blogspot.com/2019/03/super-easy-tim-holtz-floral-collage.html Vintage Card Tutorial #timholtz #idealogycollagepaper #floral #ranger #distress 5

After adhering another bit of the collage paper to the heart, I gave it a coat of Distress Clear Rock Candy Crackle Paint. Antiqued Bronze Distress Crayon highlights those gorgeous cracks. I chose an Occasions Small Talk sticker for my sentiment.

Sara Emily Barker https://sarascloset1.blogspot.com/2019/03/super-easy-tim-holtz-floral-collage.html Vintage Card Tutorial #timholtz #idealogycollagepaper #floral #ranger #distress 6

It really is that simple--so why not pull out some collage, rice or tissue paper, sewing patterns or even just plain old Kleenex and play along with our challenge?  I can't wait to see what YOU will create! Thank you for stopping by! I hope you have a blessed day! Hugs! Sara Emily

Challenge shares:
These products were used and are stocked by The Funkie Junkie Boutique:


Friday, March 15, 2019

Some Bunny Loves You With Tim Holtz Distress Oxide Sprays and Geo Springtime Die

Sara Emily Barker https://sarascloset1.blogspot.com/2019/03/some-bunny-loves-you-with-tim-holtz.html Tim Holtz Geo Springtime Distress Oxide Spray Mixed Media Card 1

Hello! Today I'm sharing a card I made for my daughter. She is not a fan of the pink, nor am I,  but I think this grungy version might be acceptable. She recently acquired a lop eared rabbit named Nugget, who is the sweetest companion for her, and he is the inspiration for this card. Sometimes one of his ears sticks straight up just like this bunny. Both of my cats are afraid of the little guy, although they are at least 3 times his size!

Sara Emily Barker https://sarascloset1.blogspot.com/2019/03/some-bunny-loves-you-with-tim-holtz.html Tim Holtz Geo Springtime Distress Oxide Spray Mixed Media Card 2

The background was made with Wendy Vecchi Crackle Paste and Tim Holtz Hearts Layering Stencil. I used Picked Raspberry Distress Oxide Spray and Ground Espresso Distress ink to color it. Love how easy it is to get all that beautiful chalky color from just 1 or 2 presses of a button.

Sara Emily Barker https://sarascloset1.blogspot.com/2019/03/some-bunny-loves-you-with-tim-holtz.html Tim Holtz Geo Springtime Distress Oxide Spray Mixed Media Card 3

And what's not to love about this geometric bunny? I cut the bunny from the background panel before I stenciled and inked it. I layered the inked panel over a second panel inked with Antique Linen, then re-inserted the Frayed Burlap inked bunny die cut.

Sara Emily Barker https://sarascloset1.blogspot.com/2019/03/some-bunny-loves-you-with-tim-holtz.html Tim Holtz Geo Springtime Distress Oxide Spray Mixed Media Card 4

I smudged over the entire panel with Prima's Opal Wax. The shimmer is very difficult to pick up on my I-phone, and I can assure you this is much prettier in real life.

Sara Emily Barker https://sarascloset1.blogspot.com/2019/03/some-bunny-loves-you-with-tim-holtz.html Tim Holtz Geo Springtime Distress Oxide Spray Mixed Media Card 5

Final details include some script stamping (Entomology) with Distress Archival ink in Black Soot, some old Remnant Rubs, a couple of Small Talk Occasions stickers and lace and pearls from my stash. Thanks so much for visiting today! Wishing you a wonderful weekend! Hugs! Sara Emily
The following products were used and can be purchased at The Funkie Junkie Boutique:

Geo Springtime Thinlits Die Set
Distress Oxide Spray - Picked Raspberry
Distress Archival Mini Ink Pad Kit #3