Friday, June 9, 2023

Discovering: An Ocean Themed Folio


Hello! It's been way too long since I've given any attention to my blog or to my crafty things for that matter. The last time I 'played' in the Closet was about a month or so ago when I indulged in a few minutes of delightful messiness experimenting with some Brusho's I picked up at a yard sale. I had no idea what to expect from these powders, but my takeaway is they require a larger work area than I have currently and don't plan on showing your hands in public for a few days after using them. And a tarp would be helpful.


For my experiment, I chose some old cheapo scrapbook paper I was going to throw out anyway and an oversized stencil I've never used. I laid the stencil on the paper, sprinkled what seemed like a very little powder and spritzed with water. These powders make so much color, and I didn't want to waste it.  I used my painted/Brusho'd stencil to make a monoprint on a heavier piece of 12 x 12 paper and then mopped up the remainder on some scraps of card, front and back. Everything sat until yesterday, when I decided to challenge myself to use those papers. For the past couple weeks, I had been watching this video  on making a folio using one book page. (I'm not much for watching videos and can only take them in small 5 or 10 minute doses at the most with the sound turned off, so it can take weeks to watch one video at lunch or with my morning coffee.) Check it out if you want to give it a try.


I used some old Prima and Tim Holtz stamps and a Tim Holtz stencil/Translucent Grit Paste to decorate the front and back covers.


More Tim Holtz stamps decorate the pockets and the tags made from those Brusho mop up scraps. Some fussy cut stamped images (an old wood block stamp from my stash) make the shallow tuck spots that remind me of waves. They hold double sided coins that I punched from a scrap I used to test my ink/crayon colors and stencils I was using on the project. Waste not, want not.


There's lots of space to journal on the tags. I used a scrap of collage paper to decorate one of the tags and  Tim Holtz old Bigz and newer Thinlits dies to make little pull tabs on the tags. Some were cut from a blue inky scrap I had on hand and others cut from the initial cheapo scrapbook paper experiment. I used parts of Tim Holtz stamps and old Remnant Rubs to label them.


The paper I used on this side of these tags was one of my first monoprint experiments from years ago using a weird tree stencil. The greens tied right in with my Brusho papers, especially when I dipped them in some Distress inks  and added some stenciling and the Halloween lacey collage paper scraps.


What a fun and quick project this is! I love the design of the folio with it's six pockets and two tuck spots; the finished piece is 6 x 3.25 inches. 

I'm listing some of my products more for my own reference:

Distress Oxide: Wild Honey
Distress Ink: Mowed Lawn, Uncharted Mariner
Distress Archival Ink: Black Soot, Faded Jeans
Distress Crayon: Picked Raspberry
Distress Paint (on charms): Lost Shadow
Distress Translucent Grit Paste
Tim Holtz Mini Stencils
Tim Holtz Dies: Bigz Tiny Tabs and Tags, Thinlits Specimen
Stamps: Prima: Net and Wire; Tim Holtz: Glitch 1, Perspective, Sealife, Tiny Text

I would like to share my folio with Simon Says Stamp in their Not A Card Monday Challenge. Thanks for stopping by!

Tuesday, February 14, 2023

Love Birds


Happy Valentine's Day! Well, it has been a long time since I've posted and this is the first for this year. I only made two Valentine's Day cards, and the other got sent off so fast I didn't get time to photograph it.


I was debating on getting rid of my old dauber topped Distress stains because I never think to use them. So I thought I would give them another chance to see if they were something I wanted to hang on to.

 I started by free handing a heart with Candied Apple stain on water color paper spritzed fairly heavily with water. The dauber makes it so easy to 'paint' on the color. I sprayed with more water to 'loosen' the edges of the heart a bit more. I dried the panel and re-sharpened the bottom of the heart with more stain because it pretty much bled out. I edged the panel with Vintage Photo stain and sprayed with water again to blend, and dried. I did some background stamping (Tim Holtz old Boundless Flight {still one of my favorites} and Entomology) with Ground Espresso ink and also ran the ink pad around the edges of the panel and dipped the edges in a puddle of water to blend. 

After the panel was thoroughly dry, I smeared Distress Opaque crackle paste through the mini Hearts stencil with my finger. When it was completely dry, I smudged the crackled hearts with Ground Espresso crayon and splattered the panel with Speckled Egg Oxide Spray using the hose inside the bottle. I stamped a few love notes from Dina Wakely's Little Birdies set and Ground Espresso Archival ink. I mounted this panel to a panel sprayed the same colors as the birds (see below) and then a card blank.


I cut two birds (Silhouette Birds--first time in use) from a scrap I sprayed with Speckled Egg Oxide Spray, water and dripped with Vintage Photo stain and dried. I die cut the bird's legs from a panel colored with Ground Espresso stain. The branches are die cut from scraps of wood grain paper using Cozy Winter Thinlits set--also a maiden voyage. I colored the branches with the brown stains.

It looks like I'll be keeping my old Distress stains after all. Have fun crafting and thanks for stopping by! Sara Emily

I'll be sharing this in the Frame It Monday challenge over at Simon Says Stamp, as the darkened edge against the soft back panel frames my Love Birds scene. And also in Simon Says Stamp Wednesday challenge, Fun With Dies.

Sunday, December 11, 2022

Christmas Greetings!


I can't let 2022 end without wishing everyone a Merry Christmas! 

I challenged myself to make all of my Christmas cards in one sitting using just a few of my newest acquired crafty goodies and some of my leftover bits and pieces to add to the shimmery backgrounds.

 This was my first time using Distress Mica Stains, and I have to say I was thoroughly impressed with the outcomes and had some inky fun making a bunch of prints with the sprays and my stencils. Photos don't do it justice, especially these that were just quickly snapped and uploaded just so I could remember the cards. But since Simon Says stamp was having a Holiday Cheer challenge, I thought I would play along.


For this simple background, I used Fresh Balsam Mica Stain Spray and the old Poinsettia Layering stencil. I did get the more recently released, but this is still my favorite Christmas stencil. The die cut greeting was already in my stash, but I cut the bursts from card sprayed with Tart Cranberry Mica Stain Spray.

That's all for me! Here's wishing you all a very Merry Christmas and blessings for the New Year!

Thursday, September 29, 2022

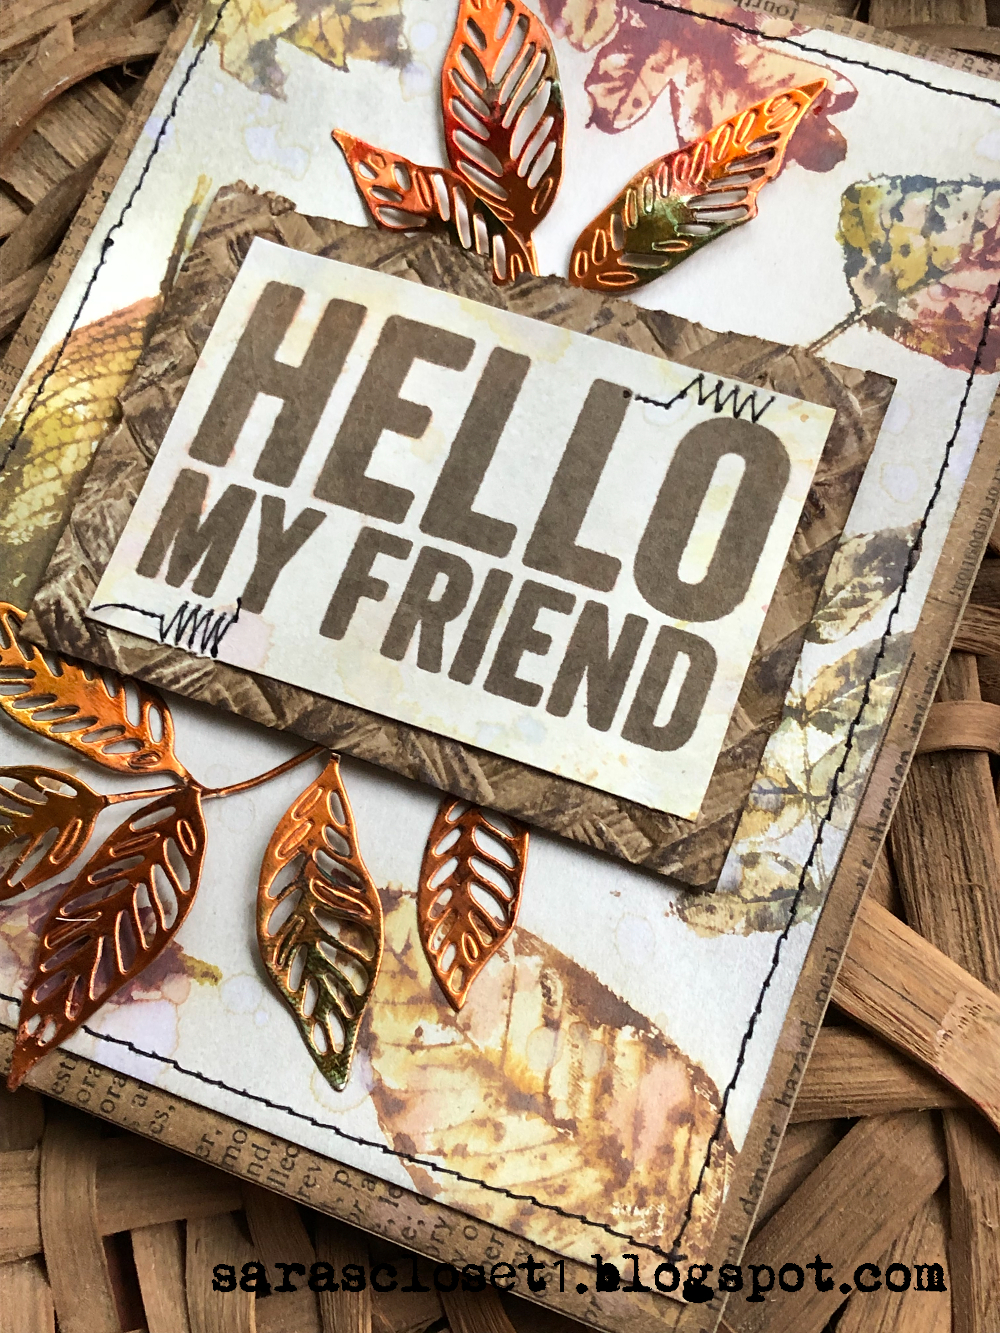
Hello, My Friend(s)


Hello, my friends! It's been a while, hasn't it? It seems everyone has moved onto Instagram, and blogging has fallen out of favor. I'm still an Instagram holdout, and am probably missing all the fun there.

 I have been doing a little making when I get a chance or inclination, just not producing a finished product. This is the first card (or anything crafty) I've actually completed since my last post. Time for fun is sparse these days and along with that comes a huge lack of creative juice. Fall is a favorite time for making, and I'm inspired by the beauty of nature.


One of my friends is very fond of the fall season, just as I am, so I decided to make her a card. I had to pull out the old stuff, as new craft stash has taken a financial back seat. But no worries! The background is stamped in various Distress inks on watercolor paper using Nature's Wonder--my go-to fall favorite. I blended the color with a water brush to bring the leaves to life (or end of life as the case may be).  I could sit and color these leaves all day long (and in fact I did--I've got plenty of these panels ready to go!). I blended the panel with Hickory Smoke, splashed with water and dried.


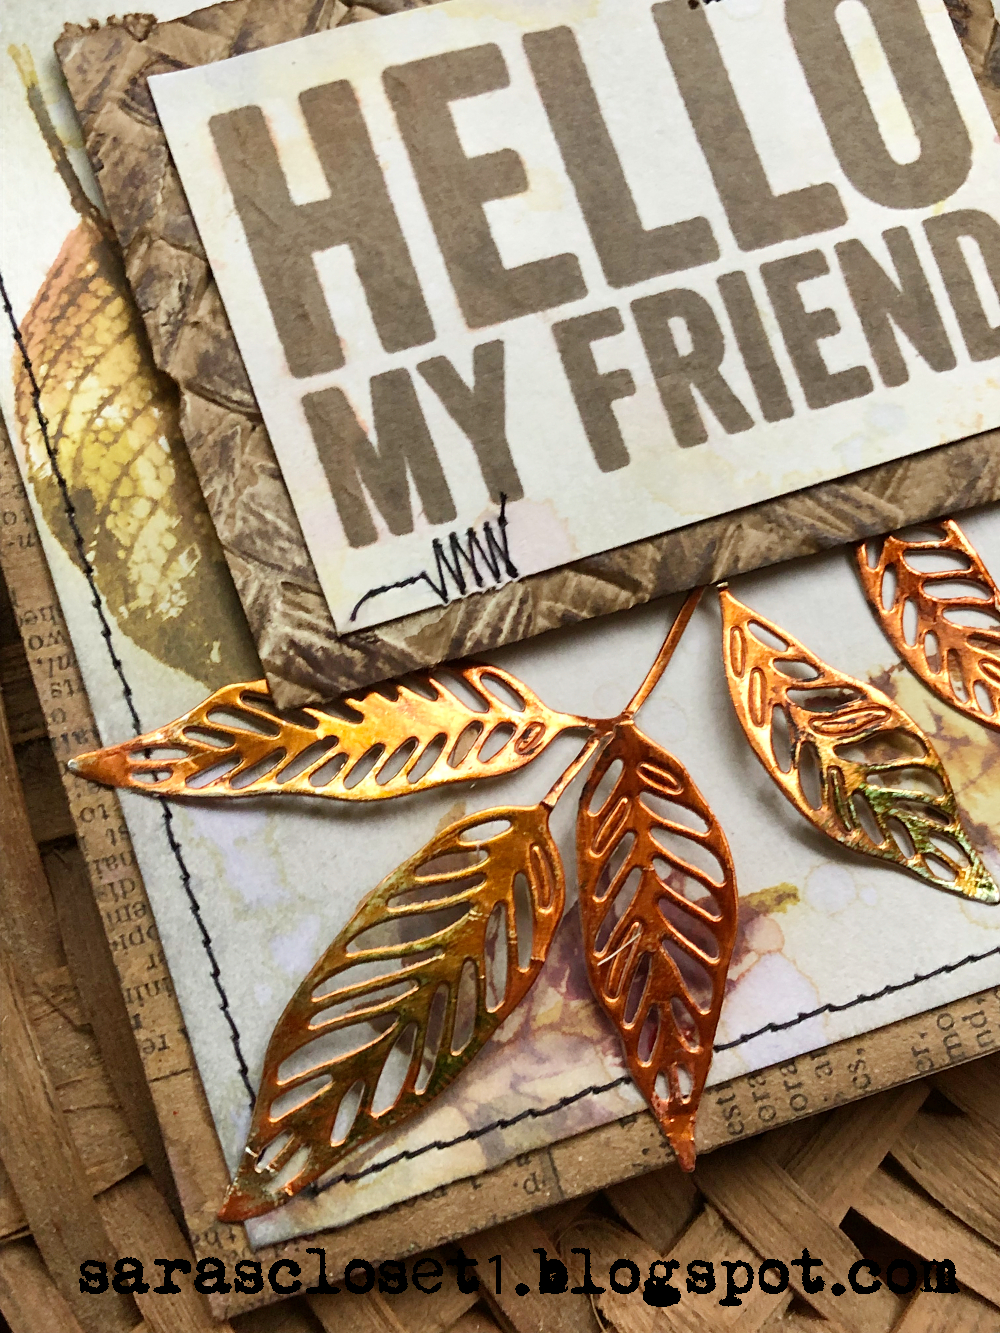
I tortured myself trying to thread my sewing machine and eventually got some stitching done on the background and on the little panel stamped with my greeting. Love these sumac leaves (Skeleton Leaves) cut from Kraft Metallic in Copper and subtly colored with archival inks and Distress crayons. Heated with my heat gun to bake in the color, with the added bonus of the leaves curling under the heat. 


For contrast, I backed the stamped Bold Sayings panel with a kraft 3D embossed panel (Intertwine) touched with Antique Linen paint and rubbed with Ground Espresso ink pads-- regular Distress and archival.

So good to get something done and share it here no matter how simple. This card is on it's way to a special friend. And it fits right in with the current challenge at The Funkie Junkie Boutique Blog--Celebrate Friendship! Hello to all my friends there, too! Sara Emily

 Other challenges I'd like to play along with:

Simon Says Stamp Monday Emboss It

Simon Says Stamp Wednesday Anything Goes

Friday, May 27, 2022

Scientific-It's All Just Junk!


Hello friends and visitors! Today I want to share an accordion folder with you, made from lots of things others might think to be trash. But us frugal crafters know that although it's all just a bunch of junk, something really great could come out of it. This all started with some waste packaging I've been saving up. The theme of the folder ended up being dictated by some pretty Nature's Wonders leaves from my stash, already inked and fussy cut. I actually had planned to use my Funky Insects and cut them from some silver foil cannister and peanut butter jar liners, but I got distracted by the leaves when I was looking at my saved scraps. 


Please don't tell me I'm the only one who saves these! I found five identical sized ones to use to make the base of my folder. Below are photos of other "trash" I used in the making of this folder;


I rarely pay full price for watercolor paper. It seems there are a lot of people out there who use one or two sheets out of a pad or block and give up on their artistic endeavors. I swoop in to save the pads from going into the landfill at various yard sales. This particular artist was into pen and ink line drawing. I just used the back side of one of the used sheets; it is exactly the size I needed to cover my waste packaging.


Paula (see below) used Tim's Fabric Tape shown in the top of the photo to adhere her tags, but in keeping with the 'trash/upclycle' theme, I chose to use a badly soiled adhesive medical tape. I picked up a bag of this at an estate sale just for crafting, and I'm pretty sure the people there must have thought I was out of my mind.


Here's a shot of me choosing from my buffet of crafty trash to make my collages after my backgrounds were partially complete.

Let me show you how it all turned out. But first, I need to give credit where credit is due. I was inspired by Paula Cheney at One Lucky Day with her In My Heart of Hearts Tag Book.  Although I did read through her post at one time and studied every beautiful photo, my internet went down throughout the entire time I was making this, and I had to wing it. And of course, the creative process takes me in different directions when I finally sat down to make. I strongly recommend you visit her blog to see her gorgeous folder as well as all of her inspiring work and to see how the folder is constructed. 

Remember to click on any photo to enlarge!


I sprayed my watercolor panel with Old Paper Oxide spray and water, stamped the cut and dried panels with Archival ink and a series of Tim Holtz Background stamps.  I used grit and texture paste with my stencils and after it dried, swiped the raised areas with a Versamark pad. I lightly let embossing glaze powder (Peeled Paint and Weathered Wood) fall over the panel and heated to melt. I used ink and crayon to add more depth and finally splattered with Ground Espresso paint. The panels were adhered to the waste packaging and plain paper applied to the backs.

The little 'frame' on the front cover is waste from a ticket I die cut years ago. The butterfly is fussy cut from a little piece of Tim Holtz' old Fragments. They were a gift from my friend Autumn of Sew Paper Paint, and every once in a while they will show up on one of my makes. I colored this guy and all the butterflies with Chipped Sapphire crayon. There's also a couple of scraps that are leftover parts from pieces used on past projects.


There's another one of those Fragments The honeycomb die cut is a bit from long ago cut from flimsy white paper. To stiffen it and contrast with the blue background, I added layers of embossing glaze (Peeled Paint and Walnut Stain) and gold embossing powder.


This butterfly is from the Field Notes ephemera pack and the circle ephemera from another older pack. There's a portion of a label holder die cut, and you'll see later, I was able to use the other portion, too. It was bright green, but I was able to age it a little for that vintage look I love.


On the fourth panel, I used a blue ticking Fragment and stamped a butterfly from an old acrylic set (7 Gypsies) that was just the right size for the piece, and layered it over another ephemera piece from another pack. The blue ticking stripe was actually what helped me choose my contrasting color for my project.


On the last panel, I used a ticket from the Fragments pieces and the other piece of the die cut label holder. I needed another butterfly, and I found this piece of book page lying on my work top. I stamped it with another butterfly from the 7 Gypsies set. All of my ephemera pieces are swiped with Vintage Photo Matte Medium (which is about ready for the trash). It's really old and goopy, and I was able to spread it really thick in some areas and when dry, scribbled and smudged with Distress crayon (in the color of whatever happened to be left on my finger from highlighting the raised stencil work). I looked around from some punched holes that might work for the label holders, but it looks like they might have actually made it to the trash. Instead, I darkened a pair of orange adhesive rhinestones with Mushroom alcohol ink; I was tickled pink that they closely resembles brass (or is it just my eyes?). The word 'moths' was left from the cover panel's fussy cut Fragment. 


I couldn't leave the back plain, so I attempted to use some small scraps of old Tim Holtz paper stash, but being too heavy a paper, the accordion wouldn't fold properly. Luckily, (I don't throw out trash) I found some bits of handmade papers in my stash (trash) that worked. It wasn't until I was adhering it to the backs of the cards that I noticed it has real leaves pressed into it. I heat embossed some phrases from Nature's Wonders and some of the leaves onto the panels and edged the back with metallic Distress Crayon.


And one final bit of 'trash' is the ribbon, rescued from the neck of a garment and originally pink! I sprayed it down with Chipped Sapphire Oxide Spray and when almost dry, rolled it over a Walnut Stain ink pad to 'age' it. And that's all for me today! Happy making!

I would like to share my folder with the following challenges:

Thursday, May 19, 2022

Enjoy Today


Hey, again! Wow, two posts within a week! I saw the challenge at The Funkie Junkie Boutique blog is Reuse and Upcycle, and that's my thing! And Simon Says Stamp encourages us to use texture on our makes, so I have that going on, too on the card I made for my Mom's birthday.


I save every little scrap I make, even after I've die cut from it or if it's a sample I've made to try out different mediums and substrates. A couple months ago, I purged boxes of it, but I have a little saved in one little shoe box.


My mom loves purple, so I pulled all the purple things out of my bits box which wasn't much, but I found a nice mis-stamped panel which I trimmed down and some dyed tissue paper scraps and a small card that I had mopped up some blue/green/yellow inks with. I have a drawer full of white/neutral scraps that I always dip into my leftover ink puddles. I have a little box of die cut and stamped butterflies that I raided and found the crinoline butterfly and a butterfly cut from clear waste packaging.


The butterfly is colored with Perfect Pearls over matte medium and wrapped with an old spring. The threads were on my worktop from dyed Mummy Cloth from my last project. I started to throw them out when I was cleaning up, but decided at the last minute they may come in handy.


The only 'new' thing on my card is the Metallic Quote. I was really pleased to see the perfectly placed word Celebrate on the poorly stamped purple background panel--serendipity! I just blended the trimmed stamped panel with Salvaged Patina ink.


This card took no time at all, and I'm quite pleased with how it turned out considering it was made  almost 100% with stuff that would have gone into the trash (if you weren't me).


I'm sharing with these challenges: