Welcome! Today marks the start of a new challenge at The Funkie Junkie Boutique challenge blog and Cec is hosting. She calls her challenge 'Staying in the Background' and here is what she says about it:
"My challenge to you is to create your own background and use it in a shabby chic or vintage project - no pre-printed patterned paper this time. You can create the background in any number of ways and it can be simple or intricate. Using embossing folders, stencils, dies, stamps, washi tape, paints, inks or a gel press are just a few ideas. Make sure you give a brief description of how you created your background in your post."
As always, the winner will earn a chance to be a Guest Designer at a future date at The Funkie Junkie Boutique challenge blog, and everyone who enters and follows the rules will go into the draw for the chance to win a $25 spending spree at The Funkie Junkie Boutique. There are also Top 3 Badges for three additional outstanding entries, chosen by the Design Team. Please see the blog for details.
Making backgrounds is so much fun, and I was excited to learn of Cec's challenge. Perhaps it's all the mayhem in our country that makes creating for any theme a bit of a challenge for me right now, and I had no ideas in mind. But the show must go on, so I decided to not sweat it, and got to playing in my Closet, without any direction in mind what so ever. Usually, just getting the ink flowing gets the ideas rolling.
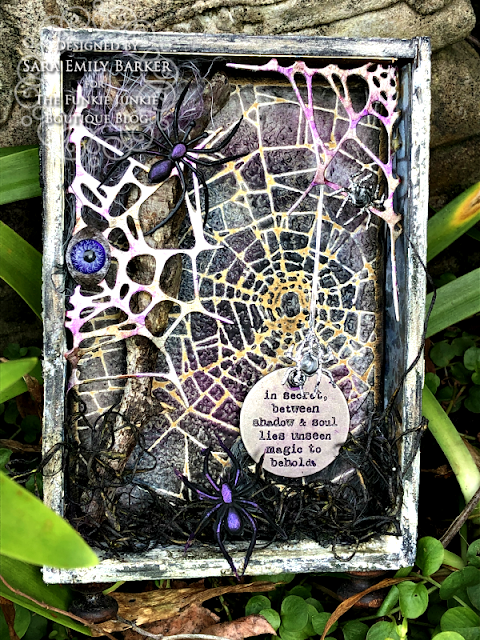
So let's take a look at my Between Shadow and Soul vignette, and then I'll share how I made my background(s).
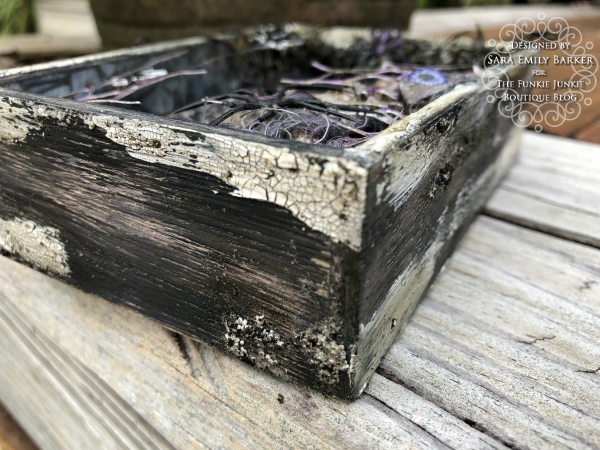
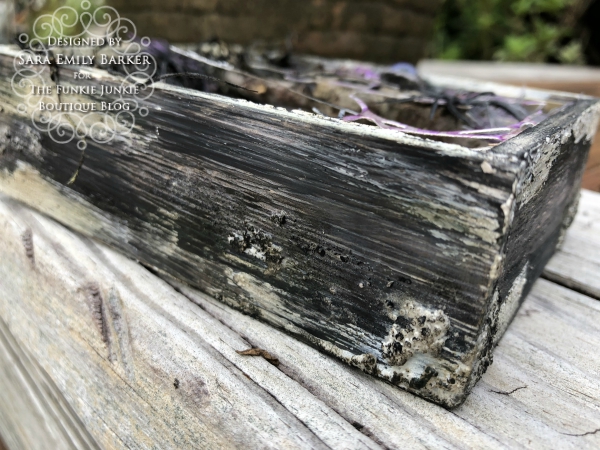
Starting with a Vignette Box, the exterior is painted with Picket Fence and Black Soot paint and smeared with crackle paste and Translucent grit paste mixed with Prima's Mini Art Stones. Crayon to accentuate the texture.
Bun feet from my stash.
I tucked in a twig I found taking a walk and some cheese cloth already colored from my stash. My guess it would be Hickory Smoke and Seedless Preserves spray stain. The plastic spiders from my stash are smudged with Prima's Antique Brilliance. I just can't take this spider seriously with those whimsical antenna.
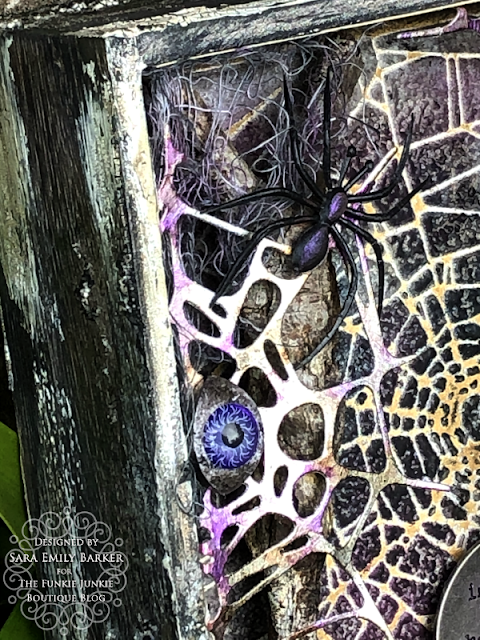
The spider also from Spider Web Thinlits die set is sponged with Black soot paint and then given a fat body with Liquid Pearls in Onyx Pearl. The Halloween Words Adornment is smudged with Wilted Violet crayon to make those words pop.
.
This spider is definitely creepier.
I included this photo, because it brings the silver spiders a bit more into focus.
This photo, while over exposed, really shows off the texture of the embossed background.
Now onto the tutorial! Actually, I consider this making lemonade when my efforts handed me lemons; there are few total losses, especially when it comes to backgrounds.
This may be a little difficult to follow along with, but hopefully the photos will help. It's confusing because I am actually working on 3 backgrounds at a time and they play off of each other. As I already said, I didn't have a plan in mind, but my play led me to create a spooky background, and the other two spun off from the first. The first one - and most obvious- is the spider web background inside the back wall of the Vignette Box. I started with a piece of heavy card that had some artwork on the reverse side. It was inside a watercolor pad I picked up at a yard sale a while ago, but it's clearly not water color paper and much heavier than any other paper in my stash. It is a good substrate for all the product I intend to throw at it.
Using the Shattered stencil, I laid down Translucent Grit paste and generously covered it with Distress Glazing powders in Hickory Smoke and Speckled Egg, keeping the colors separate, before removing the stencil. Rather than pouring off the powder, I tapped the panel from underneath, as Tim Holtz suggests, to blend the colors. When the paste was covered completely with the powder, I poured off the remainder. I put the remaining mixed powders in an empty jar, and maybe I'll use it on another project. I allow the paste to thoroughly dry.
Once the paste is dry, I heat it to melt the powder and then some, to get a bit of bubbling from the paste. After it's cooled, I blend the panel with Frayed Burlap Distress ink, and wipe it off the embossed areas. I scribble on Black Soot Distress crayon over the embossing and blend with a slightly dampened finger and a light touch so as not to get it in the 'cracks', working from the center outward.
Repeat with more crayon in the 'empty' spots: Chipped Sapphire and Seedless Preserves, blending each with my finger. When I was happy with it, I cut to size to fit the vignette box. I actually didn't know this was going to be used on a vignette box until this point. Lastly I edged with Black Soot Distress paint, and below is the completed panel ready to adhere in the box.
Second Background
In a 'what if' moment, before cleaning the stencil, I laid the soiled and still wet stencil from the previous background face down onto a tag that was close by. I covered it with a piece of copy paper and used my brayer to transfer the product to the tag.
It didn't look like much, so I sprayed the tag with Chipped Sapphire Spray Stain and then with water to mingle the color, and really that was no better. The web I was hoping to see wasn't really visible (yet).
After drying the tag with my heat tool, some of the 'webbing' appeared. Even more webbing was revealed when I blended with Rusty Hinge ink. Still, npretty horrible, but worth playing around with some more. You'll see in the collage two photos down, I splashed it with water and dried at this point, hoping to make some improvement, before doing the steps outlined below.
I thought the tag might be salvageable if I lightened it up, so I blended Distress Microglaze through a portion of the stencil onto the darkest area of the tag to work as a resist.
I got out Picket Fence Spray Stain, but it was clogged. I removed the cap and splattered some on the tag and sprayed with water.
After drying, I was pretty impressed with the result, but the tag needed lightening elsewhere. I flipped the stencil over in the upper corner and blended Speckled Egg Oxide ink over the stencil. I was pretty much over the tag at this point, so I didn't bother to take a 'completed background' photo. I did end up cutting the tag up to line the side walls and ceiling. You can see a bit of this in the close ups below.
Third Background
In an effort to salvage the panel, I sprayed the corner with water to thin the Speckled Egg out and dried. Once again, I laid the stencil over the numbers and sprayed with Speckled Egg Distress Oxide Spray and water. I removed the stencil and dried the panel with my heat tool.
I replaced the cleaned stencil and outlined the numbers in areas with Walnut Stain crayon and blended with my finger to create shadows. This is where I decided to call it a day and figure out what do do with my original embossed background panel. I hope to make something out of this numbered background.
Bonus Fourth Background
Here's a background I created from the deli paper I sprayed the moss on and which was used on the back of the Vignette Box. I used Black Soot and Wilted Violet spray stains to color the moss and I rubbed the moss in the paper to distribute the color. This left an interesting pattern on the paper, and thought it would make a good background.
I dried the paper and blended it with Frayed Burlap ink. I crumpled the paper and mostly flattened it back out. I rubbed the Ground Espresso ink pad directly to the wrinkles and then also applied Antique Brilliance randomly. This was adhered to the back with Distress Collage Medium Matte.

That's all for me, but there's more background inspiration by my talented teammates over at the blog. I hope you'll stop by and then I hope you'll link up your vintage or shabby chic project using a background. Remember to tell us how you made your background. I can't wait to see what you'll make! Happy Crafting! Sara Emily
Challenge Shares
These products were used and can be purchased at The Funkie Junkie Boutique:
Tim Holtz Distress Embossing Glaze - Speckled Egg, Hickory Smoke
Tim Holtz Distress Ink Pad- Walnut Stain, Frayed Burlap, Rusty Hinge
Tim Holtz Distress Paint -Black Soot, Picket Fence
Ranger Tim Holtz Distress Crayons - Black Soot, Wilted Violet, Walnut Stain, Chipped Sapphire, Seedless Preserves
Tim Holtz Distress Spray Stain - Black Soot, Wilted Violet, Rusty Hinge, Vintage Photo, Picket Fence
Tim Holtz Distress Oxide Ink Pad - Speckled Egg
Tim Holtz Distress Oxide Spray - Speckled Egg


Wow! The Halloween spooktacularness begins now! You always rock this holiday and this is no exception! Fabulous layering of details!
ReplyDeleteSara this post is a gold mine of ideas for gorgeous backgrounds! Your vignette is absolutely amazing,so full of wonderful details! As always...very well done my friend! Hugs....Simo
ReplyDeleteOh my what a magnificent creation, every inch crammed with texture and inspiring creativity. What a fabulous day you must have had creating this piece Sara Emily with some elements of play saved for another day by using up every drop of ink left on those stencils, what a bonus. How I wish I could hold this finished master piece to examine and explore more. I'm not a huge Halloween maker but this encourages me to go play.. So pleased to have visited today thank you so much for sharing. Creative wishes Tracey xx
ReplyDeleteWhat a fabulous and spooky make! I loved seeing and reading how it all came together although I didn't look to hard at the spiders as they aren't my favourite ...lol 😀. Thanks for the inspiration and wishing you a happy weekend! Hugs, Jo x
ReplyDeleteI am not a great lover of spiders but I am totally in love with this spooky Halloween creation Sara. I loved seeing how you brought this together, the spider web in the background is fabulous and the back of the vignette - wow! This really is a masterpiece, I love it!! Hugs, Anne xx
ReplyDeleteYou are a serious crafter... look at this magical creation.
ReplyDeleteI came here to thank you for appreciating my daughter's art on a card. She is all of 12 years old. She loves art.
Your background is so awesome. The glazes look magical!!! Great project!
ReplyDeleteYour scenes are always so perfectly realistic, Sara Emily! Believe me, as I have an intense fear of spiders!
ReplyDeleteFantastic! So many details.
ReplyDeleteSo yummy and creepy! LOVE the purple touches and that eye ball!
ReplyDeleteSara Emily this is so utterly creepy and wonderful. The layers of webs work brilliantly together and the one created for the background makes such a dramatic difference to the finished look. Thank you for sharing so many great ideas for creating the different backgrounds.
ReplyDeleteLove this too! I so look forward to Halloween crafting, but I haven't started yet. I love what you did with this vignette box, it is perfect Halloween decor! Elle xx
ReplyDeleteI adore this wonderful cobwebby shrine - fabulously creepy inside and out. All those magical textured backgrounds, brilliantly done, and eerie as you could wish!
ReplyDeleteAlison x