Saturday, June 27, 2020

Magical Place

Sara Emily Barker https://sarascloset1.blogspot.com/2020/06/magical-place.html 1

Hello friends! The Design Team at The Funkie Junkie Boutique has a very special Saturday Showcase for you on the blog. We each made a tag with the theme of flowers featuring some of our favorite products from The Funkie Junkie Boutique. I decided to showcase Stamperia's Flower Alphabet 12 x 12 paper pack on a small (not so small) Etcetera Tag.

My sister and her husband are closing up shop after over 30 years running a retail greenhouse farm, and this was the perfect opportunity to celebrate that occasion with a floral display. While there are 10 beautiful double sided pages to choose from, each with different floral design, this cheery blossom paper stole my heart.

Sara Emily Barker https://sarascloset1.blogspot.com/2020/06/magical-place.html  2

This didn't take me much time at all -- the papers have all the mixed media details already worked out for you, so it looks like you've been slaving over the craft table for days. I cut out the portion of the page I wanted, and adhered it to the thickboard tag with Distress Collage Medium matte. When it was dry I trimmed and sanded and smeared the edges with Peeled Paint crayon. That's it for the background, then it was just a matter of selecting elements, fussy cutting a few of the blossoms and pasting.

Sara Emily Barker https://sarascloset1.blogspot.com/2020/06/magical-place.html  3

Pattern Repeat chicken wire gives a nod to the chickens they also raise on the farm and offers some contrast to all those pretty posies. I inked the 'wire' with Hickory Smoke Archival ink, dabbed it with the Distress Embossing Dabber and heat embossed with Weathered Wood Embossing Glaze. The flowers are from my stash, and I tied them in with Picked Raspberry Distress Oxide Spray straight from the bottle. It even gave great coverage to those clear plastic stamens on the deep pink flower.

Sara Emily Barker https://sarascloset1.blogspot.com/2020/06/magical-place.html  4

I finally got to use my Large Stems Bigz die for the florals at the center of the tag. I cut them from two of the other papers from the Flower Alphabet pack and plain white card which was blended with Pumice Stone Distress Oxide. You might notice the pearls sprinkled about; they were inspired by the elderberries on the paper. I colored them with White Mixative Ink and Mushroom alcohol ink.

Sara Emily Barker https://sarascloset1.blogspot.com/2020/06/magical-place.html  5

The branch is cut using the Large Funky Florals die set and was in my stash. I cut one of the leaves using the same set from a couple scraps from the paper collection. In the photos above and below, you might catch a glimpse of the fussy cut and layered blossoms layered with some more of my stash flowers. There's so much depth and realism to the printed design, it's hard to differentiate the printed from the layered ones. This time the stamens were colored with Worn Lipstick paint and then dipped in Fired Brick Embossing Glaze and carefully heated (the stamens are plastic and don't tolerate the heat well--just like me).

Sara Emily Barker https://sarascloset1.blogspot.com/2020/06/magical-place.html  6

I love the quote that's already printed on the gorgeous paper -- so perfect for the retiring couple.

Sara Emily Barker https://sarascloset1.blogspot.com/2020/06/magical-place.html  7

I didn't neglect the reverse side, but left plenty of blank space to write a handwritten note. This is another of the papers from the pack. Since I really only used one of the pretty floral papers, I'll leave you with this last photo to tempt you to take a closer look at the collection of glorious floral papers. You'll find a link to the Flower Alphabet pack as well as to all the products I've used below. 

Sara Emily Barker https://sarascloset1.blogspot.com/2020/06/magical-place.html  8

Please stop by the blog to see all the other wonderful floral tags my talented teammates made for this special Saturday Showcase. You will be happy you did! Enjoy your weekend! Sara Emily

Challenge shares:
These products were used and can be purchased at The Funkie Junkie Boutique:
Stamperia - Flower Alphabet 12x12 Paper Pack
Tim Holtz Sizzix Bigz L Die - Large Stems
Tim Holtz Sizzix Thinlits Die Set - Funky Floral Large
Sizzix Chapter 1 Tim Holtz Thinlits Dies - Pattern Repeat
Ranger Tim Holtz Distress Crayons - Hickory Smoke, Frayed Burlap, Peeled Paint
Tim Holtz Distress Ink Pad - Frayed Burlap
Distress Oxide Ink Pad - Pumice Stone
Tim Holtz Distress Paint- Worn Lipstick
Tim Holtz Distress Oxide Spray- Picked Raspberry
Ranger Tim Holtz Distress Archival Mini Ink Pad - Hickory Smoke
Tim Holtz Distress Embossing Dabber
Tim Holtz Distress Embossing Glaze - Weathered Wood, Fired Brick
Tim Holtz Distress Collage Medium Matte
Ranger Tim Holtz Alcohol Ink  - White Mixative, Mushroom
Dina Wakley Media Acrylic Paint - White Gesso
Tim Holtz Etcetera Small Tag Thickboards

Wednesday, June 24, 2020

Cattywampus


Hello friends! Today starts a new challenge over at The Funkie Junkie Boutique blog, and I'm hosting this one. I call it Cattywampus and here's the skinny...

'Cattywampus is a funny sounding southern slag term I hear a lot around the house. According to the On Line Slang Dictionary it has several meanings including "appearing off center, diagonal from, crooked or not level, appearing askew, tilted or lopsided". Taking inspiration from any one of these definitions, include something cattywampus in your vintage or shabby chic project. Be sure to tell us what that cattywampus thing is; we might miss it!'

As always, the winner will earn a chance to be a Guest Designer at a future date at The Funkie Junkie Boutique blog, and everyone who enters and follows the rules will go into the draw for the chance to win a $25 spending spree at The Funkie Junkie Boutique. There are also Top 3 Badges for three additional outstanding entries, chosen by the Design Team. Please see the blog for details.

Can you guess what's cattywampus about my cat card? Well, I think it's pretty obvious the stacked postage frame is slightly crooked. It was actually an afterthought having found it sitting in a pile of castoffs that hadn't been discarded from my last playtime. I stamped and heat embossed it with the scribble from Grunged stamp set and white powder. I inked it with Distress oxide and ink and adhered it around a Gloss paper panel on which I had outlined bubbles with a ball point pen using the Bubble stencil.  I took a Q tip dipped in alcohol and traced over the lines, blending each of the bubbles. I'm sure it's not a mystery this was one of the ideas I tried on for size for our last Positively Pensive challenge.

 
The panel and frame are layered over a panel of metallic Kraft stock. I scored it with my score board and lightly sanded. It's edged with Chipped Sapphire ink. The score lines helped me to line up my frame and panel, but it turns out the card I cut the postage from was not square, so it also appears even more cattywampus relative to the scored lines.


I stamped portions of a snarky comment from the Snarky Cat set in archival ink within the bubbles. And I used another of the quotes from the same set on a scrap at the bottom for the cat to stand on. The cat looks like he might be slightly askew.


The cat is stamped using Distress Crayons and  Distress regular and Archival inks. I added little dots to his eyes to give him a different personality. I fussy cut, edged with Chipped Sapphire ink and popped him up with waste cardboard.

I tucked in some Wildflower Stems die cuts. The pink one is colored with crayons and ink and the green one is from my stash.  The Mirrored Stars are colored with white gesso and ink and then lightly touched with crayon, both Chipped Sapphire.

I hope you will take some time to pop over to the blog and check out all the amazing cattywampus projects my talented teammates made to tempt you to play along in our challenge. I can't wait to see what crazy things you will come up with! Happy crafting! Sara Emily

Challenge shares:

These products were used and can be purchased at The Funkie Junkie Boutique:
Stampers Anonymous Tim Holtz Stamp Set - Snarky Cat
Stampers Anonymous Tim Holtz Stamp Set - Grunged
Tim Holtz Sizzix Thinlits Die Set - Wildflower Stems #1 by Tim Holtz
Tim Holtz Idea-ology Metallic Confections Kraft Stock
Ranger Tim Holtz Distress Archival Mini Ink Pad -  Black Soot, Faded Jeans, Picked Raspberry
Tim Holtz Distress Ink Pads - Chipped Sapphire
Tim Holtz Distress Oxide Ink Pad - Shaded Lilac
Ranger Tim Holtz Distress Crayons -  Picked Raspberry, Chipped Sapphire
Tim Holtz Distress Collage Medium Matte
Tim Holtz Distress Embossing Dabber
Tim Holtz Distress Embossing Glaze - Weathered Wood
Ranger Embossing Powder - White
Dina Wakley Media Acrylic Paint - White Gesso
Stampers Anonymous Tim Holtz Stencil - Bubbles
Ranger Inkssentials Gloss Paper


Saturday, June 20, 2020

Shine Like the Stars - A 4th of July Celebration


Hello again!  I love 4th of July! I'm celebrating early with this card which my second post today. You can see my other post here.

 All details of this card can be found at The Funkie Junkie Boutique blog where I am presenting this week's Saturday Showcase. Today, we are featuring Tim Holtz Sizzix Decor Frames Bigz die and his Stamper's Anonymous stencils. I hope you can hop over for the details and additional close ups of this card and other samples. Wishing all who celebrate it a Happy 4th of July! Sara Emily


Challenge shares:
Simon Says Stamp Monday Sprays and Splashes My SPLASHES of color come from moving paint and ink around with SPRAYS of water. But I also used Distress Spray stain on my background.
Simon Says Stamp Wednesday Summer Fun What could be more fun than a 4th of July celebration?!
Country View Challenges June 2020 - Summer Fields Hear me out on this: Until I moved to my current city, I always watched the 4th of July fireworks in a  country field. I still remember parking the car and walking out into a huge field with hundreds of others laying on blankets to watch the display. Sadly, our little city has decided to forego the celebration this year due to the virus. (But it was OK with the protests.)
Creative Artiste Challenge #61

Making a Splash with Tim Holtz Decor Frames Bigz Die

Welcome, friends! Today I have two posts to share with you; you can find my other post here. It's my turn to host the Saturday Showcase at the Funkie Junkie Boutique Blog, and today I'm featuring Tim Holtz Sizzix Decor Frames Bigz die and his stencils. I hope you can pop over to see my tutorial for this card and others featuring these products. Have a great day! Sara Emily


Challenge shares:

Wednesday, June 10, 2020

Copper Penned Panel


Sara Emily Barker https://sarascloset1.blogspot.com/2020/06/copper-penned-panel.html Mixed Media Panel #timholtz #sizzix #stampersanonymous #ranger 1

Welcome! It's time for a new challenge at The Funkie Junkie Boutique and today it's Suzz's turn to host. You can always rest assured, she is going to come up with the most creative challenge theme. She titles her challenge, 'Positively Pensive' and here's her description:

Today is Ballpoint Pen day! The challenge is to thoughtfully use a ballpoint pen on your project.  You can doodle, journal, sketch or trace an outline using any color ballpoint pen on your art.  Create a vintage or shabby chic project with some form of ink from a ballpoint pen and if it isn't obvious how it was used make sure to tell us in your post!

As always, the winner will earn a chance to be a Guest Designer at a future date at The Funkie Junkie Boutique blog, and everyone who enters and follows the rules will go into the draw for the chance to win a $25 spending spree at The Funkie Junkie Boutique. There are also Top 3 Badges for three additional outstanding entries, chosen by the Design Team. Please see the blog for details.

I tried many different ways to use my ball point pens, and had so much fun with Suzz's challenge. But in the end, I decided on a penned background panel for my project. It seems I'm in a butterfly rut right now, although I've see very few in my garden (odd!). When I started, I visualized something a bit more bright and sun-shiney, but it just didn't work out that way. Perhaps it was the pensive mood I was in.

Let's get started. My first matter of business was to go through my pens to find one that didn't work.  You can see by my scribbling it required quite a bit of trials before coming up with one.


First I'll share some close ups, then I'll share a bit of the making.

Sara Emily Barker https://sarascloset1.blogspot.com/2020/06/copper-penned-panel.html Mixed Media Panel #timholtz #sizzix #stampersanonymous #ranger 2

I did some Field Notes stamping in Archival ink on the background at the top and bottom. I wish my penmanship was that graceful and elegant and my lettering that precise.

Sara Emily Barker https://sarascloset1.blogspot.com/2020/06/copper-penned-panel.html Mixed Media Panel #timholtz #sizzix #stampersanonymous #ranger 3

Sara Emily Barker https://sarascloset1.blogspot.com/2020/06/copper-penned-panel.html Mixed Media Panel #timholtz #sizzix #stampersanonymous #ranger 4

Sara Emily Barker https://sarascloset1.blogspot.com/2020/06/copper-penned-panel.html Mixed Media Panel #timholtz #sizzix #stampersanonymous #ranger 5

Sara Emily Barker https://sarascloset1.blogspot.com/2020/06/copper-penned-panel.html Mixed Media Panel #timholtz #sizzix #stampersanonymous #ranger 6

Sara Emily Barker https://sarascloset1.blogspot.com/2020/06/copper-penned-panel.html Mixed Media Panel #timholtz #sizzix #stampersanonymous #ranger 7

Sara Emily Barker https://sarascloset1.blogspot.com/2020/06/copper-penned-panel.html Mixed Media Panel #timholtz #sizzix #stampersanonymous #ranger 8

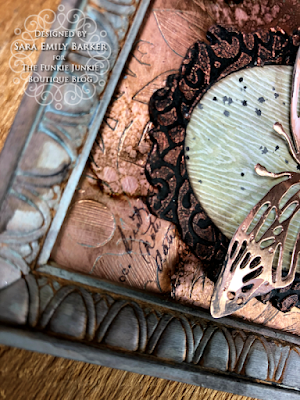
So where did I use a ball point pen? I removed the spring from the pen, pulled it apart a bit and used it for my butterfly's body. Before dismantling it, I also used my non working pen in another way, but I can't give all the details yet. Since Suzz directs that we tell how we used our pens, I'll give you a hint: I traced a design onto my background. I'll share all the details on how I made my background and Decor Frame that backs the butterfly in my June 20 Saturday Showcase.


I've finished the back with some old Tim Holtz paper stash.

Here's a bit on how I altered the frame and quote chip, and made the butterfly:


I chose a Vignette Frame and painted it with my finger and Distress Weathered Wood paint. You can see I didn't do a thorough job, and this is intentional. ;)


Next I dribbled on some Mushroom Alcohol ink  and spritzed it with water to disperse the ink into the cracks. I used my heat tool to chase around the thinned color and dry.


Last, I scribbled with Distress crayon and blended with a dampened finger.

Now I move onto the Scribbly Butterfly cut from Rose Gold Metallic Kraft Stock, and painted with a bit of Picket Fence paint and more of the Mushroom Alcohol ink, just around the wing tips (not pictured). I want my butterfly to shine. The spring is adhered with Distress Collage Medium Matte.


I altered one of the old Quote Chips (I've linked to the newer ones below) with Embossing Glaze and crayon. Swipe the chip with Embossing Dabber, sprinkle with the glaze, tap off excess, and heat to melt. When it's cool, scribble and blend with crayon.

Sara Emily Barker https://sarascloset1.blogspot.com/2020/06/copper-penned-panel.html Mixed Media Panel #timholtz #sizzix #stampersanonymous #ranger 9

So that wraps up my copper penned panel. I hope you will hop on over to the blog to see what amazing projects my talented teammates created with their ball point pens. And then, it's your turn to show and tell us how you've used your own pens to create a vintage or shabby chic project; I can't wait to see what you will make! Happy crafting! Sara Emily  

Challenge shares:
These products were used and can be purchased at The Funkie Junkie Boutique:
Tim Holtz Distress Paint - Picket Fence, Weathered Wood, Black Soot

Sunday, June 7, 2020

My Butterfly Collection

Sara Emily Barker https://sarascloset1.blogspot.com/2020/06/my-butterfly-collection.html Mixed Media AT Coins 1

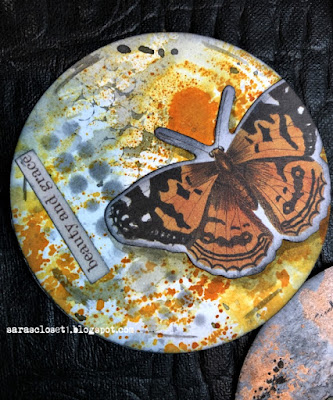
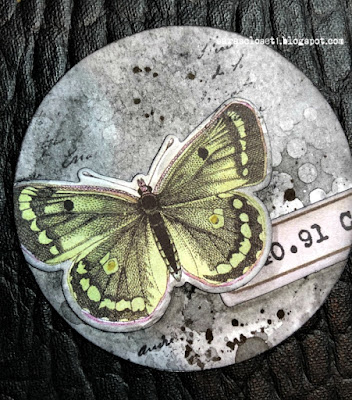
Hello friends! I had a little opportunity to play in the Closet last night, and I had some fun making some Artist Trading Coins. I love this little form of creative expression that allows me to create something really special in a very short period of time.


I started with some mop up papers from previous projects and added some stamping and stenciling to these to create some backgrounds for my coins. I punched un-stamped portions for the backs of the coins (not pictured).


I use the leftover waste from a previous AT coin project to find just the right spot on my papers. Viewed as a mop up, these papers aren't much to look at, but by focusing on the good, I made some pretty cool backgrounds. Next, I found the perfect specimens in Field Notes Ephemera pack and some Clippings Stickers that fit the bill. Lastly, after adhering my elements to the backgrounds, I created shadows with Distress Crayon and a water brush.

Sara Emily Barker https://sarascloset1.blogspot.com/2020/06/my-butterfly-collection.html Mixed Media AT Coins 2

Sara Emily Barker https://sarascloset1.blogspot.com/2020/06/my-butterfly-collection.html Mixed Media AT Coins 3

I was hoping to show off the shimmer from the Antiqued Bronze Distress paint on the background above, but I guess that's only reserved for those that look around for the light.* But if you look to the next photo, you can see the camera is cooperating when I don't really try to focus on the shimmer.

*"The light that is God is the opposite of the darkness that is evil. The light of God is His holiness, righteousness, and goodness, which is in contrast to the darkness of evil and sin. Light is part of the essence of God. He is completely, unreservedly, absolutely holy, with no sin, no taint of iniquity, and no hint of injustice." From Compelling Truth.org 

Sara Emily Barker https://sarascloset1.blogspot.com/2020/06/my-butterfly-collection.html Mixed Media AT Coins 4

Sara Emily Barker https://sarascloset1.blogspot.com/2020/06/my-butterfly-collection.html Mixed Media AT Coins 5

I love blending ink through a stencil (Halftone) and then flipping it to get the reverse imagery.

Sara Emily Barker https://sarascloset1.blogspot.com/2020/06/my-butterfly-collection.html Mixed Media AT Coins 6

I really felt this one needed no words. It's a bit melancholy and dark, but I prefer to look for the light. How about you? Are you looking for the light? Blessings, Sara Emily

 “When I shut up the heavens so that there is no rain, or command locusts to devour the land or send a plague among my people, if my people, who are called by my name, will humble themselves and pray and seek my face and turn from their wicked ways, then I will hear from heaven, and I will forgive their sin and will heal their land.

2 Chronicles 7:13-14 New International Version (NIV)

Simon Says Stamp Wednesday Masculine I think my darker ones are masculine: I don't think butterflies care about gender.
Creative Artiste Challenge #61
Country View Challenges June 2020 - Summer Fields The bright orange/yellow one only with it's abstract summer garden in the background.
We Love 2 Create at Polkadoodles Challenge #6- Anything Goes Mixed Media