Hello and welcome! Over at
Frilly and Funkie challenge blog we are celebrating Moms! Super talented Suzz is our hostess this time, and this is what she says about her challenge theme,
Mother May I?.
May in the U.S. is when we celebrate Mother's Day and honor our mothers. I am challenging you to create something that is vintage or shabby chic which is inspired by your Mother or any mother figure in your life. It can be a favorite memory, something based on her style, something she said/says to you, or anything that reminds you of your mother figure. Make sure to share with us how your mother inspired your art!
As always, the Design Team will choose their top four picks, and the winner will be invited to join us in a Guest DT spot at
Frilly and Funkie. The next three will receive Top 3 badges to display on their blogs. Everyone who enters and follows the rules will be entered into the draw to have the chance to win a $25 spending spree at
The Funkie Junkie Boutique.
My project was inspired by my Mom's love of gardening and the lilac tree and peony bush that perfumed the air outside my bedroom window growing up. Living up north, we didn't have air conditioning, so we opened the windows to cool the house. I grew up on a dairy farm, and the air was never what you would call 'perfumed' any other time of the year except when the lilacs and peonies were in bloom. I remember my Mom dressing us up and taking our photo under that lilac tree--it was her pride and joy and centerpiece of the flower garden she carefully tended. So when I saw the beautiful graphics on Stamperia's Lilac Flowers paper pack, I knew that I needed to make something with them to honor my Mom. Even though Mother's Day is passed now, my Mom has a birthday coming up and this will make a great gift.
I wanted to use every single one of the pages in the pack, so a mini album with lots of tags and flaps came to mind, inspired by my lovely teammate,
Kathy Clement. My goodness, that girl makes some magic with any paper she gets her hands on! I can picture this album as a place my Mom can make notes on her garden and even include some photos of her favorite blossoms.
I have lots of photos for you as we flip through this approximately 6 x 6 mini album--40 to be exact. You might notice some color variations in the pictures. I started taking the photos outside in direct sunlight, but because it got so hot (100 degrees in the shade) my phone stopped working, and I had to move the party indoors. Grab yourself a comfy seat, a favorite beverage and snack, and sit back and relax while we get started on the tour! We'll look at the front cover, spine and back cover and then move to the inside.
If you're interested in learning how to make a mini album like this for yourself, I'll have a step by step tutorial this coming Saturday on the Frilly and Funkie Challenge blog.
Along with the beautiful Stamperia papers, I used a Tim Holtz Lace Baseboard Frame and his Crochet die, some vintage lace from my collection, as well as paper flowers from my stash to decorate the front and back covers.
A seam binding bow holds the book closed. For the spine, I used a piece of coordinating rice paper from Stamperia that I won in their blog hop. I love Stamperia's rice papers, and Linda sells a selection of them in
her shop.
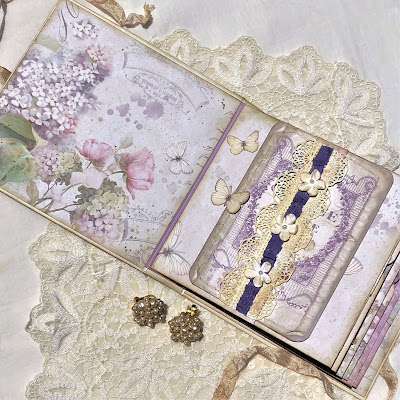
Another of the pretty papers from the collection lines the inside covers. The first page has a belly band that holds a simple folio in place. There's more of the Crochet die cuts here as well as some faux rouched ribbon and altered flowers. You'll see I used the Crochet die cuts throughout the album.
Ephemera from within the pack along with a scrap from my stash creates the folio, and more cut outs from the paper pack as well as the paper pack's cover art make tags to jot down notes.
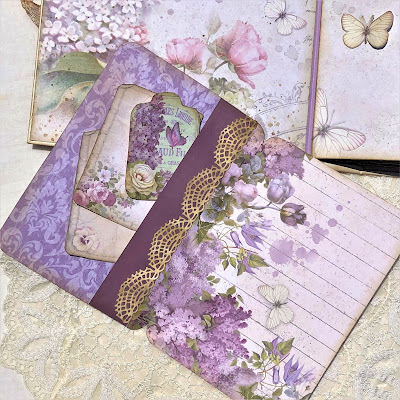
The next two pages hold lots of surprises; two pockets on the left and a figure eight string closure on the right opens to reveal another pocket within the flaps.
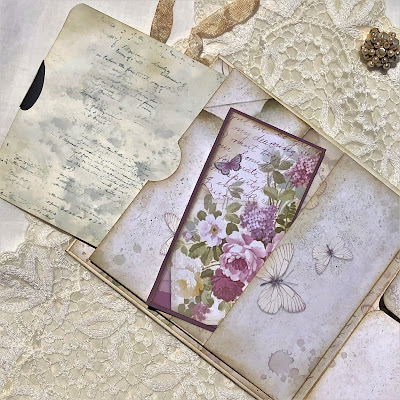
The 5 x 5 square pull out panel is colored with Distress Oxide Sprays and stamped with script from the Tim Holtz Entomology set. This would be a great place to add a photo. I can easily add more of these panels, as the pocket is quite roomy. More cover art is made into another tag matted with another scrap from my stash. The reverse side is white to accept more note taking.
The flaps on the right open to reveal a pocket with a tiny fan album tucked inside. The front and back covers of the fan album are made with a tag and paper cutout from the pack, and the papers within were colored with the Oxide sprays.
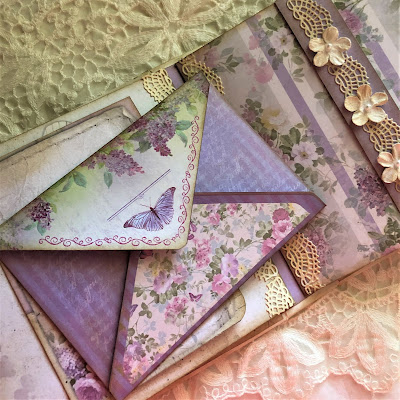
We flip to the next two page spread where there's a simple flip up feature on the left and another belly band holding a pretty envelop on the right.
The envelope comes in the pack, already decorated; all you have to do is fold it up and tuck in some of the ephemera from the pack. While the front of the flip up feature on the left is from the Lilac Flowers paper pack, the journal page underneath comes from my stash. I just cut out and adhered the pansy from the paper collection to tie it in.
This two page spread has some of my favorite images from the pack of 10 double faced sheets. Lots of lovely lilac blossoms along with little sprays of peonies. (They might be roses, but I like to think they are peonies.)
Again, on the left there's two pockets; one filled with a hand colored and stamped panel and the shorter one with some more of the cover art and scraps.
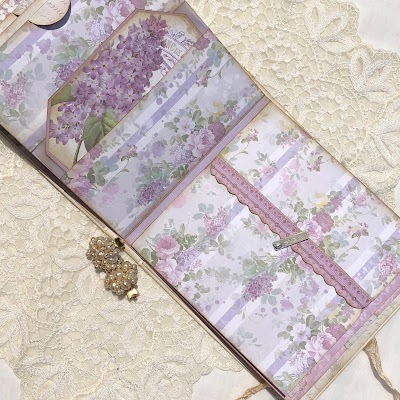
On the right there's a two flap envelope of sorts with a swivel closure made with an Ideaology Story Stick. A strip of 'lace' from the pack is fussy cut and adhered front and back of this flap. There's so much detail, it's hard not to believe it's real lace. Inside, there's lots to look at, including a top fold panel I made from the Lilac Flowers collection with a hidden booklet and two tags in a butterfly tuck spot. The butterfly and the butterfly tag are cut from the collection, and the dragonfly ephemera was in one of my thank you gifts that Linda tucks into your orders. Love this little card, and had to use it before it got lost in the shuffle; I think it plays well with this collection.


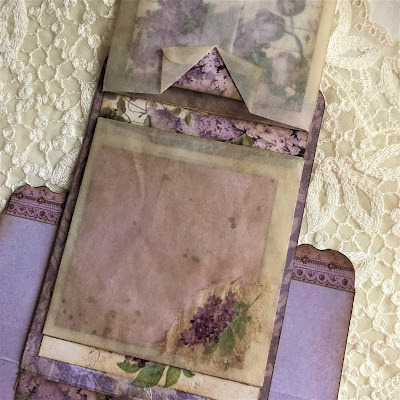

When you flip up the top fold element, there's a waterfall feature made with glassine envelopes I had in my stash. Tucked inside are little cards cut from the papers. I added some lilac bunches from the leftover rice paper. I cut slits into the envelope and folded back the edges, to make removing the cards easier.
Here are the pretty cards removed from their sleeves and a peek inside the notebook. Again, these are papers I colored with Oxide Sprays.
Here's a glimpse of the back of the booklet and cards.
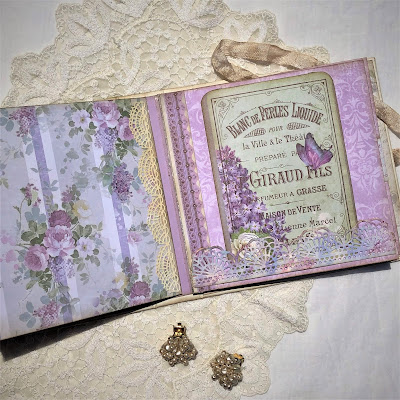
We turn the page to this two page spread. There's nothing going on on the left in the way of pockets or flaps. This design is so gorgeous I thought it would be a pity to cover it up, so I just added a Crochet die cut. On the right this stunning French advert image takes center stage with another Crochet die cut and some of that dainty lace from the collection running along the side.
When you lift the flap, there's another note card with a cover art tiny tag to pull out.
On the left side of this last two page spread there's another two flap envelope with a drop down swivel closure made with an Ideaology Trinket Pin. I bet you'll never guess why that butterfly is hiding under it. You'll have to wait 'til Saturday to find out!
Inside there are four tags from the paper pack tucked into mini glassine bags. I cut the top off and slipped in the tags. I saved mine from various goodies I purchased at
The Funkie Junkie Boutique, and some were from Linda's thank you gifts. But if you're not a hoarder like me, you can purchase a pack of them from the shop.
There's a little hidden tuck spot at the bottom for notes, a small photo or even some extra bags to hold some seeds or dried petals from the garden.


