Welcome friends and visitors! I was tempted, once again, by a few challenges out there, including that mind blowing " Time Challenge-30 Minutes or Under" at
Country View Challenges. And it's "Out of the Cold" for Cec's challenge theme at
Frilly and Funkie, so my butterfly is flitting away from the snowflakes. And a new one for me--
PaperArtsty, where the challenge is to use a mask.
I was inspired to use my Color Burst granules after reading about and seeing Alison's (
Words and Pictures) beautiful works of art using Infusions. Of course, my watery backgrounds don't look anything like her gorgeous, inky backdrops for those detailed Lynne Perrella images.
Like my last
30 minute project (which bombed, by the way), I followed
Brenda's tips; I made a recipe and gathered my ingredients. Before I got started, I even did a little test on a scrap of the same paper I would use as my substrate. Why is it that the experiment always turns out better than the actual project? Well, it does for me! Look at those beautiful colors all from one Color Burst--they didn't materialize as well on my finished tag, nor did my masking turn out as well. But 30 minutes is all I truly had, because this to make the mail today. There was no time for do overs.
This is as far as I got within the 30 minutes. You can see I didn't have time to thread the ribbon back through, but I laid it there for the finish line photo.
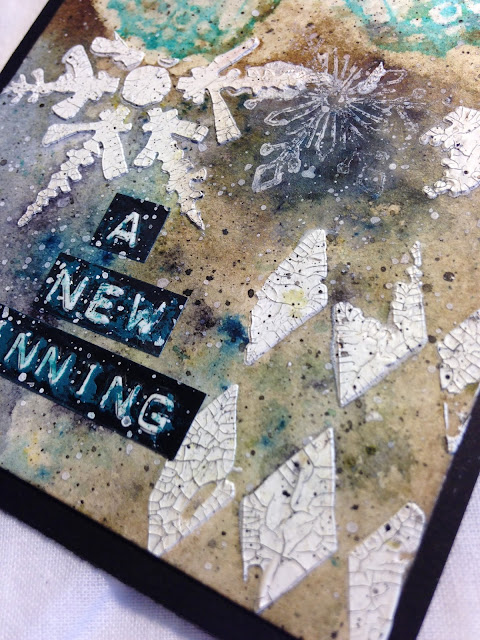
I thought I would show you the gorgeous watery color at the top and the crackled snowflake before I added the ribbon and word token. Another crafty conundrum: why are the best parts of a background always covered up by the embellishments?
I'll share my ingredients and step by step directions below. By lumping it all together, it will give you the option to skip through to the photos I took (mainly) outdoors.
Ingredients: Stencils: Tim Holtz Snowflakes, TCW Harlequin; Die: tim Holtz Tag and Bookplates; Stamp: Unnamed from my stash; Color: Distress Crayon Picket Fence, Peacock Feathers, Distress ink Peacock Feathers, Distress paint Black Soot, white acrylic paint, Color Bursts Lamp Black; Other mixed media products: DecoArt Crackle Paint, Distress Micro Glaze; Heavy watercolor paper, black card stock, seam binding, Ideaology Word Token, word stickers from my stash, Distress sprayer and splatter brush. I later added Tim Holtz Woodland Scribble stamp.
Recipe:
X Die cut tag and circle from watercolor paper.
X Using tag as a template mark black card stock on where to cut.
X Ink butterfly stamp, spritz with water and transfer image to tag. Heat dry.
X Stamp a second time on post it to use as a mask
X Roughly cut butterfly image from post it and apply to tag.
X Apply crackle paint through stencils. Put stencils and palette knife into tray of water.
X Remove mask and set tag aside to dry until cracks start to form.
X Stain seam binding to match using leftover ink on butterfly stamp and ink pad, spritz with water and crinkle. Set aside to dry.
X Cut tag from black card and punch hole.
X Apply Distress Crayon to word token and word stickers.
X Continue drying process on crackle using heat tool.
X Apply micro glaze to butterfly and buff with clean, dry paper towel. (I got a little carried away with the buffing, apparently.)
X Sprinkle (very) lightly with Color Burst, spritz with water.
X Pat butterfly with clean paper towel to soak up color. Continue to dry with heat tool. Repeat.
X Adhere painted tag to black tag.
X Continue to dry seam binding and thread through word token and hole in tag. (I didn't thread the tag's hole with the ribbon.)
X Apply word stickers.
At this point I had just under 7 minutes left on the timer, so I decided to add stamping with white acrylic paint and a Tim Holtz Woodland Scribble snowflake image. I also splattered on watered down white paint and Black Soot Distress paint and changed the color of the recesses in the word token from blue to black to white. This left me short of time to thread my ribbon through the tag's hole.


