
Hello! It's time for the Funkie side of Frilly and Funkie Design Team to unveil their inspiration for the current challenge 'Haberdashery' at Frilly and Funkie. I'm sharing my altered mannequin featuring Tim Holtz Foundry 3D Texture Fade. I'll have some process photos and details as well as some close ups following, but first let's see what our talented hostess, Zoe, has to say about her chosen theme.
A haberdasher is a person who sells small articles for sewing, such as buttons, ribbons and zippers. For this challenge create a vintage or shabby chic project including items found at a Haberdashery.
In America, the word also refers to a men's clothing store. Having visited these upscale stores with my husband, I know they often tailor off the rack clothing for their clients as part of their services. So I mingled these two concepts to come up with my project.
The Design Team will choose their top four favorites, with the winner being invited to join us in a Guest Designer spot at Frilly and Funkie, and the next three will receive Top 3 badges to display on their blogs. Everyone who enters and follows the rules will be entered into the draw to have the chance to win a $25 spending spree at The Funkie Junkie Boutique.

Here's what it looked like before I started on the body but after I had crackled the painted black base and top with DecoArt crackle medium and paints.

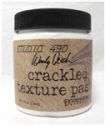
The legs required some repair work, so I used some of the drying Wendy Vecchi Crackle texture paste that forms under the rim and on the sides of the jar (waste not, want not) to fill the cracked joints. Even though it was so dry, it crackled up nicely, so I decided to swipe the entire base and top with crackle paste.


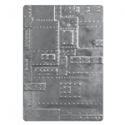
To emboss them as one continuous strip, I embossed one end and then flipped the panel around and placed the un-embossed end into the embossing folder. I carefully lined it up with the previous embossing and ran it through my Big Kick just up to that initial embossing. Maybe the photo will better explain.


In the photo above, you can see the darts I had to cut to form the card to the mannequin. There are also areas where there is little or no texture because rubbing in the ink refresher removes some of the embossed texture. Also some seams popped up,. These are all areas that I used the cut up metal pieces. After everything was in place, I gave it a coat of Distress Collage Medium Matte, and when dry, rubbed with Walnut Stain Distress crayon. I got a little carried away with the patches at times!

I had this lone zipper pull and some pearl and gold toned pins in my stash. I colored them with Caramel alcohol ink.

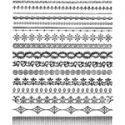
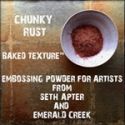
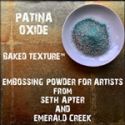
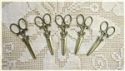
I cut a length of the tape that says 'chest' and 'bust' along with boxes to record your monthly progress in these areas to make a lanyard to hold those tools important to a seamstress. I hand sewed a hook of a hook and eye on one end and a 'loop' on the other. A loop pin holds a thimble charm and a old rusted bobbin from my stash. The hook holds this sweet scissors charm that Linda sells at The Funkie Junkie Boutique. The thimble, loop pin, and scissors were altered with Mushroom alcohol ink and Chunky Rust and Patina Baked Textures powders.


I gave the base and neck crackled portions a coat of Vintage Collage Medium. I stamped some plain tissue with text from Tim Holtz' Inventor 3 set and adhered it. I had these cute wooden spools in my stash. I stained them with Vintage Photo Distress stain and wound some thread around them.


As always, thank you for stopping in and for all your lovely comments!
Hugs and Blessings!
Sara Emily
CHALLENGE SHARES:
SanDee&amelie's SASPC September 2018 Challenge
SanDee&amelie's SASPC September 2018 Challenge
Artistic Stamper September's Creative Challenge - Going Round & Round My lace and tape goes around the bottom and lace around the neck. I used a round button and other round elements. I used stamping on base and on the tape measure.
SumMore Fun Mood Board Challenge #36 I was inspired by the Foundry at the bottom.

Simon Says Stamp Monday Stamp It On I know you really have to look, but I used 2 stamp sets.
 |  |  |  |  |
 |  |  |  |  |
 |  |  |  |  |
 |  |  |  |  |
 |  |  |

Sara Emily, this is the coolest piece! I love the creativity of using the “metal” strips and the way you’ve formed it and colored it and patched it totally blows my mind (in the best way possible!) I am such a fan of your amazing creativity and talent and this project provides another glowing reason why! Just fabulous my friend! Bravo!
ReplyDeleteHugs to you. xx
Your mannequin is absolutely stunning!! The embossed and coloured faux metal pieces look amazing and I love the crackling on the legs. The mannequin looked beautiful before but you have transformed it into a beautiful piece of home decor - a very worthwhile labour of love! Hugs, Anne xx
ReplyDeleteOh, I love, love, love every inch of this!!! The way you used up all the scraps, genius! Such an inspirational piece, truly a work of art :)
ReplyDeleteWow! Just Wow! You never cease to amaze me with your creativity!! Love this masterfully decorated dress form! I'm so happy you linked this up to the Cropstop blog this month!
ReplyDeleteA vintage dress form made even more vintage looking with the foundry embossing - Fabulous!! Love all the added notions - I wish I had remembered my snaps and hooks & eyes.
ReplyDeleteWow, I am in awe, Sara Emily! This is simply amazing! Your always have the most incredible details.
ReplyDeletethis is so cool!!! I love it! =)
ReplyDeleteOh my good golly, this is spectacular!! Wow, Sara Emily!! I'm in awe!! What a creative, clever project this is!! Every single detail is amazing!! I love this, and now I want to go out and find a mannequin I can alter like this :) So, so stunning, my friend!! Have a great day!! Big hugs :)
ReplyDeleteLisa
A Mermaid's Crafts
Dang!!!! This is AMAZING!!! How you embossed and cut and pasted the tiny squares so perfectly...love the “rusted metal” effect and that measuring tape...I know why you were keeping it for just the right project! It sets this project off just right! So fantastic!! I actually have one of these that I found at a garage sale that I’ve been holding onto, I’m going to file this in my head to use for its inspiration...such an awesome make! Thank you for sharing!! Hugs! ~ Stacy ♥️
ReplyDeleteWOWZERS! I absolutely love your dress form! The metalic patched form is awesome!
ReplyDeleteOh my word!!!!!... every inch of your vintage mannequin is just amazing, the fantastic effects you have done are making my jaw drop to the floor!!!!.. and oh my.. the vintage tape measure... I could go on!!!!... just stunning!!!. So glad you have joined in the artistic stamper challenge x
ReplyDeleteWow, wow, wow! I am completely and utterly taken with this amazing altered mannequin. Your imaginative use of product and the artful placement of each and every element has me in awe. This looks so authentically vintage, Sara Emily! This is one of my all time favorites from you. What a treasure! You can be my haberdasher any time.
ReplyDeleteThis is awesome, Sara! LOVE how you have patched her up. Steampunk at its best! Thank you for sharing this beauty with us at SanDee&amelie's Steampunk Challenges!
ReplyDeleteHugs,
Claudia x
I love altered mannequins ans the steampunk style you gave to this one is fabulous! All these details and aging colours... wonderful!
ReplyDeleteWhat a wonderful design. I love seeing projects from those who think outside the box. Beautifully done. Thank you for joining in our challenge at SumMoreFun.
ReplyDelete(Amy-SumMoreFun DT)
WOW!! That turned out so Flippin' COOL! Totally LOVE your design! Lots of amazing details and just so creative! Thanks so much for playing along with us this week over at SumMore Fun Stamp Challenge! Have a great day!
ReplyDeleteTheresa
Theresa’s Crafty Creations
An absolute showstopper, Sara Emily - the foundry body, in those glorious burnished rust colours, the crackled stand, the amazing haberdashery accessories - this is a knockout!
ReplyDeleteAlison x
Wow Sara Emily, this turned out very cool!
ReplyDeleteYou really created a piece that looks as those it was made of scrap metal- Super work!
Jackie xo
Super cute!!! Thank you for joining us at Love to Craft, good luck!!! Amy DT
ReplyDeleteWOW! This project is absolutely amazing!! I love the effect you got with the embossing folder and all the wonderful details. Look at the little zipper, needles, and everything else. It is fantastic. Thank you so much for sharing with us at the Simon Says Stamp Monday Challenge blog, and celebrating STAMPtember with us!
ReplyDeleteThis is CRAZY INCREDIBLE! How ever did you even think this up?! The EF is so perfect for this grungy make and I utterly adore the little details you added. The crackled base is so fabulous! Wow wow wow!!! You're a mad genius, you know? LOL! Hugs, Autumn
ReplyDeleteThis is absolutely FANTASTIC!! All those different textures and elements are so awesome. Thank you for joining the SumMore Fun mood board challenge.
ReplyDeleteOh wow, I really love your creation and your take on our current mood board. I actually really like this, you did an amazing job.
ReplyDelete**Thank you for joining in the ~SumMore Fun~ mood board challenge, I hope to see you again**
Have a wonderful day,
Jessica (SumMore Fun DT Member)
Polka Dot Orchard
Absolutely fabulous, love your awesome project Sara!! Many thanks for sharing with us SanDee's and Amelies Steampunk Challenge!
ReplyDeleteOhhh La La!!! This is fabulous! From beginning to end so many wonderful details that you could spend an hour inspecting all the cool techniques and details! I adore that metal layer on the mannequin! Always so much inspiration to be found here!! :)
ReplyDeleteOh Sara Emily you made this mannequin look so industrial and yet so feminine with your antique tape, lace and clever haberdashery additions. Love the idea of chopping up the embossed metal! And thank you so much for your kind shout out xx
ReplyDeleteGorgeous love the dress form & the gorgeous vintage look you have created x
ReplyDelete