
My little handmade journal was on it's way to the yard sale box when I was inspired by Autumn's altered journal cover HERE, so I quickly rescued it and gave it a new life. Sorry, but I don't have any before photos--it was wheat colored with a brown faux croc spine (probably tape).
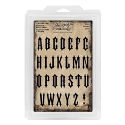
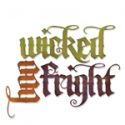
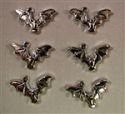
To start, I painted the spine and edges with black gesso and prepared my covers. Tim's Gothic Cling stamps spell out Good Treats. I used my Wendy Vecchi stamps to make the embossed pattern over my stamped title. I stamped two of Tim's sweet spiders in archival ink and doodled their eyes with a Recollections pen. I'll have a step by step tutorial on this metallic technique at Frilly and Funkie on October 21. I hope you'll stop by to check it out.


Here's a closer look at that texture and mercury glass look.


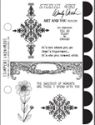
2. Blend Chipped Sapphire Distress ink over hat, (Try to color in the lines) Antique Linen over skull, and Bundled Sage over shadowed area of skull.
3. Place mask over stamped image. (I cut mine out of regular card stock. You can see I've used it a lot.)
4. Blend Hickory Smoke and Wilted Violet Distress inks around image.
5. Leaving mask in place, spritz with water, slowly pull trigger on spritzer for droplets. Remove mask. Allow to sit for a moment and then heat dry. (Middle photo shows those great water droplets.)
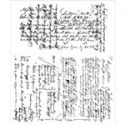
6. Replace mask and ink up script stamp with embossing ink. Stamp over mask.
7. Remove mask and heat powder just until it turns clear. You can see spots where I got less than desirable results due to overheating. But I went with it for the old time worn effect.
8. When powder is fully cooled, blend entire panel with Black Soot and Wilted Violet Distress inks.
9. Place clean plain white paper over panel and iron quickly with a HOT iron. You can see the used paper in the last photo.
10. Sit back and enjoy you handy work.
Before adhering the inner panels, I glued down some seam binding I colored with Distress Oxides. I attached a Halloween typed token with a loop pin. The token is colored with Distress paint and crayon.


Then it's over to YOU! Create a vintage or shabby chic project following the challenge guidelines and link up at Frilly and Funkie before midnight on Tuesday, October 10th.
The Frilly and Funkie team will choose our top four picks with the winner being invited to join us in a Guest DT spot at Frilly and Funkie. The next three will receive badges to display on their blogs. Everyone who enters and follows the rules will be entered into the draw to have the chance to win a $25 spending spree at The Funkie Junkie Boutique.
I can’t wait to see what you make!
I'm sharing with these challenges:
Sandee and amelie's Steampunk Challenges SASPC October 2017 Challenge Anything Goes - Steampunk/Industrial
Country View Challenges October 2017 - Mixed Media with Autumnal Hues Purples and deep smokey colors are my choices in Oct.
The Artistic Stamper October's Creative Challenge- Steampunked
Creatalicious Challenges Challenge #124 ANYTHING GOES with optional make your own background
Simon Says Stamp A Walk On The Dark Side
Lost Coast Portal to Creativity 31 Days of Halloween
Penny Black and More October - Close to Nature

Thank you for stopping by today and for all your lovely comments! I really appreciate them!
Hugs and Blessings!
 |  |  |  |  |
 |  |  |  |  |
 |  |  |  |  |
 |  |  |  |  |
 |  |  |  |  |
 |  |  |  |  |

Wow!! This is awesome Sara!! Fabulous colour choices and I love the stamping .. beautifully done!! Love, love, love the metallic look covers and can't wait to see the tutorial! Brilliant work!! hugs xx
ReplyDeleteWowzer - fabulous shimmering metallics, and those Gothic letters are really amazing. Love how the masking makes the skull pop against the rich colours of the background - a fantastic spooky make.
ReplyDeleteAlison x
My goodness Sara Emily! You really have transformed what sounded like something very plain into a spooktacular cover! I love how the lettering has been combined with the texture and inkiness, right down to the seam binding tie at the side. Delicious! xx
ReplyDeleteAwesome journal, Sara Emily!
ReplyDeleteI am so thrilled to have inspired this journal makeover!!! It was so much better than getting a quarter for this in the yard sale - ha! ;0 I am on pins and needles waiting for this metallic surface tutorial - oh my goodness!!! I love your use of purple with the metallic accent, so pretty. Big hugs, Autumn
ReplyDeleteWow Sara, you really are rocking the Halloween theme today, your journal cover is fabulous, the skull in the top hat is one of my favourite Halloween stamps, I love your background colours, they have a lovely metallic look to them - brilliant work!! Hugs, Anne xx
ReplyDeleteWow! The finish on the cover is amazing...it really does look like mercury glass. I can tell you had fun making this..,.it just oozes with eerie goodness!
ReplyDeleteOhhhh I love a good purple and black inspired Halloween project and this is no exception! Gorgeous! The rich patina is fabulous! Spookily beautiful!
ReplyDeleteWhat an amazing journal cover Sara, these are my favourite Halloween colours, so eerie! I love the techniques that youve used with the masking and script, so very effective. I'm putting on my two (top) hats now to say thank you so much for entering our challenges at Country View Crafts and Lost Coast Designs, and have a spooktacular weekend. Sue xx
ReplyDeleteThe background colours and textures of your cover are awesome! Thanks for showing us at Country View Challenges!
ReplyDeleteBeautiful journal. Love those spooky skulls. Such gorgeous textures and colours. Thanks for joining the fun at the Lost Coast Portal to Creativity challenge. Hugz
ReplyDeleteThats a spooky journal and a half!!!! Lots of stamps and inks (just the way I like it!!!) and with your twist on our close to nature theme with the spiders hanging down - love it - well done!!! Thanks for sharing this with us at Penny Black and More challenges, Leanne DT xxx
ReplyDeleteSuper spooky journal Sarah! the whole design of this is fabulous, great recycling!! :-)
ReplyDeletethanks for joining us on the Simon Says Stamp Monday Challenge
Luv
Lols x x x
Wow! Fabulous. I love mixed media creations. Thanks for joining us at creatalicous. Good luck. Maggie, DT
ReplyDeleteWow what a spooktakular project! So much detail and beautiful stamping. Thanks so much for joining us at We Love 2 Create with Polkadoodles
ReplyDeleteClaire xx
Love this x
ReplyDeleteI love the mercury glass look you did. Thanks for joining in the Halloween Lost Coast Event.
ReplyDeleteThe ghostly look u achieved is very cool. Not easy to achieve. Ur card looks classy and the colors are a great choice. Thanks for sharing. I love seeing other creative inspiration.
ReplyDeleteAwsome creepy card! Love the colours you've used and how you've created the background. Thank you for sharing this card with us at Creatalicious Challenges. Hope to see you next time.
ReplyDeletexx Grietje
Grietje's Kaartenhoekje
Creatalicious Challenges DT
wow! this is really amazing. you've put so much work into this and it shows. love the colors you used and the skeleton head wearing a top hat! it's really a great piece of work! Thanks for joining the the Halloween Lost Coast Challenge!
ReplyDeleteFantastic journal, Sara!!! The background of your cover is really unique, the Halloween words look fabulous on it!!! Great stamping and colours too!!! Thank you for joining the October challenge of the Country View Challenges blog!
ReplyDeleteLove this Sara and will be back on Oct 21, for sure, to see how you achieved this look. TFS!
ReplyDeleteFabulous! Thank you for joining in The Artistic Stamper Creative Challenge :)
ReplyDeletespooky!!!
ReplyDeletejust stunning!
thanks again for playig with us at MMP!
This looks so beautifully worn, weathered and gloomy, Sara! Wow!
ReplyDeleteLove the textures and your attention to detail! A wonderful piece!
Thank you so much for sharing it with us at SanDee&amelie's Steampunk Challenges!
Claudia xxx
Amazing!
ReplyDeleteThank you for joining as at Mixed Media Place!
Great work.
ReplyDeleteThank you for sharing at Penny Black & More 'Close to nature' challenge and good luck x Susan x