Wednesday, August 31, 2016

Guest Designer for Mixed Media Mojo-Collect Beautiful Moments


Hello, crafty friends! I'm so happy you have stopped by today! I'm super excited to be invited by Jannet atMixed Media Mojo to Guest Design for them today! For their theme "Harvest With a Twist of Adding Fruit",  I've made an autumnal card.


To see how I made the leafy background panel, please visit Mixed Media Mojo. It really turned out to be a mess, so I'm happy it's mostly covered up.


The apple crate and leaves are stamps by an unknown maker and were the inspiration for my card. I bid on these and eight other sets of stamps in a lot at my first online auction, and "won" them all for just $6! Now, that's a crafty bargain!

I inked the crate and leaves in Potting Soil Archival ink. For the leaves, I started by coloring my water color paper with Distress inks in the following late summer/fall colors: Squeezed Lemonade, Mowed Lawn, Peeled Paint, Spiced Marmalade, Vintage Photo, and Forest Moss, then stamped the image. For the apple crate, I stamped my image first, then colored with Antique Linen, Weathered Wood, Spiced Marmalade, Barn Door and Candied Apples Distress markers and a water pen. When dry, I drizzled on Clear Rock Candy Distress Crackle paint, and allowed that to dry. I highlighted the cracks with Ground Expresso ink and covered the apples in Ranger Glossy Accents. I fussy cut the leaves and apple crate, and everything was edged with Ground Expresso ink.

The twig die cut is Impression Obsession, and the trim is from my stash.


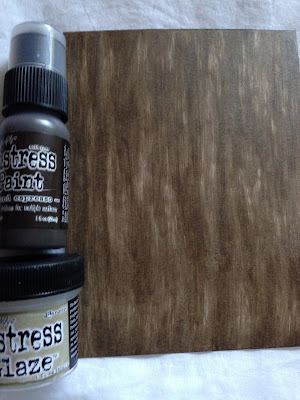
The wood signs started as a tag from my stash. I cut it in half and gave it a coat of gesso. For the back tag, I pulled an art texture comb through the wet gesso to create a wood grain pattern. When dry, I inked that with Weathered Wood and Ground Expresso and flicked with water to blend the colors--you can still see a bit of the original graphics through the gesso and ink, but I think it adds to it. I edged in Ground Expresso and distressed.

The top sign was colored first with DecoArt Burnt Umber, dried, and then coated with DecoArt Weathered Wood. When dry, I gave it a final thin coat of DecoArt Titan Buff and then edged with Ground Expresso ink. The sentiment comes from Tim Holtz Remnant Rubs.

The very back woodgrain panel is kraft card, clear embossed using an All Night Media woodgrain stamp and then painted with Weathered Wood Distress paint. I edged in Ground Expresso and distressed.


I think that does it! Here is another glance at the finished card. I would like to thank Jannet and all the talented Design Team at Mixed Media Mojo for allowing me to join them today! What a wonderful group of artists!


I would like to enter this into the following challenges:
A Vintage Journey Stencil It! Tim Holtz Flourish Stencil.
The Artistic Stamper August Creative challenge-Anything Goes

I apologize for being missing in action lately. In case you have been wondering where I've been, here are a few shots of what's been keeping me away from blogland. My sweet baby girl has gone off to college, and I was spending as much time as possible with her. We took a short trip to the mountains of North Carolina 2 weeks ago, and last week we got her settled in her dorm room. 


We had to go down before we could go UP!


And up we went! We started at "ground zero" and hiked to the top.


That became this waterfall.


Which looks pretty small from the top lookout!


Thank you for stopping by to visit and leave your lovely comments! They make my day!
Hugs and Blessings!
Sara Emily 

Monday, August 29, 2016

Keep Life Simple-Twelve Tags of 2016-August

Hello crafty friends and visitors! Here we are at the end of the summer, and Tim has the perfect Technique Remix to inspire us--Brayered Stain-Frameworks. You can see his gorgeous tag and full instructions here on his blog.


I kept my tag design pretty much like Tim's, choosing my own colors and embellishments. My stain is Stormy Sky and Weathered Wood and my inks are Frayed Burlap and Brushed Corduroy, with edges and splashes in Walnut Stain.


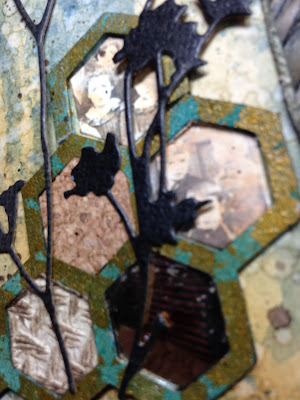
I also used Honeycomb Frameworks--my only frameworks die, but colored it with Evergreen Bough Spray Stain, and Tarnished Brass Distress paint using Tim's Eroded Metallic technique from his Compendium of Curiosities-Volume 3 book.  My filler pieces are from an alcohol inked Found Relatives card, cork, Mirrored, and Textile Surfaces and a scrap of woven paper from my stash. The Mirrored hexagon and Mirrored star are colored with Mushroom alcohol ink and the Textile Surfaces are left over from my June tag. The butterfly on my Vial Label is a Remnant Rub. I chose the words "Keep Life Simple" and therefore, chose not to add stitching to my tag, because that complicates life. 


Tim's Linen Ribbon and Paper Twine finish off my simple tag. Another look--simple, right?


I would like to submit my tag in the following challenges:
Country View Challenges-August-Hot summer Days This is how my garden looks after a hot dry summer. Lot's of browns and a dark stormy sky most of the time as we wind down into autumn.
Nordsalten Hobbyklubb #144 No Picture No stamped image here-just die cuts.
Allsorts Week #378-Use At Least Two Dies I used Sizzix Honeycomb Frameworks and Sizzix Wildflowers Thinlits dies.

Thank you for stopping by today and for all of your amazing comments! I read and appreciate each and everyone of them!
Hugs and Blessings!
Sara Emily

Monday, August 22, 2016

Altered Green Bottles

Hi everyone! I just came back from the mountains of North Carolina inspired by the changing leaves and crisp weather to make some Halloween bottles. When I saw Cec chose the theme 'It's a Small, Small World" at Frilly and Funkie, I knew my bottles would have to be tiny.

I had two green medicine bottles in my stash, and I altered them with some of my new Tim Holtz Halloween goodies I picked up in Charlotte over the weekend. I apologize for the blurry photos, but these are tiny and I had to zoom in with nothing to use but my I phone.


I aged the bottles using Tim Holtz Faux Cracked Glass technique and highlighted the cracks with alcohol inks in Teakwood, Mushroom and Copper Mixative. The lids were also colored with alcohol inks. The gunk you see on the smaller lid is some Distress Crazing I had left drying on my brush from another project I was working on-perfectly icky!!


I tore a few "witches" from Tim's Regions Beyond paper stash, colored them with Distress inks and markers and gave them hats from Tim's Gothic Remnant Rubs. I highlighted the hats with my Recollections opaque marker to have them show up against the dark background and then toned them down again using Frayed Burlap ink. I smeared on Platinum Stickles for a little extra magic.


I aged some pieces from Tim's Curiosities Ephemera pack as well as more rub ons from the Curiosities pack this time, to decorate further. I made some disgusting ooze from gel medium to run down the sides.


Just to show how tiny these bottles are I took a few shots in my alcohol ink stained hand and next to our garden spider. I actually had to put my hand down into his 3D web to get this shot! Eeewww! (The bottles measure 2.5 and 3 inches tall.)


I would like to enter my bottles in the following inspiring challenges:


Thank you for stopping by today and for all your amazing comments! I read and appreciate each and every one! 
Hugs and Blessings!
Sara Emily

Sunday, August 7, 2016

A Blast From the Past for Emerald Creek Dares

Dear friends and visitors, welcome! You may have remembered this from the not too distant past, and here it is for it's encore at Emerald Creek Dares, one of my favorite challenge blogs. Kim, the owner, always has such fun challenge themes, and this time she invites us to link up one of our personal favorite posts from the past. It's not often you get to have a "second chance", so I thought I'd play along. Here is a favorite creation and you can find additional close ups and details on my blog here.


This one was really a blast from the past, because I was able to recycle a texture pasted journal page gone bad. I also used OLD stamps. Kind of a blast of the past, PAST! I also love shades of blue, texture, mixed media, birds, and flowers, so it is a favorite of mine. It won a few challenges, so I suppose it was a favorite of a few others, too!


Thank you for your visit today! If you choose to leave a comment again, that would be fabulous! Please don't feel like you have to if you've already seen this! I know your blogging time is precious!
Big hugs and Blessings!
Sara Emily

Friday, August 5, 2016

Anything But Cute August Challenge # 16-Shabby Garden Mood Board


Hello friends and visitors! It's time for a new challenge at Anything But Cute, and this time it's the talented and lovely Lisa who is hosting. She has chosen a Shabby Garden Mood Board, and I will give you more details on that in just a moment. But first, here is my wedding card I made for my one of my nieces-Edel and her awesome groom to be, Daniel.


Lisa has this to say about her Shabby Garden theme:  For this challenge, we are asking you to take a stroll through a romantic shabby garden. Create any mixed media project strongly inspired by the mood board. Think flowers and plants in cracked pots, peeling paint bird feeders, distressed timeworn furniture, crumbling statues, soft pastels and feminine accessories. Don't forget to tell us how the mood board inspired your project and have fun!


As you can see I was inspired by Lisa's beautiful mood board--specifically the soft colors, peeling paint, window panes,  hearts, filigree and the sense of romance. I would love to live in a place that looks like this!

Here are a few close ups of my card; I will give you the how-to's at the end of my post. The pink dimensional flowers are hand made using Tammy Tutterow's Shabby Posies and Tim Holtz' Tattered Florals. I colored them with Ranger Antiquities ink in Claret. The foliage is Tim Holtz' Spring Greenery and Tattered Lace's Ornate Leaves colored with Distress inks in Shabby Shutters, Peeled Paint and Forest Moss. The chippie heart is from Michael's and is painted with gesso. Pearl strand, flower stamens, white silk flowers and lace are from my stash. The butterfly and deep pink roses peeking out are die cuts by K and Company and I've tucked in a Memory Box Quinn Flourish under the flowers.


The chippie birds from my stash were simply painted with Distress Picket Fence Crackle paint. I'm at the end of my jar, and this stuff is so thick I didn't think it would crackle, but looks better than when it was fresh. I "tied the knot" with embroidery thread and Stiffen Stuff fabric stiffener. That's my favorite part about this card!


I love the background paper--I found it in my stash from a LONG time ago--"love, honor, cherish". I couldn't decide to ink it with Weathered Wood, Frayed Burlap or Bundled Sage, so I blended on all three colors. I also found a **working** sewing machine in the back of my sewing cabinet, and put that to use around the edges. Special thank you's and hugs to my dear teamie Anne, who helped ease my fears over this. She's written a fabulous tutorial on adding sewing to your artwork here. I dyed some of  the cheesecloth with the Claret ink.


Sizzix Curly Gate makes the window topper and Tim Holtz Window and Window Box die makes the window. I cut two of each and layered them together for extra body. I painted them following a similar method as the barn wood panels behind them. Instructions follow.


Instructions for barn wood panels: 
 1. Paint card with Distress paint, Ground Expresso. Don't worry about how even it looks--the more uneven the better.
2.  Rub Distress Micro Glaze with your finger over random areas on the card, keeping strokes vertical for wood grain.


3.  Brush on a coat of DecoArt White Wash acrylic paint and wipe off with a clean cloth.
4.  Brush on DecoArt Weathered Wood and allow to dry. (Sorry, no pics for this and the following steps.)
5.  Brush on a second coat of White Wash, dry and sand back.
6.  Cut into strips and edge with Ground Expresso Distress ink.
7.  Adhere strips to a base card cut to desired size.


Here is a photo of the completed panel.


 I just had to show you a shot of the window frame and topper by themselves, since they got covered up with flowers and birds. Love the chippy peeled paint look.


Instructions for window frame and topper:  
1.  Paint die cut with Ground Expresso paint and heat dry.
2.  Rub in Micro Glaze over random areas.
3.  Apply thin coat of gesso and dry partially.
4.  While gesso is still partially wet, press with a clean paper towel and quickly remove to peel off some of the gesso. Heat dry.
5.  Apply Crackle paint randomly and allow to dry.
6.  Apply coat of Ultra Matte to protect the crackle. 


Here's a little tip to get more out of your craft stash. If you are like me, you can't turn down a clearance sale.I fell for some deeply discounted K and Company die cuts years ago. I never use them, for whatever reason. In this case, the blue just didn't fit into my color scheme. Below you will see the one I chose from the pack  as shown on the package. I simply painted  over the blue with white acrylic paint (or it might have been gesso) and colored with my water pen and Seedless Preserves Distress marker and Wilted Violet Distress ink.Not perfect but it will mostly be covered anyway.


Here's one last look at my card. I hope you will pop over to Anything But Cute to see all the amazing Shabby Garden projects my talented teamies made. I hope you will be inspired by Lisa's mood board and enter our Shabby Garden challenge. You've got an entire month to play along!


I'm sharing my card with the following inspiring challenges:
Scrapy Land Challenge #47-Anything Goes I used a Spellbinders, Memory Box, Tattered Lace, and four Sizzix dies.
Deep Oceans Challenge # 134 "Foto Inspiration" I drew my inspiration from the bride, the bird,the bouquet and the wooden table.
-Simon Says Stamp Monday Challenge Celebrate! happy Birthday SSS! I'm celebrating my niece's and her fiancee's wedding!
-Country View august Challenge-Hot Summer Days Summer seems to hold so many weddings--I have 2 in my family this summer! Flowers also remind me of summer.
-Paper Sweeties Inspiration #46 August 2016 I was inspired by the pink flowers and colors pink and sage. This also reminds me of the dessert table at a wedding reception.

Thank you for stopping by today and for all your amazing comments! I read and appreciate each and every one of them!
Hugs and Blessings!
Sara Emily 

Update: Yippee!