Hello friends! I'm still having so much fun playing with my Tim Holtz Botanical 3D Texture Fade, and seeing just how versatile it is! This time, I've given my card a clean modern vibe using Tim Holtz Ideaology Metallic Kraft Stock as the base.
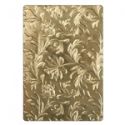
To get one continuous pattern on this extra long card, I ran the 8 by 3.75 inch panel through my die cut machine with the Botanical folder, embossing the top portion of the card. I removed the card from the folder and simply flipped it around to emboss the opposite end, using the same portion of the folder as I did the first pass. I emboss it only to where the first pass finished. You'll notice there's a line there, but it will be covered up. And the flower is pointing upward as opposed to the downward facing ones on the top portion. This folder was so cleverly designed it works so nicely from either direction.
I sanded the panel and colored it with some shades of green and blue inks which almost disappear on the metal.
I applied clear crackle paste and allowed it to dry overnight. You can see how the paste really brings the color to life. To add some contrast, I swiped the embossed blossoms with metallic wax, using the lightest touch. I think you could achieve similar results with Distress Crazing Medium and Distress Metallic Crayons, but the wax was out, and I'm fresh out of Crazing.
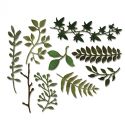
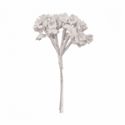
I colored a Garden Greens die cut, a length of Crinkle Ribbon, a trio of Bouquet Findings, and a flower from my stash using coordinating inks.
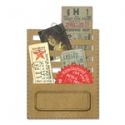
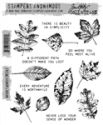
The sentiment is from Tim's newly released Nature's Wonder set. I embossed it on a scrap of the metallic kraft stock with embossing ink and Ranger black embossing powder, using my Stamp Platform to make the impression. I cut it from the card using the label die from Stitched Slots. If you missed how I used those gorgeous leaves and another of those wonderful sentiments from Nature's Wonder you can view my post
here.
I sanded an old sandable card stock (also by Tim Holtz) from my stash to layer my card onto. I adhered it with Distress Collage Medium Matte and also used the collage medium to adhere my assembled elements. Although this card is so simply designed, I think it packs a lot of drama from the amazing 3D embossing and metallic card.
That's all for me today! As always, I am so grateful for your time spent here and for your lovely comments!
Hugs and Blessings!
Sara Emily


This card is so beautiful, Sara Emily! The colors are so pretty and fresh.
ReplyDeleteReally stunning! LOVE the idea of the crackle paste!
ReplyDeleteThis is rally beautiful Sara Emily!
ReplyDeleteHalloween is coming!
Sandy xx
Absolutely stunning!! I love the gorgeous colors!! I have got to take that embossing folder out and play with it!! It's just sitting in my craft room, begging me to reach for it!! The dimension is amazing!! Love everything about this!! Have a great day!! Big hugs :)
ReplyDeleteLisa
A Mermaid's Crafts
Stunning!
ReplyDeleteThis is gorgeous Sara!!! The colours with the metal and crackle combine for an amazing effect. Love it! :)
ReplyDeleteThanks so much for stopping by and leaving some love. You made my day! I haven't been to active other than Magenta but am getting back into the swing again. ;)
You've been rocking the Botanical TF, Sara Emily - I've caught sight of it even if I haven't always had time to comment lately... and this is a gorgeous example. Lovely colours, and fabulous subtle crackle.
ReplyDeleteAlison x
This is such a pretty card, love that you used the folder on an extended card, the possibilities truly are endless! The colors you’ve chosen look so pretty combined, I have yet to get this 3D folder and every make I see of yours really makes my desire for it increase! Thanks for sharing your creativity and inspiring me! Hugs!
ReplyDeleteThat is just gorgeous, Sara Emily, I must get that folder out to play with. Your colors are so pretty over the metallic cardstock and I love the effects of the crackle paste. So soft and pretty with the flowers and green sprig. I also love the long card showing more of that gorgeous folder. Great job!! Hugs :-)
ReplyDeleteMore beautiful colouring with that folder, really pretty. x
ReplyDeleteI haven't seen this paper before but what a gorgeous outcome! I love the various colors brought out in your background along with the embossing. Simple but Elegant!
ReplyDeleteKate
It's just so lovely! This folder is my favorite and your techniques have really inspired me. Gorgeous idea to keep the embellishments simple to let the background be the star. Hugs, Autumn
ReplyDeleteIt doesn't matter what type of business you run; you always need to have an Office Max presentation folder. Links to an external site. When you run any business then obviously you have to tackle a lot of things at once. Obviously, it is not easy to remember each and every one. Therefore, you must keep a record of everything. For example, what you buy or where you spend. You just have to have all the receipts for these things in your hand. However, you can't keep track of everything if you don't have these folders. Yes, these presentation folders are the best for organizing all your documents in one place.
ReplyDeleteThis is awesome post I ever find that relates with my information .I really like it the most. You have really done great job by sharing the beautiful post. Thanks lot for the informative post. Learn more about kraft presentation folders
ReplyDeleteI really like it the most. You have really done great job by sharing the beautiful post. Thanks lot for the informative post. Learn more about kraft presentation folders
ReplyDeleteThis is awesome post I ever find that relates with my information. Buy Silk Presentation Folders at PrintMagic and get accurate and consistent printing services. We offer several customization options to deliver products that have a professional and polished final look, great for impressing clients, prospects, and business associates. PrintMagic offers an easy way to order your Custom Silk Presentation Folders on the Internet without having to spend extra time or money. We make sure to deliver the best quality printing for the artwork, designs, and images you want to add for creating innovative Folder designs.
ReplyDelete