Hi! Back again with my second post today! I should have a third post coming later today. I've been busy trying to make up for lost time while I was on vacation. I have another Tim Holtz 3D embossing tutorial for you, this time using the wonderful Lumber Texture Fade. I actually completed a card this time. My daughter wanted to make some Christmas cards before she goes back to college, now that her internship is done, and she has some free time. She asked me to make up a few simple designs she could make quickly and easily.
Making these backgrounds is super simple and requires very few products. You can see my tutorial using the Botanical 3D Texture Fade
here and how I used one of the panels
here. I also give some tips for using the Lumber and Foundry folders
here. There are plenty of ways to use these little gems, and a good place to find lots of inspiration for these and other Tim Holtz products is on
Tim Holtz Addicts Facebook Group.
Onto the tutorial:
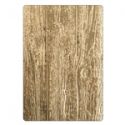
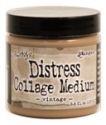
First, I apply Vintage Collage Medium to kraft card stock with a brush. I like the lines, and I think it gives it more texture in the finished product.
Next, apply a coat of Picket Fence Distress Paint with a paintbrush. Again, the lines add to the design and texture of the finished "wood". Let it dry or use a heat tool.
Now it's time for the magic! Run the panel through your die cut machine in the Lumber 3D Texture Fade 3 passes, as Tim advises. No need to spray with water, because the collage medium keeps the paper from cracking.
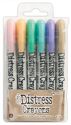
For the final step, I just randomly scribble on Distress crayons in Walnut Stain, Black Soot, and Hickory Smoke and blend with my finger. The crayon glides smoothly because of the collage medium I put down first. It helps to look at some wood to get an idea for how it weathers naturally when you're adding your colors.
To complete my card I layered the wood panel over black card for contrast, then over a panel cut from Tim's Christmas paper stash from last year aged with Frayed Burlap Distress ink.
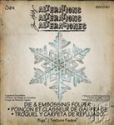
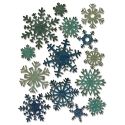
I embellished simply with a Layered Snowflake topped with a Mini Paper Snowflake so the wood remains the star of the show. Well almost; it's hard not to notice the snowflake! A Holiday Talk Metallic sticker stands in for my sentiment.
I cut the snowflakes from Metallic Kraft stock, painted them with Picket Fence paint, Bundled Sage Distress Oxide, and Cracked Pistachio and Walnut stain Distress crayons.
That's all for me! If you have any questions, please feel free to leave them in the comments section below and I will get back to you with an answer.
Hugs and Blessings!
Sara Emily


Amazing!!! That panel really looks like weathered wood...so perfect! Always so inspiring my dear friend! Thank you for sharing these precious tips! Hugs...❤
ReplyDeleteThis is gorgeous Sara Emily! Love the real wood look you have achieved and the colors on the snowflake are beautiful
ReplyDeleteAbsolutely gorgeous! Thank you for sharing!
ReplyDeleteWOWZERS, this is awesome! I love the tip that the Collage Medium used as the first application prevents the paper from cracking in the embossing folder. Question, does it need to still be a little moist when you emboss?
ReplyDeleteHi, Lagene! Thank you for your excellent question. No, the collage medium dries quickly, and mine was completely dry when I passed it through my die cut machine. I don't think you would want it moist in the least, since that would get in the recesses of your embossing folder. I hope this helps! Hugs!
DeleteAwesome card and techniques, Sara Emily! That snowflake die is one of my favorites!
ReplyDeleteThis is gorgeous Sara Emily!! Love the snowflake ❄️ against the 3D wooden planks. Thnx for sharing xx
ReplyDeleteSimple it may be, but it is also stunning! You always make the most beautiful Christmas cards Sara! Hugs, Anne xx
ReplyDeleteThat's my current favorite embossing folder - you can get so many different looks with it just by changing up the colors! Such a stunning background you've created - and great tutorial too!
ReplyDeleteWow, spectacular!! The wood background looks so amazing!! I love the texture and the beautiful snowflake!! This is stunning, my friend!! Have a great evening!! Big hugs :)
ReplyDeleteLisa
A Mermaid's Crafts
That background panel is amazing Sara .. so realistic!! I love the texture and you have added the colour beautifully!! The large snowflake is the perfect focal point! This is totally stunning!!! hugs xx
ReplyDeleteWow your background is so very cool! I love how that turned out..the snowflake is gorgeous!
ReplyDeleteHugs,
Sherrie K
Love your beautiful wood background with that big gorgeous snowflake! I love the look of the added white to the project, it does look so realistic, and the colors of your snowflake complement the wood grain perfectly. I'm inspired to get this folder and to play with my big snowflake die. Hugs!!
ReplyDeleteFabulous colours and the background is very effective. I agree seeing it look so good makes you want to get it out and use it - always a good thing!
ReplyDeleteI spent half a day at the lake this weekend trying to make barnwood backgrounds! When I saw this on FB I almost fell out! Great minds and all. LOL! You did such a great job. The DP gives a great base for the crayons. Love love how you added this cool snowflake. Big hugs, Autumn
ReplyDeleteStunning woodgrain - amazing! Thanks for taking us through your steps to create such a perfect faux wood look. A beautiful card.
ReplyDeleteAlison x
Sara Emily, I have been looking at this gorgeous creation for days, and finally had to pop over and let you know how much I love it. That technique for the wood panel background is sheer genius! I hereby dub you the Queen of Techniques! I love the sparkly snowflake standing all alone in the spotlight, too. What a magnificent creation! xo
ReplyDeleteNice job! xoxo
ReplyDeletebeautiful!! I haven't tried it yet with collage medium and crayons. It looks great!
ReplyDeleteA complete satisfactory read and experience I got here after ensuring my first entrance. The faux barn wood tutorial with 3d lumber (though I was interested about 3D wall panels ) project you described was super knowledgeable. I was excited seeing so many useful information altogether. The images also look so classy and elegant. I appreciate your good work.
ReplyDelete