Showing posts with label Beach theme. Show all posts

Thursday, September 6, 2018

One Last Beach Day - Shabby Card For A Vintage Journey


Sara Emily Barker http://sarascloset1.blogspot.com/ One Last Beach Day Shabby Card #timholtz #sizzixalterations #stampersanonymous #rangerdistress 1

Hello friends! It's time for a new challenge at A Vintage Journey and our lovely hostess, Jennie, has chosen Back to Nature as her theme. 

Jennie says: This month we are asking you to celebrate natural elements in your project. Think real nature in terms of twigs, dried flowers, shells or pebbles or perhaps stamps and stencils depicting these wonderful elements. Immerse yourself in the colours of the seasons whether they be bright or muted and create a project in our preferred styles of vintage, shabby, mixed media, art journaling, industrial, timeworn or steampunk.

Sara Emily Barker http://sarascloset1.blogspot.com/ One Last Beach Day Shabby Card #timholtz #sizzixalterations #stampersanonymous #rangerdistress 2

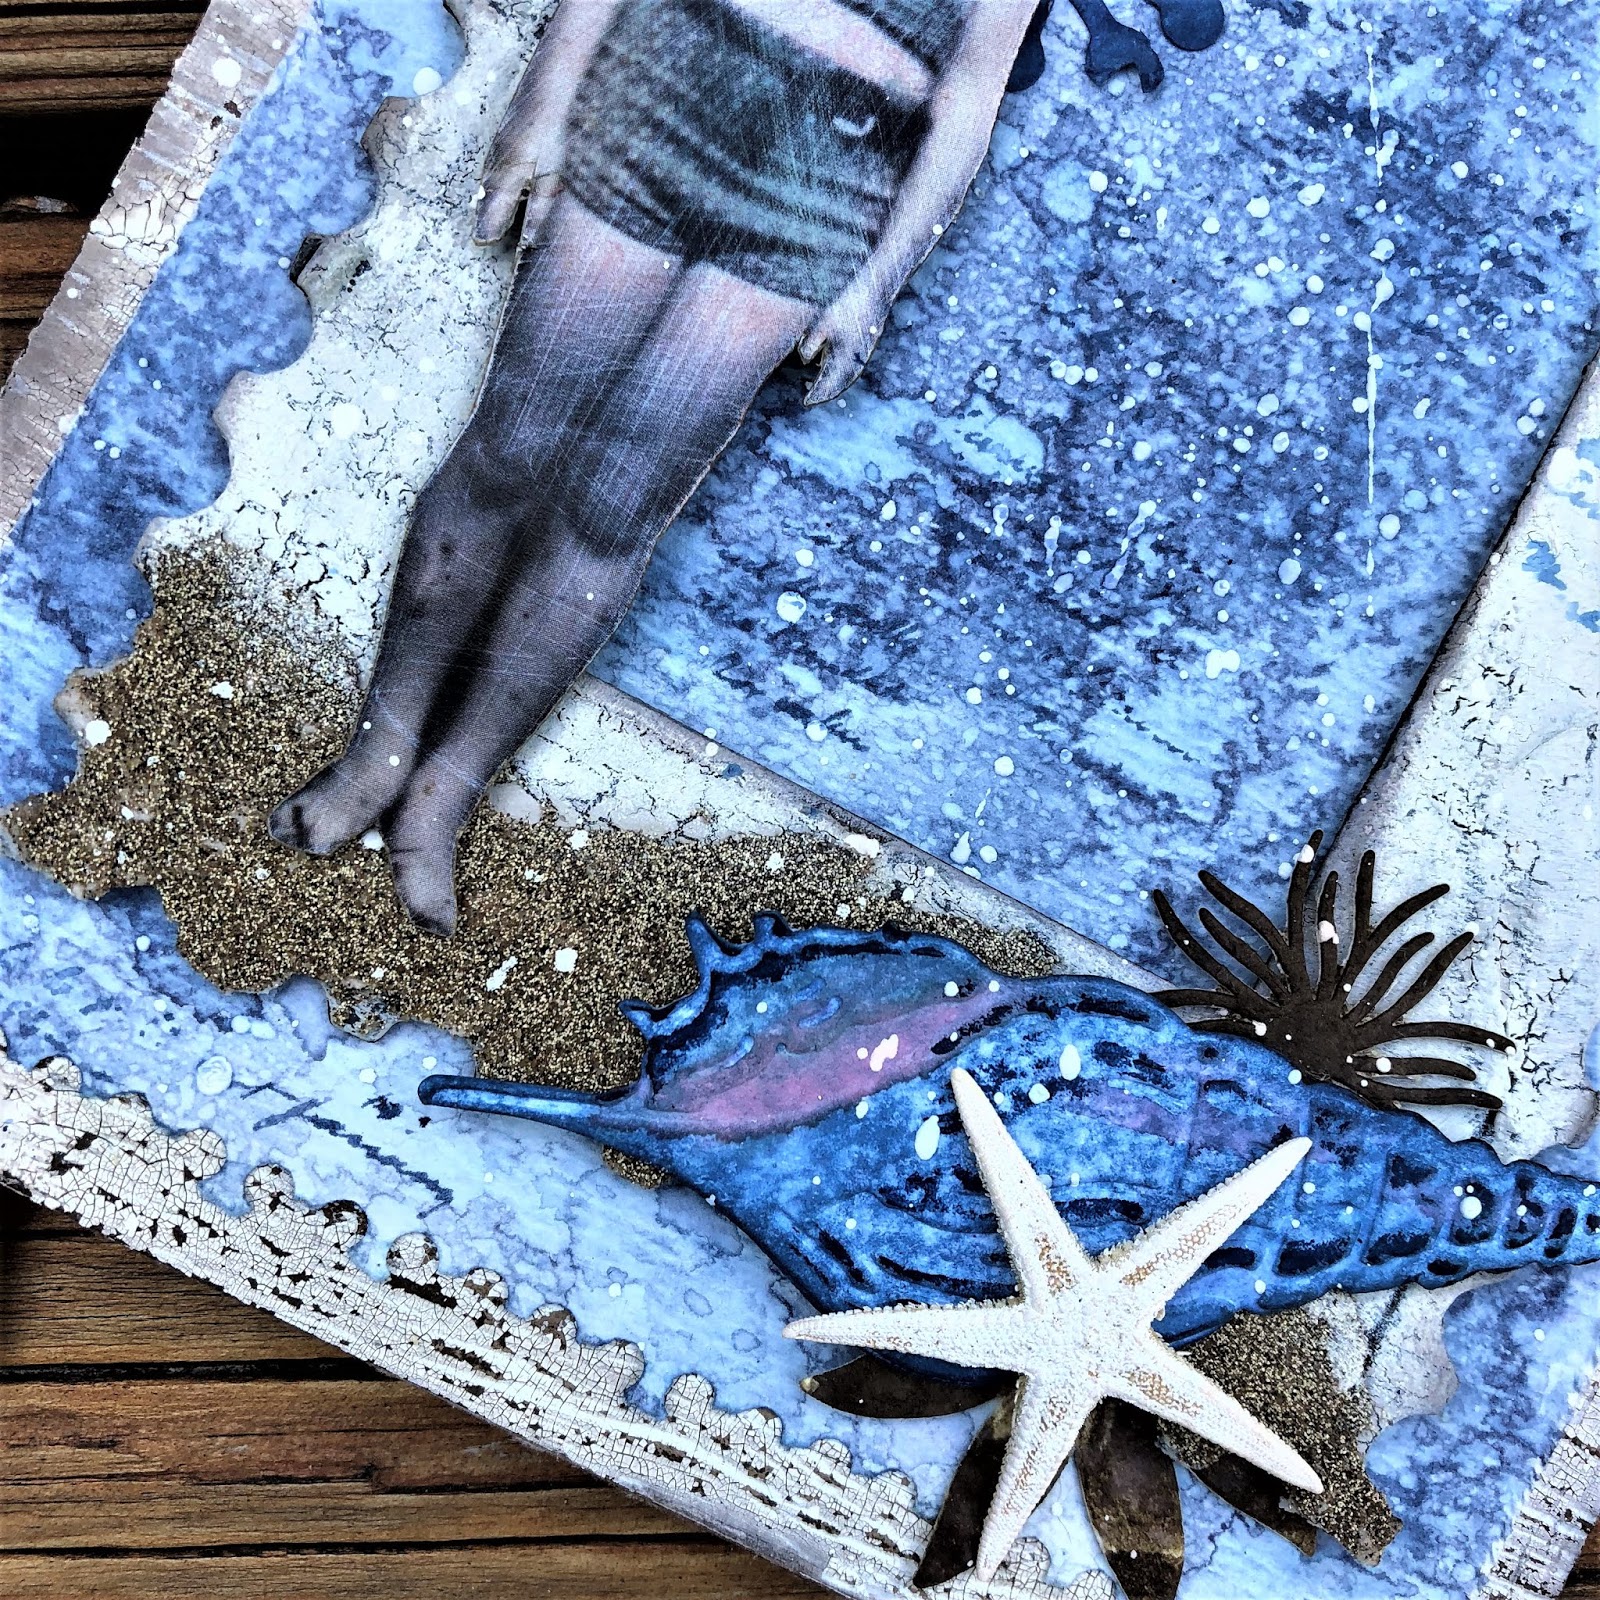
I had a lot of fun choosing my natural element and everything that went along with it. I wanted to make a beach themed card, but didn't want the bulk of a seashell. I had some dried starfish in my stash which are perfect to layer over a Seashells die cut I had left over from another project.

I colored watercolor paper with Distress oxides in blue for my background and even added a little stamping with the script from Tim Holtz' very popular Entomology set. I left the waste end of the paper on, to give a nod to the waves lapping at the shoreline.

The girl was chosen especially to go with the Snarky Small Talk sticker I chose just for this project. She is fussy cut from a Found Relatives Occasions card and colored with Distress markers. It looks like she forgot to use her sunscreen!

I've hoarded those spiky die cuts since this spring. I colored them with DOX to match the shell. Autumn and I traded dies at the lake, and I went home with a year's supply of die cuts and die-cutter's elbow. Thanks for sharing and a wonderful weekend, Autumn! You're the best!
Sara Emily Barker http://sarascloset1.blogspot.com/ One Last Beach Day Shabby Card #timholtz #sizzixalterations #stampersanonymous #rangerdistress 3

I made a frame using Tim's Postage Stamp die and Rectangles Movers and Shapers. I cut it from card I covered with strips of waste packaging paper to give extra texture. I used DecoArt crackle medium and chalky paints, Distress oxides, inks, and paints. I also used the script stamp here. While the stamp was inked up from stamping the background, I kept adding more spritzes of water and stamping again until there was no more color to stamp with.  I blended all the edges of the frame in Ground Espresso ink.
.
Sara Emily Barker http://sarascloset1.blogspot.com/ One Last Beach Day Shabby Card #timholtz #sizzixalterations #stampersanonymous #rangerdistress 4

I had to have a sandy beach for my girl to stand on, and this was made with Dirty Sand Baked Texture, unheated. I die cut some Funkie Florals 3 greenery to add interest and contrast. I sponged the starfish with white chalky paint.

Sara Emily Barker http://sarascloset1.blogspot.com/ One Last Beach Day Shabby Card #timholtz #sizzixalterations #stampersanonymous #rangerdistress 5

And here's the Snarky Small Talk sticker that inspired my entire card. After Labor Day, the locals can really enjoy the empty peaceful beaches. I probably won't run into anyone on the beach today, so I can wear this suit again tomorrow! Ha! Ha!

Everything is layered on a panel of kraft embossed with Tim's Lumber 3D Texture Fade . I spread DecoArt Crackle paint just around the edges in random thicknesses and when dry, embossed it. To get the extra large panel, I simply folded the card in half and embossed the 2 layers together. I smeared on Ground Espresso Distress stain and heat dried.

Sara Emily Barker http://sarascloset1.blogspot.com/ One Last Beach Day Shabby Card #timholtz #sizzixalterations #stampersanonymous #rangerdistress 6

That's all for me today, but if you pop over to A Vintage Journey, you will be delighted by what my fellow Creative Guides have made especially for you using nature as their inspiration. Then, it's over to you! We invite you to play along in our 'Back to Nature' challenge. I can't wait to see  what you create!

At the end of the challenge the Creative Guides will choose 3 Pinworthy winners who are each awarded a Pinworthy badge for their blog, and their winning projects are pinned to our pinterest board. 

Thank you for stopping by and for all your wonderful, inspiring comments! 

Hugs and Blessings!
Sara Emily


These products were used and are available at The Funkie Junkie Boutique:

Wednesday, May 16, 2018

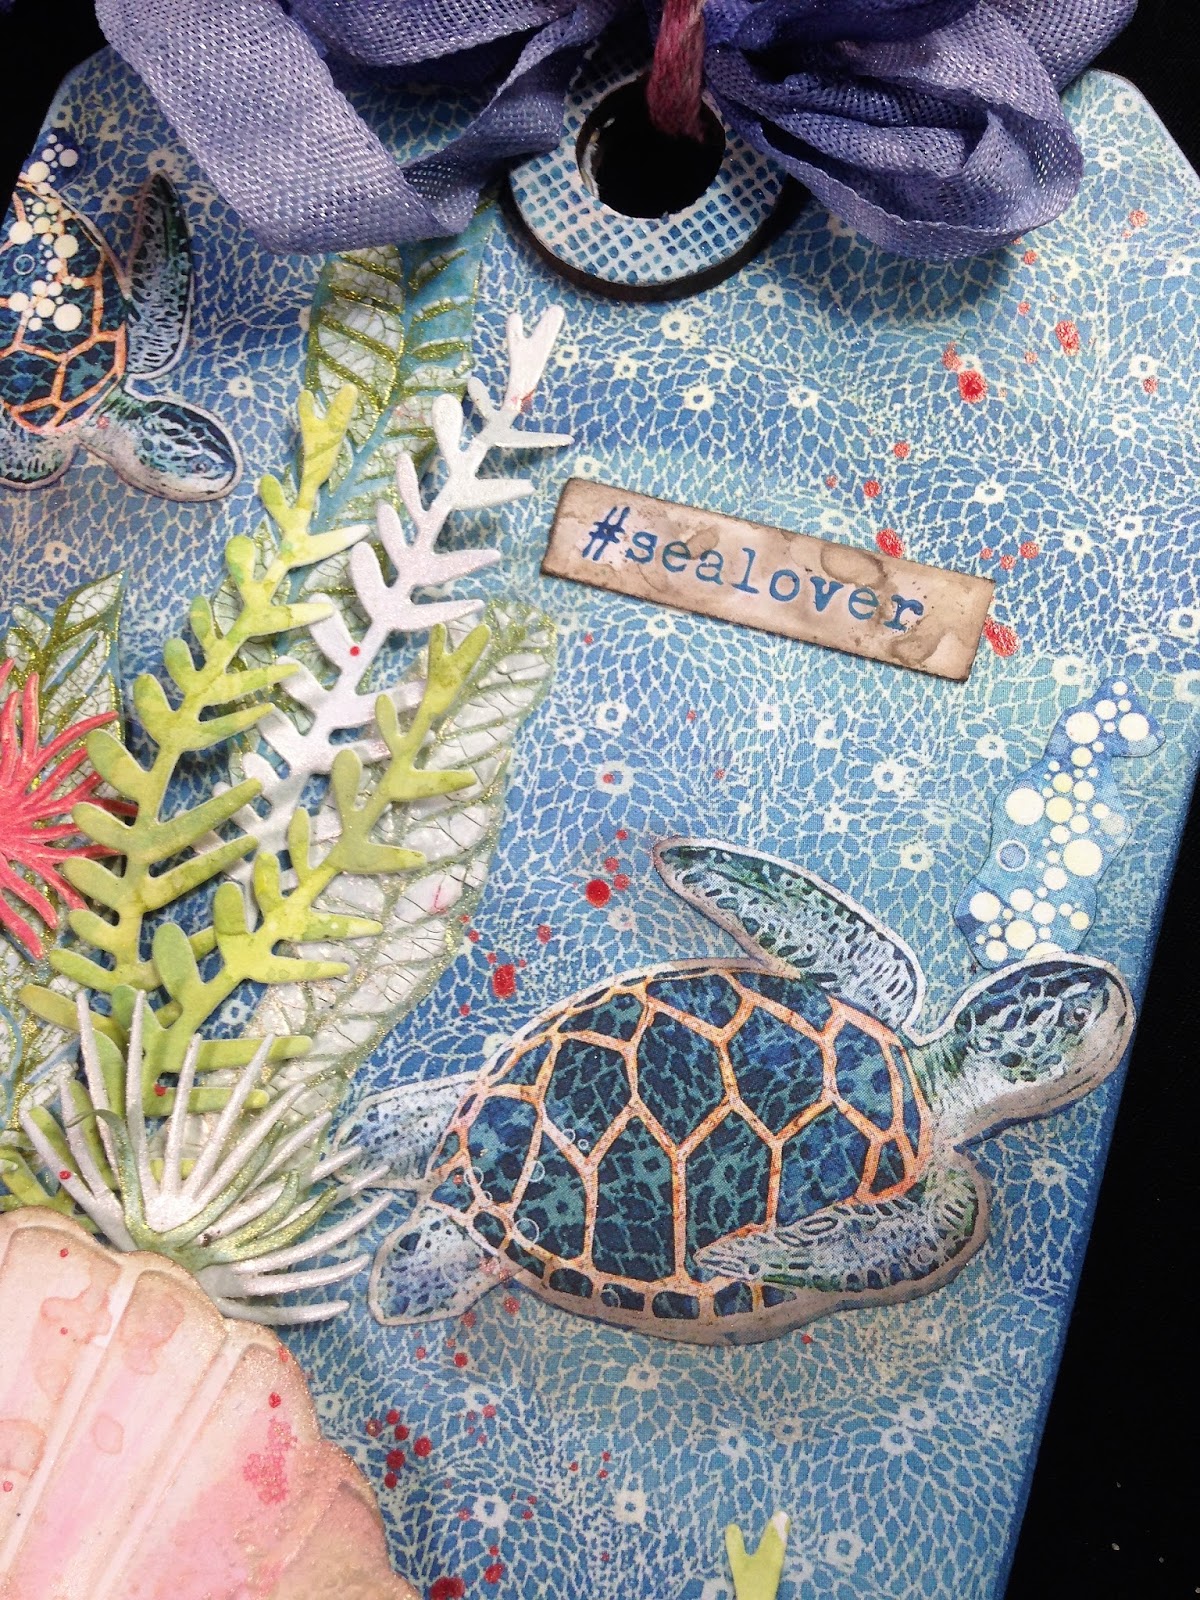
#sealover Tag with Tim Holtz, Graphic 45, Prima, and Seth Apter's Baked Texture


 Welcome friends! Thank you for joining me today! It's time for the Funkie side of the Frilly and Funkie team to share some inspiration for our current challenge 'Surf's Up', chosen by our very creative Frilly teammate, Kathy.

Kathy details her challenge: Who's ready for a little sand, a little sun and a little surf?  Let's take this challenge for a stroll beside the shore!  Create a vintage or shabby chic project with a beachy theme.  Use ocean colors and beach images to add a fun seaside feel to your project.

Rather than seaside,  I went into the sea with my Tim Holtz Etcetera Mini Tag!


I chose the Graphic 45 Sun Kissed 8x8 pad just for this one beautiful paper to use on this project, but the pad is just loaded with gorgeous designs perfect for a beach themed album, card, folio or just a mixed media piece like this. I used collage medium to stick the paper down, trimmed and sanded the edges, and gave it a coat of clear gesso. I blended the edges with various Distress inks, going darker at the bottom. See those cute sea turtles? They are fussy cut from another of the papers in the pack and added to my scene to float off to deep unknown places in my imaginary sea. I added shadows with Frayed Burlap Distress ink. Maybe when they go deeper there won't be any shadows. 


 The reinforcing ring that comes in the tag pack was coated with gesso, and I stamped the cheesecloth pattern in Cobalt Archival ink to make it blend with the background pattern.


I made the crackled 'seaweed' in the back by swiping crackle paste through a Mini Layering Stencil over Plain Tissue Wrap painted with Prima Sparks Fairy Wings acrylic paint. If you think you see more shimmer, it's because I swiped on Prima's Vintage Silk Opal Magic Wax over the dried crackle. The sea anemones and other seaweed are die cut using Tim's Funky Floral #3 set. They were colored with Prima Coral Reef and  Fairy Wings acrylic paints. Some seaweed was cut from Oxide scraps I had laying around.


My title is inked in Cobalt archival on a piece of the business card Linda includes on those wonderful little thank you gifts she sends along with your Funkie Junkie Boutique order. Waste not, want not.  I dipped it into a puddle of Frayed Burlap Distress Oxide.


The shells are die cut using Tim's Seashells Bigz die and textured using the included seashells Texture Fade. That crusty texture on the scallop shell is from Prima's clear crackle paste, and the color is from Worn Lipstick, Tattered Rose and Frayed Burlap Oxides. In real life it has a shimmery sheen from  Vintage Silk wax, but sadly the camera  didn't pick up that incredible pearly iridescence.

My ocean 'floor' is made with Seth Apter's Baked Textures, Deep Sea and Dirty Sand. (What could be more appropriate?)


I don't know if true solid blue shells exist in nature (I see blue tones in the real shell below), but I took a little artistic license here making a blue shell colored with Faded Jeans and Blueprint Sketch Distress inks, touched with Worn Lipstick and Tattered Rose Oxides. Both shells are edged in Frayed Burlap Distress ink. If you are looking for more ways to color your seashells and tips on how to shape them, please take a minute to check out my tutorial at Frilly and Funkie, where I've used a plethora of Distress products to make some realistic and not so realistic sea shells. No two seashells are alike! I can't wait for Tim to come out with a smaller Thinlits version!

All that was left to do was to splatter with a little Coral Reef paint and tie on a seam binding ribbon bow I already had dyed in my stash (pretty sure it was dipped in Blueprint Sketch ink) using Tim's Linen ribbon dipped in Worn Lipstick Oxide.


I hope you are inspired to join in the Surf's Up challenge at Frilly and Funkie. Please be sure to stop by the blog to check out the details of the challenge and the amazing sea themed inspiration by my Frilly and Funkie teammates, and then it's over to YOU! I can't wait to see what you will create!

I'll be sharing my tag with these challenges:
Simon Says Stamp Monday Stencil It I used a mini layering stencil for some of the seaweed.
The Artistic Stamper May's Creative Challenge - Backgrounds I used two stamps--one on the reinforcing ring and one for my title. My background was collaged.

Thank you for stopping by today and for all of your AMAZING comments!
Hugs and Blessings!
Sara Emily 

The following products were used and are available at The Funkie Junkie Boutique: