Welcome! Today is the start of the second week of our two week challenge at Frilly and Funkie, and that means the Funkie side of the team gets to inspire you with their creations. I am privileged to host the current challenge titled 'Back to Nature'. I hope you'll pop over to the blog to see all the amazing inspiration by both the Frilly and Funkie Design Team members.
Here's the brief: Having just returned from our annual trek to the mountains of West Virginia where we observed so much natural beauty on our hikes, I couldn't help but make my challenge nature themed. You can make anything you like, from a card or tag to altered art, just be sure to include a natural element in your vintage or shabby chic project. Think real twigs, leaves, shells, pebbles. Or you could include a die cut or a stamped or stenciled image representing a natural object.
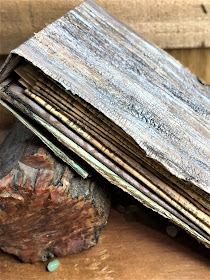
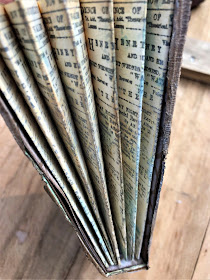
For my project, I decided to make an expanding pocket album, inspired by this tutorial by Sheila. Her samples are so neat and precise! She uses purchased coin envelopes but I made a template to cut mine. I also adjusted her measurements to fit my needs. Otherwise, I just copied her album, putting my natural spin on it.
The Cover
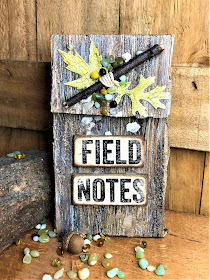
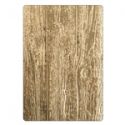
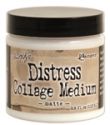
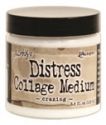
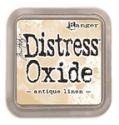
To make the cover, I cut a length of manila file folder to the length and width I needed and embossed with Lumber 3D Texture Fade. I had to do some strategic folding of the card to get one continuous strip of wood grain. I layered Distress crazing, paint, crayons, and oxides until I was satisfied with the texture and color.
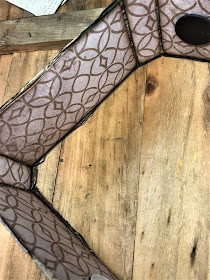
I colored the inside of the embossed piece with Ground Espresso and Weathered Wood paint. I cut my chipboard pieces to my desired size and covered them with paper from Wallflower paper stash. The panel's edges were blended with Ground Espresso ink. I adhered them to the prepared 'bark' strip using collage medium. I left about 1/8 inch between the individual panels so the box would fold properly. Lastly, I scored between each of the panels. I adhered magnets to the inside flap and front panel. These were not the best magnets to use; too thick to put under the paper, and they don't have the best grab. But they were the best I could get locally.
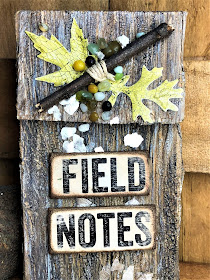
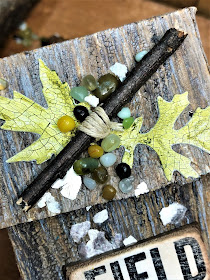
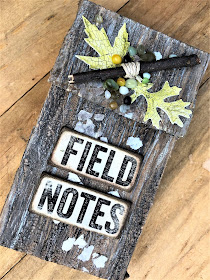
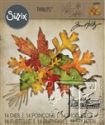
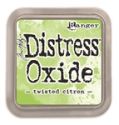
I used some die cut Fall Foliage leaves along with a twig tied with twine, mica chips and pebbles from my stash to decorate the flap. I cut the leaves from card I coated with DecoArt crackle paint and colored them with Peeled Paint Distress Crayon and Twisted Citron oxide ink.
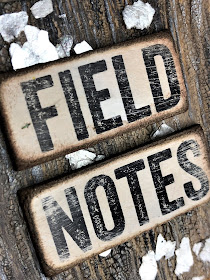
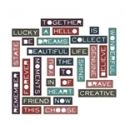
The Quote chip serves as my title, sanded and inked with Frayed Burlap and Ground Espresso.
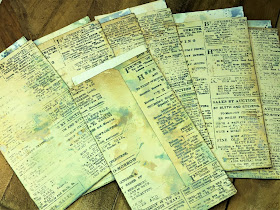
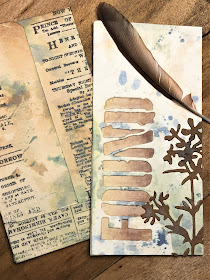
The Pockets
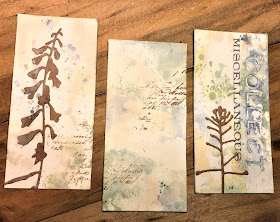
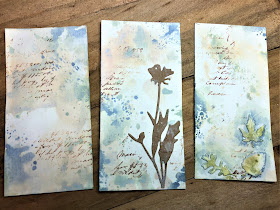
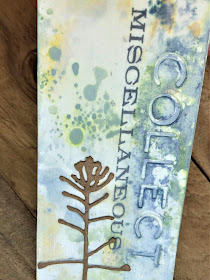
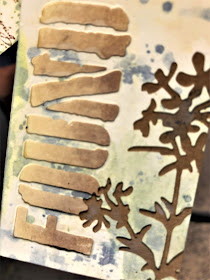
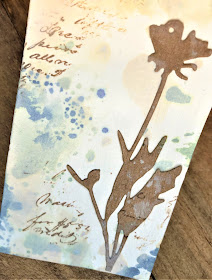
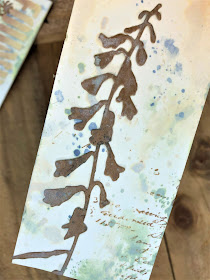
The Tags
(Apologies over the color variation. My indoor photo light died, and it's going to be a couple of weeks before a replacement is shipped. Some of my photos were taken before the bulb blew.The light was fading as I took these photos outdoors. Just pretend the colors are the same in the second photo above as the first, which reflects the actual colors.)
Challenge shares:
Mini Album Makers August

Scrapy Land Challenge #96 Anything Goes I used 4 Sizzix die sets.
Country View Challenges August 2018 - Sun, Sea and Sand
Love 2 Create Challenge #11, Anything Creative/Mixed Media Goes
The Artistic Stamper August's Creative Challenge - Anything Goes I used 3 stamp sets.
Let's Craft and Create Challenge #140 - ANYTHING GOES + option LOTS OF LAYERS
Love to Scrap LTSCB #112 - Old School!
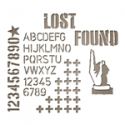
Die Cut Divas' Silhouettes I used silhouettes on the note cards.
SumMore Fun Mood Board Challenge #35 I was inspired by the earthy colors, the letter tiles, and the wood siding.

Hugs and Blessings!
Sara Emily
Sara Emily











Awesome project, Sara Emily!
ReplyDeleteSara Emily, everything you make is always so wonderful! I was just thinking of doing a Field Notes journal too and this gives me some great ideas to get started. I am very curious to know how you got the entire length of your cover embossed in such a continuous fashion. I can't envision getting the middle sections through my Vagabond... I hope you're willing to divulge.
ReplyDeleteThank you for your visit and sweet comment, Heather. You're going to give me a fat head! And thank you for your question. I will do my best to explain. First I cut my strip of manila file folder plus an extra inch or so of length, so that all of my chip board pieces would fit. Obviously, there is already a fold in that from where the file folds. I kept the strip folded at this line before running it through my Big Kick with the embossing folder. Then I folded the other end of the strip and ran that folded portion through with the folder. So essentially, I am embossing each folded end. There is the original fold line from the file folder on the bottom of the box, but it's not seen as it's on the bottom. I held my breath each time I passed it through, because it does add extra thickness which could mess up your machine. I don't know about a Vagabond. I hope this all makes sense. You can see why I didn't include it in my post. Tee Hee! I also tend to create 'on the fly', and this was just an experiment I hoped would work. Hugs!
DeletePS I can't wait to see how your journal turns out! I hope you'll share the link to your post with me! Hugs!
DeleteOhhhh! I get it (I think) so in essence you embossed two layers at once and then turned it around and did the other end. So one 'side' actually is embossed in the reverse (negative bumps). Yes? I'm glad to see I'm not the only one taking experimental chances (not just craft ones either). :) BTW the Vagabond II won't let you break itself with too thick a sandwich (which IS how I broke my first one). Whee!
DeleteYou got it, girl!
DeleteIt's sooooo BEAUTIFUL Sara! Your Gorgeous Journal goes so well with the Challenge too! Thanks for playing along with us over at SumMore Fun Stamps! Have a great day!
ReplyDeleteTheresa (SumMore Fun DT)
Oh my goodness, spectacular!! Wow, Sara Emily, I'm in awe!! The bark look of the outside is amazing!! I love the crackled leaves and the twig - what a perfect touch!! Everything is so stunning!! I'd gush some more but I want to scroll back up and look at the pictures again!! Love, love it!! Have a great day, my friend!! Big hugs :)
ReplyDeleteLisa
A Mermaid's Crafts
Oh wow Sara, your mini album is fabulous! The crackle on the cover is amazing, I love your decorated pockets inside and the twig on the front is the perfect finishing natural touch! Hugs, Anne xx
ReplyDeleteOops, forgot to say thank you for joining in with us this month at Mini Album Makers too xxx
ReplyDeleteSara Emily, I just saw you post on Tim Holtz Addicts and had to come over to see how you did it. An I found so much more than I expected. It is an incredible album. Just a treasure in every detail. Thank you so much for sharing so many details on how you made it.
ReplyDeleteOk...that cover is amazing! It looks just like tree bark! This is a beautifully designed project!
ReplyDeleteSara Emily, this is a stunning field journal! I love the inside pockets and the embellishments on the outside of the journal. That wood effect takes the cake though!
ReplyDeleteKate
AMAZING creation Sara Emily!! I love your journal~The cover is gorgeous and love all the fantastic pockets! The inking, the details, wood grain and beautiful twig on front looks awesome! The crackled texture on the leaves..so creative and inspiring. I wish I had time to hide away in my room and get inky. So many thoughts run through my head but just don't have the time right now. Life is busy and family needs me.
ReplyDeleteThanks for sharing your wonderful creation...love your creativity!
Hugs,
Sherrie K
Also, thanks for joining us in the Scrapy Land Challenge!
What a stunning project! You've achieved such a realistic, natural, rustic look! Amazing!
ReplyDeleteThank you for joining us this month at We Love 2 Create! Jane S (DT) xxx
OMG Sara, this is beyond incredible!!!! I completely and utterly adore absolutely everything about this!! From the amazing cover (it really looks like wood) and the way you have decorated it, - to each of the pockets and then those tags and cards for notes, so, so cool!!! I think I am going to give this a try! Stunning, stunning work my friend!!
ReplyDeleteI love this nature themed album. The cover is just fantastic, and the inside pockets... no matter the colour of your pictures, it is beautiful!
ReplyDeleteWOW, amazing project. What a beauty. So glad you joined us at Die Cut Divas.
ReplyDeleteSuper cute!!! Thank you for joining us at Let's Craft, good luck!!! Amy DT
ReplyDeleteOh my goodness, this is just divine, I’d be a happpy person if you did a tutorial on the cover, most amazing I’veever seen, tfs
ReplyDeletehttps://welove2create.blogspot.com/
ReplyDeleteWow amazing love your project, thank you so much for sharing with the DT from We Love To Create Hugs Terry xxx
A fab little album ! Thank you so much for joining my challenge "sun, sea and sand" over at Country View Challenges !
ReplyDeleteCorrie x
OK, I'm going home and throwing away the one of these I made... LOLOL! Mine is nowhere near as cool and creative as your version. I just love the "continuous bark" idea!!! This is such an awesome project and as usual, filled with so many amazing mixed media details per your typical spin! :) We are so thankful you shared in our challenge at Mini Album Makers. Big hugs, Autumn PS. Make sure to add our badge to your post to be eligible to win the prize.
ReplyDeleteSimply brilliant - love the bark wallet and those delightful tags. A real treat. Thanks so much for playing along at Mini Album Makers.
ReplyDeleteAlison x
Oh WOW! I am totally in awe of this project! That outside looks like wood. The whole project is simply amazing. Thank you for linking up with the SumMore Fun mood board challenge!
ReplyDeleteAmazing!!!!❤ I love the fact you did something different!!! Thinking outside the box is a wonderful gift. And loving that you used the building from the mood board to inspire you. So cool!! Thank for joining in the challenge over at SumMoreFun!!!❤
ReplyDeleteAmy (SumMoreFun DT)
I can't believe I didn't come see this gorgeous fabulous fold out project sooner! Wow is the texture fantastic on the outside and inside hidden gems! Wonderful inspiration!
ReplyDeleteThis is amazing! Thank you for using our mood board and joining us at SumMore Fun
ReplyDeleteOh wow, I really love your creation and your take on our current mood board.
ReplyDelete**Thank you for joining in the ~SumMore Fun~ mood board challenge, I hope to see you again**
Have a wonderful day,
Jessica (SumMore Fun DT Member)
Polka Dot Orchard
Wow!! An amazing project. Thanks for joining us at Die Cut Diva's challenge.
ReplyDeleteDawn DT
Thanks so much for entering the Love To Scrap Challenge Blog's August "Old School" challenge with your amazing entry! We hope to see you again for our new September challenge! ;)
ReplyDeleteHugs,
Leslie, LTSCB DT
Love To Scrap 2
Love To Scrap!
What a great project Sara,
ReplyDeleteThank you for joining our challenge at
Let's Craft and Create this week and good luck.. Ursula Uphof DT